Category: Instructions (Page 2 of 2)

xavier 3 in 1 tv stand instructions

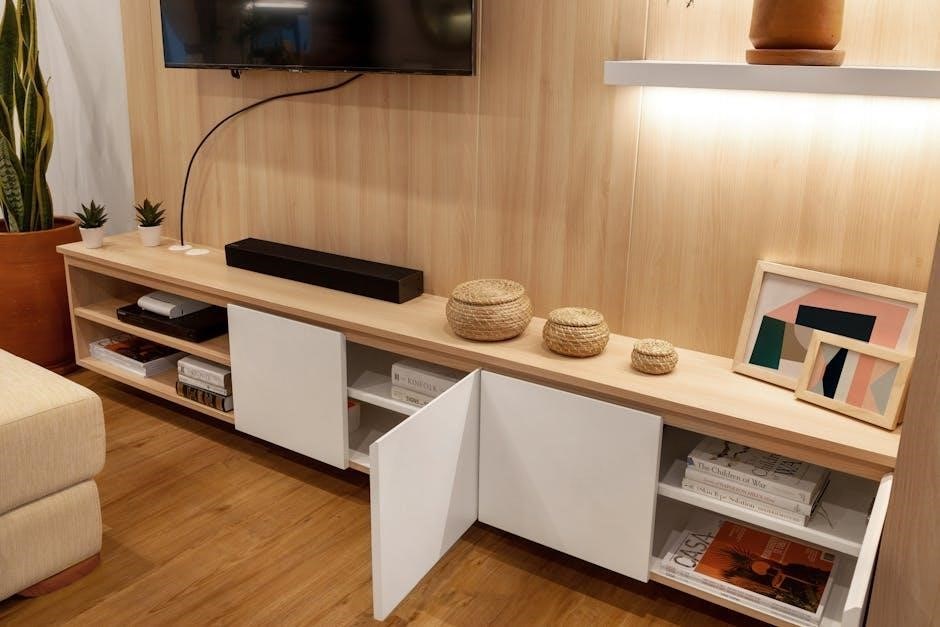
The Xavier 3-in-1 TV Stand offers versatile display options for flat-screen TVs, supporting up to 75 inches. Its sleek design from the Xavier Collection enhances any room.

Key Features and Benefits

The Xavier 3-in-1 TV Stand is a versatile and sturdy solution for displaying flat-screen TVs up to 75 inches and 100 lbs. Its patented design offers three display options: swivel mount, wall mount, and table-top installation, providing flexibility for any space. The stand features a sleek, contemporary design with clean lines, enhancing your home decor. It includes tilt and swivel functionality for optimal viewing angles and comes with a comprehensive assembly manual for easy setup. Built with durable materials, it ensures stability and long-lasting performance, making it a practical and stylish choice for modern entertainment systems.

Importance of Proper Assembly

Proper assembly of the Xavier 3-in-1 TV Stand is crucial for safety, stability, and optimal functionality. Incorrect assembly can lead to instability, potentially causing damage to your TV or injury. Follow the provided instructions carefully to ensure all components are securely fastened. Sorting hardware by size and verifying all parts are included before starting helps avoid delays. Assembly may require a second person for certain steps, especially when handling heavier parts. By adhering to the guidelines, you ensure a sturdy and level installation, preventing wobbling and ensuring your TV is displayed safely and securely.

Preparing for Assembly

Begin by reading the 25-page manual carefully. Ensure all parts and hardware are included and sorted by size. This preparation ensures a smooth and efficient assembly process.

Tools and Hardware Required

To assemble the Xavier 3-in-1 TV Stand, you’ll need a Phillips screwdriver and a 4mm hex key. Ensure all hardware is sorted by size, including bolts, washers, and screws. The kit includes 1 3/4” bolts (P) for frame assembly. Review the hardware list in the manual to confirm all parts are present. Having a second person assist is recommended, especially for larger TVs. Allocate about 2 hours for assembly, depending on your skill level. Proper tools and organization are key to a smooth process.

Understanding the Components

Familiarize yourself with the Xavier 3-in-1 TV Stand components. The main parts include the frame, shelves, mounting hardware, and adjustable spine assembly. The frame forms the base, while shelves provide storage. The mounting system allows for swivel, wall, or table-top setups. Hardware like bolts and washers ensures stability. Check for all components, including 1 3/4” bolts (P) and 4mm hex key (W). Ensure each piece is accounted for before starting assembly to avoid delays. Understanding how parts connect simplifies the process and ensures proper alignment of the stand.

Setting Up the Workspace

Prepare a flat, stable surface for assembly. Ensure the area is clear and large enough to accommodate the stand. Gather all tools, such as a Phillips screwdriver, and sort hardware by size. Avoid overtightening components. Lean the TV against a solid surface during assembly to prevent damage. Use a second person to assist, especially when handling larger parts. Place a soft cloth on the floor to protect the TV screen. Align all components on the workspace to ensure proper fitting. Double-check compatibility and alignment before securing parts permanently. Refer to the manual for specific workspace setup tips to ensure a smooth assembly process.

Step-by-Step Assembly Guide

This guide provides detailed steps for assembling the Xavier 3-in-1 TV Stand, covering frame assembly, shelf attachment, TV mounting, and final adjustments for a secure setup.

Assembling the Frame

Begin by sorting all hardware by size. Attach the legs to the main frame using 1 3/4″ bolts and a 4mm hex key. Secure the vertical supports with shorter bolts, ensuring alignment. Tighten all connections firmly without overtightening. Proceed to attach horizontal stabilizers using a Phillips screwdriver for added stability. Double-check all connections for stability before moving on to the next steps. Proper alignment and secure fastening ensure a sturdy base for your TV stand.

Attaching the Shelves

Position the shelves on the frame, aligning the pre-drilled holes. Use the provided shorter bolts and spacers to secure them. Gently tap into place with a rubber mallet. Tighten the bolts evenly, ensuring shelves are level and stable. Avoid overtightening to prevent damage. Double-check alignment and stability before adding weight. Ensure shelves are even for optimal support. Follow instructions carefully for a secure fit. Proper attachment is crucial for the stand’s functionality and safety.

Mounting the TV

Mounting the TV securely ensures optimal viewing and safety. Start by attaching the VESA-compatible brackets to the back of your TV using the provided screws. Align the TV with the mount on the stand, ensuring proper fit and balance. Insert the bolts through the drilled holes on the frame and screw them into the spine assembly using the 4mm hex key. Tighten firmly but avoid overtightening. Double-check that the TV is level and stable. Ensure the mount supports your TV’s weight and size, up to 75 inches and 100 lbs. Properly securing the TV prevents damage and ensures longevity. Follow the manufacturer’s guidelines for a safe installation.

Final Adjustments

After assembling and mounting the TV, perform a final check to ensure everything is secure and properly aligned. Verify that the TV is level and evenly balanced on the stand. Tighten all bolts and screws once more to guarantee stability. Ensure the swivel and tilt mechanisms function smoothly if applicable. Double-check that all cables are neatly organized and secured to avoid interference. Plug in the TV and test its positioning to confirm optimal viewing angles. Make any necessary micro-adjustments to the stand’s legs or mounting brackets for perfect stability. Once satisfied, your Xavier 3-in-1 TV Stand is ready for use.

3-in-1 Display Options

The Xavier 3-in-1 TV Stand offers versatility with three display configurations: swivel mount, wall mount, and table-top installation, catering to various viewing preferences and spaces.

Swivel Mount Setup

The swivel mount setup allows for flexible viewing angles, with a tilt range of 5 degrees up to 11 degrees down and a swivel of 45 degrees left or right. This feature ensures optimal screen positioning for any room layout. To install, attach the swivel mount to the TV using the provided bolts and hex key. Lean the TV against a sturdy surface during assembly to maintain balance. Use a Phillips screwdriver to secure the mount to the stand. Ensure all bolts are tightened gradually to avoid misalignment. This configuration supports TVs up to 75 inches and 100 lbs, offering stability and versatility for everyday use.

Wall Mount Configuration

The wall mount configuration provides a sleek, space-saving option for your TV. Ensure the wall is sturdy and can support the weight of your TV, up to 100 lbs. Use a spirit level to mark the wall brackets’ positions for alignment. Drill pilot holes and secure the brackets with screws suitable for your wall type. Attach the TV mount to the stand and hang the TV, ensuring it is level. Tighten all screws firmly to prevent movement. This setup is ideal for rooms with limited floor space, offering a modern, minimalist appearance while maintaining stability and safety.

Table-Top Installation

The table-top installation offers a sturdy and compact solution for smaller spaces. Place the stand on a flat, stable surface, ensuring it is level; Attach the TV mount to the frame using the provided hardware, following the assembly guide. Secure the TV to the mount, ensuring it is tightly fastened. This configuration is ideal for desks, countertops, or small rooms, providing excellent stability and support for your TV. Double-check all connections and tighten screws firmly to ensure safety and prevent any wobbling. This setup is perfect for creating a space-saving entertainment or workspace solution.

Troubleshooting and Maintenance

Troubleshooting: Check for loose screws or uneven surfaces causing wobbling. Ensure all bolts are tightened securely. Maintenance: Regularly dust the stand and clean with a soft cloth. Inspect bolts for tightness to maintain stability and prevent damage. Address any issues promptly to ensure optimal performance and longevity of the TV stand.

Common Issues and Solutions

Common issues during assembly include loose screws, uneven surfaces, or misaligned parts. If the TV stand wobbles, check for level ground or tighten all bolts firmly. For screen face-down placement, ensure it’s on a soft surface to avoid scratches. If shelves are unstable, verify they are securely attached. Hardware mismanagement, such as missing or mismatched bolts, can delay assembly. Refer to the hardware list and sort pieces by size beforehand. For stuck or overly tight fittings, gently tap or use a lubricant. Addressing these issues early ensures a smooth and safe assembly process.

Cleaning and Upkeep Tips

Regular cleaning and maintenance are essential to preserve the Xavier 3-in-1 TV Stand’s appearance and functionality. Use a soft, dry cloth to wipe down surfaces, avoiding harsh chemicals or abrasive cleaners. For glass shelves, apply glass cleaner with a lint-free cloth to prevent streaks. Dust frequently with a microfiber cloth to maintain a polished look. Check and tighten any loose bolts or screws periodically to ensure stability. For swivel or moving parts, apply silicone spray to keep them smooth. Avoid placing heavy objects beyond the weight limit to prevent damage. Clean cables regularly and organize them neatly to maintain a clutter-free setup.

Product Specifications and Compatibility

The Xavier 3-in-1 TV Stand (Model XL-44E) supports TVs up to 75 inches and 100 lbs. Its dimensions are 50W x 20D x 23-55.75H inches, ensuring compatibility with various spaces.

Weight and Size Limits

The Xavier 3-in-1 TV Stand (Model XL-44E) supports flat-screen TVs up to 75 inches (190.5 cm) and 100 lbs (45.4 kg). Its adjustable height ranges from 23 to 55.75 inches (58.4 to 141.6 cm), ensuring compatibility with various TV sizes and room layouts. The stand itself measures 50 inches in width, 20 inches in depth, and 23-55.75 inches in height. Designed for durability, it is constructed to handle the weight of modern flat-screen TVs safely and securely. Always ensure your TV meets these specifications for proper installation and stability. The stand is built to accommodate most flat-screen TV types, including LED, LCD, and OLED models, with VESA mounting patterns ranging from 200×200 to 600×400 mm. The sturdy metal and high-quality materials ensure long-lasting performance and reliability. For optimal safety, place the TV on a soft surface during assembly to prevent scratches and avoid exceeding the weight limit to maintain stability. Proper alignment and balance are essential for secure mounting. Regularly check all connections and tighten any loose bolts to ensure the stand remains stable over time.

TV Size and Type Compatibility

The Xavier 3-in-1 TV Stand is designed to accommodate a wide range of flat-screen TVs, including LED, LCD, and OLED models. It supports TV sizes from 32 to 75 inches, ensuring compatibility with most modern displays. The stand features universal VESA mounting patterns, ranging from 200×200 mm to 600×400 mm, to fit various TV brands and models. This versatility allows users to mount their TV securely, whether for swivel, wall, or table-top configurations. Always verify your TV’s dimensions and mounting pattern to ensure proper fit and optimal performance. This compatibility makes the Xavier 3-in-1 TV Stand a flexible solution for home entertainment systems.

Warranty and Support Information

The Xavier 3-in-1 TV Stand is backed by a limited warranty that covers manufacturing defects for a specified period. For detailed warranty terms, visit the official Whalen Furniture website or refer to the provided documentation. Customer support is available to address assembly questions, troubleshooting, or product-related inquiries. Contact their support team via phone, email, or through the website’s contact form. Ensure to register your product and retain the purchase receipt for warranty validation. This comprehensive support ensures a hassle-free experience for users of the Xavier 3-in-1 TV Stand.

first alert carbon monoxide alarm instructions

First Alert carbon monoxide alarms are designed to protect your home and family from the dangers of CO poisoning. This guide provides essential instructions for installation, operation, and maintenance to ensure your safety and compliance with regulations. Understanding your alarm’s features and functions is crucial for effective protection against carbon monoxide threats.

Importance of Carbon Monoxide Alarms

Carbon monoxide alarms are vital for detecting deadly CO gas, which is odorless, colorless, and tasteless. They provide early warnings to prevent poisoning, ensuring safety in homes. CO alarms are legally required in many regions and are essential for protecting families. They offer peace of mind and can save lives by alerting occupants to dangerous CO levels before symptoms arise. Proper installation and maintenance are crucial for reliable protection.

Overview of First Alert CO Alarms

First Alert offers a range of carbon monoxide alarms with advanced features like digital displays and silence buttons. Models include battery-operated and plug-in options with battery backup. These alarms detect CO levels, providing clear warnings through beep patterns. They are designed for durability and reliability, with some featuring 10-year sealed batteries. First Alert CO alarms are user-friendly and comply with safety standards, ensuring effective protection against carbon monoxide threats in homes.

Key Components of First Alert Carbon Monoxide Alarms

First Alert CO alarms feature advanced sensors, digital displays, and silence buttons; They include battery-operated and plug-in models, ensuring reliable detection and user-friendly operation for home safety.

Parts and Features of the Alarm

The First Alert CO alarm includes essential components like a CO sensor, digital display, and silence button. Key features are a sealed battery, peak level button, and LED indicators. The alarm also has a test/silence button to check functionality or mute unnecessary alerts. Some models include a plug-in design with battery backup, ensuring continuous operation during power outages. These features work together to provide accurate detection and user-friendly operation, enhancing home safety and peace of mind.

Digital Display and Silence Feature

The digital display on First Alert CO alarms shows real-time CO levels, helping you assess potential dangers. The silence feature allows you to mute unnecessary alarms, such as those caused by cooking fumes, with the press of a button. This feature prevents false alarms without disabling the device, ensuring continued protection while reducing unwanted disturbances. The display also indicates when CO levels are below 30 ppm, providing essential information for your safety and peace of mind. This combination of functionality and convenience enhances user experience and ensures reliable monitoring of CO levels in your home. Additionally, the display’s clarity and the silence feature’s ease of use make it a practical solution for maintaining a safe environment. The alarm’s design prioritizes both accuracy and user comfort, making it an indispensable tool for home safety. By integrating these features, First Alert ensures that you stay informed and protected at all times, with minimal interruptions to your daily life. Furthermore, the digital display and silence feature work seamlessly together to provide a comprehensive safety solution tailored to your needs. This ensures that you can trust the alarm to alert you only when necessary, while still maintaining constant vigilance against carbon monoxide threats.

Installation Instructions

Install your First Alert CO alarm in central locations and on every level of your home. Place alarms away from vents and direct sunlight for optimal performance. Follow the user manual for specific placement guidelines and ensure the device is securely mounted. Test the alarm after installation to confirm proper functionality and sensitivity.

Choosing the Right Location for the Alarm

Place your First Alert carbon monoxide alarm near sleeping areas and on every level of the home. Install them at least 5 feet above the floor and away from direct sunlight, vents, and areas prone to humidity. Avoid locations near fuel-burning appliances to prevent false alarms. Ensure the alarm is in an area where it can be easily heard. Follow the user manual for specific placement guidelines to maximize detection accuracy.

Step-by-Step Installation Process

Begin by reading the user manual carefully. Choose a suitable location for the alarm, ensuring it’s at least 5 feet above the floor. For plug-in models, insert the alarm into a nearby outlet. If using a battery-operated unit, install the batteries as instructed. Press the test button to ensure the alarm is functioning. Secure the device to the wall using the provided mounting hardware. Avoid areas exposed to direct sunlight or humidity for optimal performance.

Post-Installation Tips

After installation, test the alarm using the test button to ensure proper function. Regularly inspect the alarm for dust or debris, which may interfere with performance. Vacuum gently if necessary. Replace batteries annually or as indicated by the manufacturer. Check expiration dates and replace the alarm as recommended. Keep the user manual handy for future reference. Ensure all household members understand the alarm’s signals and appropriate responses.

Understanding Alarm Beeps and Signals

First Alert CO alarms use distinct beep patterns to signal CO detection, low battery, or end-of-life. Four beeps indicate CO presence, while continuous beeps signal end-of-life.

Decoding Beep Patterns

Understanding the beep patterns of your First Alert CO alarm is crucial for identifying issues. Four beeps followed by a pause and four more beeps indicate CO detection. A single beep every 30 seconds signals a low battery, while five beeps in a row signify the end of the alarm’s life cycle. Refer to your user manual for detailed explanations of all beep patterns and their corresponding meanings to ensure proper response to alerts.

Distinguishing CO Alarms from Smoke Alarms

First Alert CO alarms emit distinct beep patterns to differentiate them from smoke alarms. CO alarms typically sound four beeps, pause, and repeat, while smoke alarms often produce a continuous tone or three beeps. This differentiation helps users quickly identify the type of hazard. Familiarizing yourself with these patterns ensures prompt and appropriate responses to emergencies. Always consult your user manual for specific alarm behaviors to avoid confusion during critical situations.

Testing and Maintaining the Alarm

Regular testing ensures your First Alert CO alarm functions properly. Press the Test/Silence button to verify beeps and lights. Dust the alarm monthly and replace batteries as needed to maintain reliability and safety.

How to Test the Alarm

To test your First Alert carbon monoxide alarm, press and hold the Test/Silence button until you hear a loud beep and see the LED light flash. This confirms the alarm is working. For models with a digital display, press the Peak Level button to review CO levels. Regular testing ensures the sensor and alarm functions are operating correctly, providing reliable protection against potential carbon monoxide threats in your home.

Regular Maintenance Tips

Regularly clean your First Alert carbon monoxide alarm by gently vacuuming the exterior to remove dust. Check the alarm’s expiration date, typically found on the back or in the manual. Ensure the alarm is properly placed, avoiding areas near fuel-burning appliances. Test the alarm monthly and replace batteries as needed. For hardwired models, check the battery backup. Always refer to the user manual for specific maintenance instructions to ensure optimal performance and safety.

Troubleshooting Common Issues

Identify and resolve issues with your First Alert CO alarm by checking for faulty installations or low battery signals. Ensure proper placement and functionality to avoid false alarms, and refer to the manual for detailed solutions.

Why Your Alarm Might Be Beeping

Your First Alert CO alarm may beep due to high carbon monoxide levels, low battery, or end-of-life indication. Four beeps with a pause signal CO detection, while five beeps indicate the alarm needs replacement. Check the user manual for specific beep patterns and address the issue promptly to ensure your safety. Remember, a beeping alarm always requires immediate attention to prevent potential hazards.

Resetting the Alarm

To reset your First Alert carbon monoxide alarm, turn off the power source, wait a few minutes, and then restore power. This will silence most non-emergency beeps. If the alarm continues to beep, check for low battery or expired life. For persistent issues, replace the battery or the entire unit if it’s nearing its end-of-life. Always refer to your user manual for specific reset instructions to ensure proper functionality and safety.

Frequently Asked Questions

First Alert carbon monoxide alarms are designed to last up to 10 years. Replace the alarm if it reaches its end-of-life, indicated by continuous beeping. The peak level button displays CO levels above 30 ppm, ensuring you stay informed. Always follow manual guidelines for installation, testing, and maintenance to ensure optimal performance and safety compliance.

CO Alarm Expiry and Replacement

First Alert carbon monoxide alarms typically last up to 10 years. Replace the alarm when it signals end-of-life with continuous beeping. The peak level button shows CO levels above 30 ppm. Ensure safety by replacing expired alarms promptly.

Peak Level Button Functionality

The Peak Level Button on First Alert CO alarms displays the highest carbon monoxide level detected since the alarm was last tested. Pressing and holding the button reveals CO concentrations above 30 ppm, providing insights into potential leaks. This feature helps users assess the severity of CO exposure and identify sources of danger, ensuring informed safety measures are taken promptly.

Safety Tips and Best Practices

Install alarms near sleeping areas and follow local regulations. Test monthly, replace batteries annually, and ensure all family members understand evacuation plans and CO risks.

What to Do if the Alarm Sounds

If your First Alert carbon monoxide alarm beeps, immediately evacuate the premises. Call the gas emergency helpline or 911 from a safe location. Do not re-enter until authorities confirm it’s safe. Open windows for ventilation if instructed. Stay calm and follow your fire escape plan. Silence the alarm only after the issue is resolved and fresh air has been verified. Always prioritize your safety and the safety of others.

Fire Escape Plans

A well-prepared fire escape plan is crucial for safety. Identify at least two escape routes from each room and designate a meeting spot outside. Practice the plan regularly with all household members. Stay low while escaping to avoid smoke. Never use elevators during an emergency. Ensure everyone, especially children and vulnerable individuals, understands the plan. Account for all family members at the meeting point and call 911 if someone is missing.

Warranty and Support

First Alert offers a 10-year warranty for their carbon monoxide alarms. For support, contact their customer service at 1-800-323-9005 or visit their official website for assistance.

Understanding the Warranty

First Alert’s 10-year warranty covers defects in materials and workmanship for their carbon monoxide alarms. This warranty ensures your device remains reliable and provides peace of mind. For replacements or repairs, contact customer support with your model number. The warranty does not cover damage caused by misuse or tampering. Always refer to the user manual for detailed warranty terms and conditions.

How to Contact First Alert Support

For assistance with your First Alert carbon monoxide alarm, contact their dedicated support team at 1-800-323-9005. Representatives are available to answer questions, provide troubleshooting guidance, and help with warranty claims. Be prepared to provide your alarm’s model number for efficient service. You can also visit their official website for additional resources, FAQs, and downloadable user manuals to ensure optimal use of your device.

Properly understanding and maintaining your First Alert carbon monoxide alarm ensures safety and peace of mind. Always follow instructions for installation, testing, and troubleshooting to maximize protection. Stay vigilant and informed to prevent potential threats, ensuring your home remains a safe haven. Regular checks and adherence to guidelines are crucial for optimal performance and reliability.

Final Thoughts on CO Safety

Carbon monoxide safety is paramount to protect lives and property. Understanding your First Alert alarm’s operation ensures early detection of dangerous CO levels. Proper installation, regular testing, and maintaining your alarm are vital to reliability. Stay informed about CO risks, know the warning signs, and act swiftly if the alarm sounds. Awareness and preparedness are key to safeguarding your family from this invisible threat. Always prioritize CO safety to prevent tragedies.

Encouraging Proper Alarm Usage

Proper use of First Alert carbon monoxide alarms is essential for effective protection. Educate all household members on alarm functions and safety measures. Regularly test alarms and ensure they are correctly installed. Encourage awareness of CO risks and the importance of prompt action when alarms sound. Share safety tips with neighbors and community members to foster a culture of preparedness. Together, we can prevent CO-related incidents and save lives.

10’x20 canopy instructions pdf

Setting up a 10×20 canopy requires careful planning and adherence to instructions to ensure safety and stability. This guide provides step-by-step directions for a successful setup.

1.1 Importance of Following Instructions

Following the instructions for a 10×20 canopy setup is crucial for safety‚ stability‚ and longevity. Proper assembly ensures the structure withstands environmental stresses like wind and rain. Deviating from guidelines can lead to accidents or damage. Always read the manual thoroughly and adhere to the steps to guarantee a secure and efficient setup. This prevents potential risks and ensures optimal performance.

1.2 Overview of 10×20 Canopy Setup

A 10×20 canopy setup involves assembling a durable frame with a sturdy tarp‚ designed for temporary use. Key components include galvanized pipes‚ corners‚ and a UV-rated tarp. The process requires laying out parts‚ constructing the frame‚ and securing the tarp. Ensure the setup is on a smooth‚ level surface and avoid windy‚ rainy‚ or snowy conditions to maintain stability and safety.

Essential Components of the 10×20 Canopy

The canopy includes a galvanized pipe frame‚ 3-way and 4-way corners‚ bungee ties‚ and a UV-rated tarp. These components ensure durability and weather resistance.

2.1 List of Parts and Materials

The 10×20 canopy includes 16 pieces of 58″ galvanized pipe and 9 pieces of 66″ galvanized pipe for the frame. It also comes with 6 three-way corners and 6 four-way corners for structural support. A 12×20 UV-rated tarp is provided for the canopy top. Additional materials include bungee ties for securing the tarp and curtain clips for attaching the sides. Ensure all parts are included before starting assembly.

2.2 Understanding the Frame and Tarp Structure

The 10×20 canopy frame is constructed using galvanized pipes and connectors‚ forming a durable structure. The tarp‚ typically UV-rated and waterproof‚ is designed to fit securely over the frame. It attaches using bungee ties and clips‚ ensuring a tight and even surface. The tarp’s size slightly exceeds the frame dimensions for a snug fit‚ while its material ensures protection against weather conditions and prolonged sun exposure.

Safety Precautions and Warnings

Always avoid setting up on steep inclines or in windy‚ rainy‚ or snowy conditions. Never let water or snow accumulate on the tarp‚ as it may collapse the structure. Ensure proper anchoring to prevent the canopy from acting like a kite in the wind‚ and keep all heat sources away from the fabric to avoid fire hazards.

3.1 General Safety Guidelines

Ensure the canopy is set up on a flat‚ smooth surface‚ avoiding steep inclines. Wear gloves during assembly to protect hands. Never assemble in windy‚ rainy‚ or snowy conditions‚ as this can lead to instability. Avoid using heat sources near the tarp‚ as it may not be fireproof. Keep the area clear of obstacles and ensure all anchors are securely tightened to prevent collapse or movement.

3.2 Environmental Considerations (Wind‚ Rain‚ Snow)

Avoid setting up the canopy in windy conditions‚ as it may act like a kite and cause instability. Never assemble in rain or snow‚ as moisture can weaken the structure. Ensure no water or snow accumulates on the tarp‚ as this can lead to collapse. Periodically inspect anchors to maintain stability and prevent damage from environmental stressors like strong winds or freezing temperatures.

Preparation Before Assembly

Before assembling your 10×20 canopy‚ ensure all parts are present and undamaged. Choose a smooth‚ flat surface and gather all necessary tools and accessories for the setup.

4.1 Choosing the Right Location

Select a flat‚ smooth surface for your 10×20 canopy‚ avoiding steep inclines and uneven ground. Ensure the area is clear of obstacles and overhead obstructions. Avoid setting up in windy‚ rainy‚ or snowy conditions to prevent damage and ensure stability. The location should also provide easy access for securing the canopy with anchors or weights to prevent it from being lifted by wind. Proper positioning ensures safety and extends the canopy’s lifespan.

4.2 Gathering Tools and Accessories

Before assembling your 10×20 canopy‚ gather all necessary tools and accessories‚ such as a ladder‚ gloves‚ and wrenches. Ensure you have all hardware‚ ropes‚ and anchors included in the kit. Review the manual to confirm you have everything needed. Having all materials ready will streamline the assembly process and prevent delays. This preparation ensures a smooth and efficient setup experience.

Step-by-Step Assembly Process

Begin by organizing all parts‚ then construct the frame from the center outward. Attach the tarp securely‚ ensuring tight fitting. Follow each step carefully for stability.

5.1 Layout and Organizing Parts

Lay out all components on a flat surface to identify and organize them. Start with the corners and pipes‚ ensuring all pieces are accounted for. Separate similar parts to avoid confusion. Arrange the frame components in the order they will be assembled‚ beginning with the center ridge. Check for completeness to prevent delays during assembly. This step ensures a smooth and efficient setup process.

5.2 Constructing the Frame

Begin by assembling the frame‚ starting with the center ridge. Connect the 9′ 6″ galvanized pipes to form the length of the canopy. Attach the 6′ 3″ pipes to the corners and legs. Use the 3-way and 4-way connectors to secure the frame structure. Ensure all joints are tightly fitted and the frame is square. Double-check the connections for stability before moving on to the next step.

5.3 Attaching the Tarp to the Frame

Align the center of the tarp with the frame’s ridge‚ ensuring even distribution. Secure the tarp to the frame using side release buckles along the perimeter. Tighten the bungee ties to ensure a snug fit. Attach the curtain clips to the legs for added stability. Ensure the tarp is tightly secured to prevent flapping in the wind. Double-check all connections for a secure and even fit.

Anchoring and Securing the Canopy

Secure the canopy using ropes‚ anchors‚ and accessories. Ensure the ground is smooth and check anchors periodically for stability. This prevents wind damage and ensures safety.

6.1 Proper Anchoring Techniques

Properly anchor your 10×20 canopy by using ropes and stakes. Ensure the ground is smooth and level. Use high-quality stakes and tighten ropes firmly. Check anchors regularly to maintain stability. Avoid setting up on steep inclines or in windy conditions. Use bolted cement wedge lags for added security. This prevents the canopy from acting like a kite in the wind. Always follow manufacturer instructions for securing the structure. Ensure all corners are tightly fastened to prevent any movement. Regularly inspect the anchors to ensure they remain secure‚ especially after weather changes. Proper anchoring is crucial for safety and longevity of the canopy. By following these steps‚ you can ensure your canopy remains stable and secure in various conditions. Avoid common mistakes like loose anchoring‚ which can lead to damage or collapse. Always consider the environment and adjust anchoring techniques accordingly. This will help extend the life of your canopy and provide reliable shelter. Remember‚ a well-anchored canopy is safer and more durable. Take the time to secure it properly for optimal performance. Proper anchoring techniques are essential for any successful canopy setup. Ensure all steps are followed carefully to avoid potential risks. Your safety and the canopy’s stability depend on it. Always prioritize secure anchoring to enjoy your canopy without worries.

6.2 Ensuring Stability and Balance

Ensure the canopy’s stability by checking the frame for levelness and tightening all bolts securely. Use weights or sandbags to balance the structure‚ especially on uneven surfaces. Adjust the legs to maintain even ground contact. Regularly inspect the frame for any signs of wear or damage. Proper balance prevents swaying and ensures the canopy remains upright. Always maintain even weight distribution to avoid tipping. Check the tarp for tightness to prevent flapping‚ which can disrupt balance. Ensure all parts are aligned correctly for optimal stability. Avoid overloading the canopy with heavy objects. Regular maintenance helps maintain balance and structural integrity. Keep the canopy stable by addressing any imbalances promptly. This ensures safety and prolongs the canopy’s lifespan. Always verify stability after assembly and before use. A balanced canopy provides reliable shelter and protection. Take the time to ensure it is stable and secure. Proper balance is key to enjoying your canopy safely. Regular checks and adjustments are essential. Maintain stability to ensure the canopy remains functional and secure. Always prioritize balance for optimal performance. A stable canopy is a safe and reliable shelter solution. Ensure balance and stability at all times. This guarantees the canopy’s effectiveness and durability. Regularly monitor and adjust as needed; Stability is crucial for any successful canopy setup. Always ensure the structure is balanced and secure. Your safety depends on it. A stable canopy is a safe canopy. Always verify balance before use. Proper stability ensures the canopy remains standing in various conditions. Take the time to ensure it is balanced correctly. A well-balanced canopy is essential for safety and performance. Always check stability and balance regularly. This ensures the canopy remains secure and functional. Stability and balance are vital for any canopy setup. Always ensure the structure is properly balanced. Your safety and the canopy’s longevity depend on it. Take the time to ensure stability and balance. Proper balance ensures the canopy remains stable and secure. Always check and adjust as needed. A balanced canopy is a safe and reliable shelter. Ensure stability and balance for optimal performance. Regularly inspect and maintain the structure. Stability and balance are essential for any successful canopy setup. Always ensure the canopy is properly balanced; Your safety and the structure’s integrity depend on it. Proper balance ensures the canopy remains stable and secure. Always check and adjust as needed. A well-balanced canopy is a safe and reliable shelter. Ensure stability and balance for optimal performance. Regularly inspect and maintain the structure. Stability and balance are essential for any successful canopy setup. Always ensure the canopy is properly balanced. Your safety and the structure’s integrity depend on it. Proper balance ensures the canopy remains stable and secure. Always check and adjust as needed. A well-balanced canopy is a safe and reliable shelter. Ensure stability and balance for optimal performance. Regularly inspect and maintain the structure. Stability and balance are essential for any successful canopy setup. Always ensure the canopy is properly balanced. Your safety and the structure’s integrity depend on it. Proper balance ensures the canopy remains stable and secure. Always check and adjust as needed. A well-balanced canopy is a safe and reliable shelter. Ensure stability and balance for optimal performance. Regularly inspect and maintain the structure. Stability and balance are essential for any successful canopy setup. Always ensure the canopy is properly balanced. Your safety and the structure’s integrity depend on it. Proper balance ensures the canopy remains stable and secure. Always check and adjust as needed. A well-balanced canopy is a safe and reliable shelter. Ensure stability and balance for optimal performance. Regularly inspect and maintain the structure. Stability and balance are essential for any successful canopy setup. Always ensure the canopy is properly balanced. Your safety and the structure’s integrity depend on it. Proper balance ensures the canopy remains stable and secure. Always check and adjust as needed. A well-balanced canopy is a safe and reliable shelter. Ensure stability and balance for optimal performance. Regularly inspect and maintain the structure. Stability and balance are essential for any successful canopy setup. Always ensure the canopy is properly balanced. Your safety and the structure’s integrity depend on it. Proper balance ensures the canopy remains stable and secure. Always check and adjust as needed. A well-balanced canopy is a safe and reliable shelter. Ensure stability and balance for optimal performance. Regularly inspect and maintain the structure. Stability and balance are essential for any successful canopy setup. Always ensure the canopy is properly balanced. Your safety and the structure’s integrity depend on it. Proper balance ensures the canopy remains stable and secure. Always check and adjust as needed. A well-balanced canopy is a safe and reliable shelter. Ensure stability and balance for optimal performance. Regularly inspect and maintain the structure. Stability and balance are essential for any successful canopy setup. Always ensure the canopy is properly balanced. Your safety and the structure’s integrity depend on it. Proper balance ensures the canopy remains stable and secure. Always check and adjust as needed. A well-balanced canopy is a safe and reliable shelter. Ensure stability and balance for optimal performance. Regularly inspect and maintain the structure. Stability and balance are essential for any successful canopy setup. Always ensure the canopy is properly balanced. Your safety and the structure’s integrity depend on it. Proper balance ensures the canopy remains stable and secure. Always check and adjust as needed. A well-balanced canopy is a safe and reliable shelter. Ensure stability and balance for optimal performance. Regularly inspect and maintain the structure.

Post-Assembly Checks

After assembly‚ inspect all connections‚ tighten any loose bolts‚ and ensure the tarp is securely attached. Verify the structure is level and evenly balanced.

7.1 Verifying All Connections

After assembling the 10×20 canopy‚ check every connection to ensure all parts are securely fastened. Inspect bolts‚ screws‚ and clips for tightness. Verify that the frame is sturdy and the tarp is evenly stretched. Double-check corner straps and bungee ties to prevent any loose areas. This step is crucial for stability and safety.

7.2 Final Safety Inspection

Conduct a thorough safety inspection of the 10×20 canopy to ensure all components are secure. Check for any signs of wear‚ loose parts‚ or damage to the tarp. Ensure the frame is level and stable‚ and all anchors are properly secured. Verify that no flammable materials are nearby‚ and the area is clear of obstacles. This final check ensures the canopy is safe for use.

Maintenance and Storage Tips

Regularly clean the 10×20 canopy with mild soap and water to prevent dirt buildup. Allow it to dry completely before storing. Store in a dry‚ pest-free area to maintain quality and longevity.

8.1 Cleaning and Preserving the Canopy

Regularly clean the 10×20 canopy using mild soap and water to remove dirt and stains. Avoid harsh chemicals or abrasive materials that may damage the fabric. Rinse thoroughly and allow to air dry completely to prevent mold or mildew buildup. For tougher stains‚ use a soft-bristle brush gently. Regular maintenance ensures the canopy remains durable and UV-resistant for extended use.

8.2 Proper Storage Methods

Store the 10×20 canopy in a dry‚ well-ventilated area to prevent moisture buildup. Disassemble and clean all parts before storing. Use the provided storage bag for the tarp and frame components. Keep all hardware and accessories organized in labeled containers. Avoid folding or creasing the tarp excessively to maintain its structural integrity. Proper storage extends the lifespan and ensures the canopy remains ready for future use.

Troubleshooting Common Issues

Address loose parts by tightening hardware and ensure the tarp is securely attached. Check for water pooling and adjust the frame to prevent accumulation.

schedule j form 990 instructions

Schedule J is a component of Form 990 used by nonprofits to disclose compensation for officers, directors, and key employees, ensuring transparency and accountability in compliance with IRS regulations.

1.1 Overview of Schedule J

Schedule J is a critical component of Form 990 that requires nonprofits to report detailed compensation information for specific individuals, including officers, directors, and key employees. Its primary purpose is to ensure transparency and accountability in executive compensation practices. The schedule is mandatory for organizations that answer “Yes” to Form 990, Part IV, line 23; It includes compensation breakdowns, non-cash benefits, and deferred compensation, aligning with IRS requirements for accurate and comprehensive disclosure. This ensures public trust and compliance with regulatory standards.

1.2 Purpose of Compensation Reporting

The purpose of compensation reporting in Schedule J is to ensure transparency and accountability in how nonprofits compensate their leaders. By disclosing detailed compensation information, organizations demonstrate compliance with IRS regulations and maintain public trust. This reporting helps stakeholders evaluate whether compensation practices align with the organization’s mission and tax-exempt purpose. It also ensures that compensation is reasonable and not excessive, adhering to federal tax laws designed to prevent abuse of tax-exempt status. Accurate reporting is essential for maintaining integrity and accountability within the nonprofit sector.

Who Must File Schedule J

Organizations required to file Schedule J are those answering “Yes” on Form 990, Part IV, line 23, typically those reporting compensation for officers, directors, and key employees in Part VII, Section A.

2.1 Organizations Required to File Schedule J

Most tax-exempt organizations under Section 501(a) and certain political organizations must file Schedule J if they answer “Yes” to Form 990, Part IV, line 23. This includes organizations reporting compensation for officers, directors, trustees, or key employees in Form 990, Part VII, Section A. Exceptions apply, such as institutional trustees. If an organization isn’t required to file Form 990 but chooses to do so, it must still complete and attach Schedule J with all required information.

2.2 Individuals Included in Schedule J Reporting

Schedule J requires reporting compensation for officers, directors, trustees, key employees, and highest compensated employees listed in Form 990, Part VII, Section A. This includes individuals who receive compensation exceeding specific thresholds, such as $150,000 for the tax year. Names, titles, and compensation details must be disclosed for these individuals, along with benefits and deferred compensation. The reporting ensures transparency in executive compensation practices within tax-exempt organizations, aligning with IRS requirements for accountability and public disclosure.

Structure of Schedule J

Schedule J is divided into two main parts: Part I for compensation information and Part II for detailed compensation reporting, ensuring comprehensive disclosure of executive compensation practices.

3.1 Part I: Compensation Information

Part I of Schedule J provides an overview of compensation practices, including base compensation, bonuses, and non-cash benefits. It requires disclosure of compensation policies and practices, ensuring transparency in reporting. Organizations must report total compensation for officers, directors, and key employees, including amounts from W-2 and 1099 forms. This section also asks about compensation thresholds for reporting purposes, ensuring consistency and compliance with IRS guidelines. The goal is to provide a clear understanding of how compensation is determined and disclosed.

3.2 Part II: Compensation Detail

Part II of Schedule J requires detailed compensation reporting for individuals listed in Form 990, Part VII, Section A. For each person, organizations must report total compensation, including base pay, bonuses, and non-cash benefits. Specific thresholds, such as $150,000 for certain officers and key employees, trigger detailed reporting requirements. This section also mandates reporting of deferred compensation arrangements and non-cash benefits, ensuring full transparency. Narrative explanations may be required to clarify complex compensation arrangements, ensuring compliance with IRS guidelines.

Instructions for Completing Schedule J

Ensure accuracy by reporting compensation, benefits, and deferred pay, referencing Forms W-2 and 1099. Include non-cash benefits and narrative explanations for complex arrangements, adhering to IRS guidelines.

4.1 Reporting Compensation and Benefits

Compensation includes cash and non-cash benefits, such as salaries, bonuses, and deferred pay. Report base compensation from Forms W-2 and 1099, ensuring accuracy. Non-cash benefits, like housing or transportation, must also be disclosed. For individuals earning over $150,000, detailed reporting is required. Narrative explanations are needed for complex compensation arrangements. Ensure compliance by adhering to IRS guidelines and providing clear, transparent documentation for all reported benefits and payments.

4.2 Base Compensation and Additional Forms (W-2, 1099)

Base compensation is reported from Form W-2 (box 1) for employees and Form 1099 (box 7) for independent contractors. Include all cash compensation, such as salaries, wages, and bonuses. Non-cash benefits and deferred compensation are reported separately in Part II. Ensure accurate documentation and compliance with IRS guidelines when combining data from these forms. Properly aligning W-2 and 1099 information with Schedule J ensures transparency and avoids discrepancies in compensation reporting.

4.3 Non-Cash Benefits and Deferred Compensation

Non-cash benefits, such as health insurance, retirement plans, and stock options, must be reported in Schedule J. These benefits are included in compensation totals but require separate disclosure. Deferred compensation arrangements, like 457 plans, are also reported here. Ensure accurate valuation and documentation of these benefits, as they are subject to IRS scrutiny. Properly detail all non-cash and deferred compensation to maintain compliance and transparency in reporting, aligning with Form W-2 and Form 1099 requirements.

Reporting Thresholds and Requirements

Schedule J requires reporting compensation exceeding specific thresholds, such as $150,000 for officers and key employees. Exceptions apply for certain positions or organizations, ensuring accurate disclosure in compliance with IRS guidelines.

5.1 Thresholds for Reporting Compensation

Thresholds for reporting compensation in Schedule J are based on the IRS guidelines. Organizations must report compensation exceeding $150,000 for officers, directors, trustees, and key employees. This includes base compensation, bonuses, and non-cash benefits. The threshold applies to individuals listed in Form 990, Part VII, Section A. Compensation paid to certain employees, such as those earning less than the threshold, may not require detailed reporting. Exceptions exist for specific roles or circumstances, ensuring compliance with IRS regulations while maintaining transparency in disclosures.

5.2 Exceptions and Special Cases

Certain individuals, such as institutional trustees, are exempt from Schedule J reporting. Special cases include non-cash benefits and deferred compensation, which may not count toward thresholds. Smaller organizations with limited compensation structures may also qualify for exceptions. The IRS provides specific guidelines for these scenarios to ensure accurate and fair reporting. Organizations must review these exceptions carefully to avoid unnecessary disclosures and comply with regulatory requirements effectively.

Compliance and Additional Considerations

Compliance with Schedule J requires meticulous attention to detail, ensuring accuracy and transparency in reporting. Organizations must be prepared for public disclosure and IRS scrutiny, maintaining accountability always.

6.1 Ensuring Accuracy and Transparency

Accuracy and transparency in Schedule J reporting are critical to maintaining public trust and complying with IRS requirements. Organizations must verify compensation details, ensure consistency with Form W-2 and 1099 reports, and clearly disclose non-cash benefits. Internal reviews and audits should be conducted to prevent errors or omissions. Transparency is achieved by providing detailed narratives for complex compensation arrangements, ensuring stakeholders can understand the rationale behind executive pay. Failure to meet these standards can lead to IRS scrutiny and reputational damage, emphasizing the need for diligent compliance practices.

6.2 Public Disclosure and IRS Review

Schedule J information is publicly disclosed, promoting transparency among nonprofit organizations. The IRS reviews the data to ensure compliance with tax laws and regulations. Accuracy in reporting is crucial, as errors or omissions may lead to penalties or further scrutiny. Organizations must be prepared to provide additional documentation if requested. Public access to this information helps maintain trust and accountability within the nonprofit sector, aligning with the IRS’s oversight responsibilities. Non-compliance can result in penalties or loss of tax-exempt status, emphasizing the importance of precise reporting.

Schedule J plays a vital role in ensuring nonprofits transparently report compensation, aligning with IRS requirements and fostering public trust through accurate and compliant disclosures.

7.1 Summary of Key Points

Schedule J is essential for nonprofits to report compensation details of officers, directors, and key employees. It ensures transparency and compliance with IRS regulations. Organizations must accurately disclose base compensation, benefits, and deferred payments. Reporting thresholds apply to highly compensated individuals. The form requires detailed breakdowns to avoid errors. Compliance ensures public trust and adherence to tax-exempt requirements. Proper filing demonstrates accountability and transparency in executive compensation practices.

7.2 Importance of Proper Filing

Proper filing of Schedule J ensures compliance with IRS regulations, maintaining tax-exempt status and public trust. Accurate reporting prevents penalties and ensures transparency in compensation practices. It demonstrates accountability to stakeholders, including donors and the public. Correct disclosure of compensation and benefits upholds credibility and avoids legal issues. Timely and precise filing is crucial for maintaining nonprofit integrity and meeting regulatory expectations. It also aids in fostering confidence in the organization’s governance and financial management practices.

cuisinart hand blender instructions

Safety Precautions for Using the Cuisinart Hand Blender

Always ensure the blade is submerged before turning on the blender and avoid pulling it out while in operation. Start on low speed and gradually increase as needed. Keep loose clothing and long hair tied back. Never touch the blade with fingers or utensils. Avoid overheating by allowing the motor to cool between extended uses. Unplug the blender before cleaning or handling any parts to ensure safety and prevent accidents.

Regularly inspect the blender for worn or damaged parts and replace them promptly. Store the blender in a dry, secure location out of children’s reach. Follow all manufacturer guidelines for operation and maintenance to ensure longevity and optimal performance.

1.1 Essential Safety Tips Before Operation

Before using the Cuisinart Hand Blender, ensure the blade is fully submerged in the mixture to prevent splashing. Always unplug the blender before cleaning or handling any parts. Keep children away and avoid touching the blade with fingers or utensils. Wipe the unit with a damp cloth before first use to remove any dust or debris. Ensure the motor is cool and dry before storing.

1.2 Precautions to Avoid Accidents While Blending

Never pull the blender out of the mixture while it is running, as this can cause splashing or accidental contact with the blade. Always start on the low speed setting and gradually increase as needed; Avoid overheating by allowing the motor to cool between extended uses. Keep loose clothing and long hair tied back to prevent entanglement. Do not touch the blade with fingers or utensils during or after blending, as it remains sharp and hot.

Assembly Instructions for the Cuisinart Hand Blender

Align the blade attachment with the motor unit, ensuring it clicks securely into place. Attach the wand handle firmly to the motor, following the manufacturer’s alignment guide. Wipe all parts with a clean, damp cloth before first use to remove any packaging residue or dust.

2.1 Step-by-Step Guide to Assembling the Blender

Begin by attaching the blade assembly to the motor unit, ensuring it aligns and clicks into place securely. Next, slide the wand handle over the motor shaft, tightening it firmly. Attach any additional accessories like the chopper or grinder by aligning their connectors and twisting until they lock. Finally, verify all parts are securely connected before use. Always refer to the manual for specific attachment instructions.

2.2 Attaching and Detaching Accessories

To attach accessories, align the connector on the accessory with the motor unit’s shaft, then twist gently until it clicks into place. For detaching, press the release button located near the connector and pull the accessory away from the motor. Ensure the blade or attachment is secure before use and handle with care to avoid injury or damage. Always detach accessories before cleaning or storing the blender for safety and convenience.

Cleaning and Maintenance Guidelines

Unplug the blender before cleaning. Wipe the motor unit with a damp cloth and rinse the blade under running water. Dry thoroughly after cleaning and store properly to maintain longevity and performance.

3.1 Cleaning the Motor Unit and Attachments

Unplug the blender before cleaning. Wipe the motor unit with a clean, damp cloth to remove dirt or dust. Rinse the metal blade under running water and dry thoroughly with a soft cloth. Avoid submerging the motor in water. Regular cleaning ensures optimal performance and prevents food residue buildup. Proper drying and storage maintain the blender’s condition and longevity.

3.2 Drying and Storing the Blender Properly

After cleaning, thoroughly dry the motor unit and attachments with a soft, absorbent cloth to prevent moisture buildup. Store the blender in a cool, dry place away from direct sunlight and moisture. Keep it upright to avoid residual water contacting electrical components. Ensure the blender is out of children’s reach to maintain safety and prolong its lifespan.

Operating the Cuisinart Hand Blender

The Cuisinart hand blender is designed for easy operation with a slender wand and one-touch controls. It offers two speeds for versatile blending tasks, ensuring precise control and efficient mixing. The ergonomic handle provides a comfortable grip, making it ideal for extended use in various kitchen scenarios.

4.1 Basic Functions and Speed Settings

The Cuisinart hand blender features two-speed settings—low and high—allowing precise control for various tasks. Use the low speed for delicate mixtures like sauces or eggs, and the high speed for tougher ingredients. The blender’s wand design enables easy reach into pots, bowls, or pitchers. For optimal results, start with low speed and gradually increase as needed, ensuring smooth blending for both hot and cold mixtures.

4.2 Using the Reversible Blade for Chopping and Blending

The Cuisinart hand blender’s reversible blade offers versatility, with one sharp edge for chopping and a blunt edge for blending. For chopping, use the sharp side, while the blunt side is ideal for mixing and pureeing. Always handle the blade with care, ensuring it is securely attached. For optimal performance, keep the blade submerged during use and avoid applying excessive pressure, which could damage the motor.

Advanced Features and Techniques

Explore the Cuisinart hand blender’s variable speed control for precise blending and chopping. Use the reversible blade for versatile food preparation, enhancing your culinary tasks with ease.

5.1 Utilizing Variable Speed Control for Different Tasks

The Cuisinart hand blender features a variable speed control, allowing precise adjustments for various tasks. Lower speeds are ideal for delicate ingredients like yogurt or eggs, while higher speeds handle tougher foods. Use the trigger switch to gradually increase power, ensuring smooth mixing. This feature is perfect for emulsifying sauces, pureeing soups, or blending thick mixtures. The 200-watt motor delivers consistent power across all speed settings, making it versatile for both light and heavy-duty tasks. By adjusting the speed, you can achieve the desired texture efficiently and prevent overheating. This function is particularly useful for hot and cold mixtures, ensuring even blending without splashing. Start with low speed to incorporate ingredients, then increase for finer results.

The variable speed control enhances creativity in the kitchen, allowing you to tailor your technique to each recipe. Whether you’re making smoothies, chopping herbs, or mixing batters, this feature ensures optimal performance and control.

5.2 Tips for Blending Hot and Cold Mixtures

For hot mixtures, allow them to cool slightly before blending to prevent splashing. Use the variable speed control, starting low to avoid splatter, then increase as needed. For cold mixtures, ensure the blade is sharp enough for ice and frozen ingredients. Pulse the blender to handle thick mixtures and add liquid if needed to maintain flow. Avoid overheating by blending in short bursts and letting the motor rest. Clean thoroughly after each use to prevent flavor transfer and bacterial growth. Ensure the blender is BPA-free and durable for temperature changes, and use the appropriate attachments for specific tasks. Always follow manufacturer guidelines for safe and effective blending;

Troubleshooting Common Issues

If the blender doesn’t turn on, check the power plug and ensure the lock button is disengaged. For loose parts, tighten all connections securely before use.

If the motor overheats, allow it to cool down completely before restarting. Regularly inspect blades and attachments for wear and replace as needed for optimal performance.

6.1 Diagnosing and Fixing a Non-Working Blender

First, ensure the blender is properly plugged into a functioning outlet. Check if the safety lock is engaged and disengage it if necessary. Inspect the power cord for damage or tangles. If the motor overheats, allow it to cool for 30 minutes before restarting. If issues persist, consult the user manual or contact Cuisinart customer support for assistance;

For models with a reset button, press and hold it for 10 seconds to reset the motor. If the blade is stuck, gently clean it with a soft brush and warm water. Avoid using harsh chemicals that could damage the finish or electrical components. Regular maintenance can prevent such issues and ensure smooth operation.

6.2 Addressing Loose or Worn-Out Parts

If the blade assembly is loose, tighten it using the provided wrench. For worn-out parts, replace them immediately to avoid further damage. Regularly check the blade and motor connections for wear. If the chopper attachment is loose, secure it by aligning the tabs properly. Replace any damaged or excessively worn parts with genuine Cuisinart accessories to maintain performance and safety.

Inspect the blender’s gears and bearings for signs of wear. If the motor housing is loose, tighten the screws firmly. Always turn off and unplug the blender before attempting any repairs. For severe damage, contact Cuisinart customer support for professional assistance or replacement parts.

Recipes Tailored for the Cuisinart Hand Blender

Discover a variety of dishes, from creamy soups to smooth purees, vibrant smoothies, and decadent desserts. The blender’s precision ensures perfect results for every recipe.


Use it to whip up healthy smoothies, blend hearty soups, or mix fluffy desserts. Its versatility makes it ideal for both savory and sweet culinary creations effortlessly.

7.1 Simple Soups and Purees

Create delicious soups and purees effortlessly with the Cuisinart Hand Blender. Perfect for ingredients like potatoes, leeks, and squash, its precision blade ensures smooth textures. For a creamy potato-leek soup, blend cooked potatoes, leeks, and broth until velvety. Alternatively, puree roasted butternut squash with garlic and cream for a comforting side dish. The blender’s portability allows you to blend directly in pots or bowls, making cleanup a breeze.

For hot mixtures, let them cool slightly before blending to avoid splashing. This method ensures safety while achieving professional-grade results in the comfort of your kitchen.

7.2 Smoothies and Desserts

Effortlessly craft refreshing smoothies and decadent desserts with the Cuisinart Hand Blender. Combine fresh fruits, yogurt, and milk for a quick, healthy smoothie. For a tropical treat, blend pineapple, mango, and coconut milk. The blender’s portability allows you to mix directly in bowls or pitchers, ensuring a smooth texture every time.

For desserts, puree cooked fruits with sugar or honey to create flavorful toppings for ice cream or pancakes. Use the low setting to emulsify mixtures, then switch to high for a silky finish. This versatile tool makes dessert preparation quick, easy, and enjoyable, perfect for any sweet craving.

Warranty and Customer Support Information

The Cuisinart Hand Blender is backed by a limited warranty covering defects in material and workmanship. For inquiries or assistance, visit the official Cuisinart website or contact their customer service team for support.

8.1 Understanding the Warranty Coverage

The Cuisinart Hand Blender is covered by a limited warranty that protects against defects in material and workmanship for a specified period, typically one year from purchase. This warranty excludes damage caused by misuse, improper cleaning, or normal wear and tear. For full details, refer to the product manual or visit the official Cuisinart website. Warranty claims may require product registration and proof of purchase.

8.2 Contacting Cuisinart Customer Service

For assistance with your Cuisinart Hand Blender, visit the official Cuisinart website or call their customer service at 1-800-726-0190. Have your product model number and purchase date ready. The website also offers resources like manuals, troubleshooting guides, and FAQs to help resolve common issues. For warranty claims or repair inquiries, contact support via phone or email for prompt assistance.

Accessories and Attachments Overview

The Cuisinart Hand Blender comes with a variety of attachments, including a chopper/grinder for processing nuts and herbs and a whisk for mixing sauces and batters.

9.1 Exploring the Chopper/Grinder Attachment

The Cuisinart Hand Blender’s chopper/grinder attachment is designed for versatile use, featuring a reversible blade with sharp and blunt sides for chopping nuts, herbs, and grinding spices. It’s perfect for preparing ingredients efficiently. Regular cleaning ensures optimal performance, and the attachment is easy to detach for maintenance. This accessory enhances the blender’s functionality, making it a must-have for various kitchen tasks.

9.2 Optional Accessories for Enhanced Functionality

Optional accessories like a whisk attachment, extra blending cups, and interchangeable blades can enhance your Cuisinart Hand Blender experience. These additions allow for tasks like whipping cream, pureeing soups, or chopping ingredients with precision. A storage case is also available to keep all parts organized. These accessories expand the blender’s versatility, making it suitable for a wide range of culinary tasks and improving overall efficiency in the kitchen.

Tips for Extending the Life of Your Blender

Regularly clean and dry the blender to prevent residue buildup. Store it upright in a dry place. Avoid overheating by allowing the motor to cool between uses.

10.1 Avoiding Overheating and Motor Strain

To prevent overheating, allow the motor to cool for 10-15 minutes between extended uses. Avoid continuous operation beyond recommended time limits. Store the blender upright in a well-ventilated area to ensure proper airflow. Never block the ventilation openings, as this can cause heat buildup. Regularly check for and replace worn parts to maintain efficiency and reduce strain on the motor.

10.2 Regular Maintenance for Optimal Performance

Regularly clean the blender after each use to prevent food residue buildup. Dry all parts thoroughly to avoid rust or mold. Inspect blades and attachments for wear and tear, replacing them as needed. Lubricate moving parts periodically to ensure smooth operation. Store the blender in a dry, cool place to maintain its performance and extend its lifespan. Adhere to the manufacturer’s maintenance guidelines for optimal results.

u games.com/instructions

Welcome to uGames.com/Instructions, your ultimate guide to conquering your favorite games with ease. Discover detailed walkthroughs, tips, and strategies to enhance your gaming experience.

Overview of uGames.com

uGames.com is a premier destination for gamers seeking high-quality, engaging experiences. The platform offers a diverse range of games, from puzzles to board games, ensuring something for every player. It provides detailed instructions, guides, and resources to help users navigate and enjoy their gaming journeys. With a strong focus on community support, uGames.com features forums, FAQs, and customer support to address player needs. Regular updates and user feedback ensure the content remains relevant and up-to-date, making it a trusted hub for both casual and dedicated gamers.

Importance of Instructions in Gaming

Instructions play a crucial role in gaming, serving as a roadmap for players to navigate and enjoy their experiences seamlessly. Clear guides prevent confusion, ensuring players understand rules, mechanics, and objectives. Well-structured instructions enhance gameplay by reducing frustration and setup issues. They also provide troubleshooting tips, addressing common problems and errors. Detailed instructional content empowers players to make the most of their games, fostering a more enjoyable and rewarding experience. Accessible instructions are a valuable resource for both new and experienced gamers, ensuring everyone can participate fully.

Finding Instructions on uGames.com

Accessing game guides on uGames.com is straightforward, thanks to its intuitive search functionality and well-organized categories. Find detailed instructions for setup, gameplay, and troubleshooting.

How to Access Game Instructions Online

To access game instructions on uGames.com, visit the website and navigate to the “Instructions” section. Use the search bar to find specific games by name or product number. Browse through categorized lists or filter by game type for quick access. Once you locate your game, click on the title to view detailed guides, which may include PDF downloads, step-by-step tutorials, and visual aids. This streamlined process ensures you can easily find the information you need to set up and enjoy your games seamlessly.

Organization of Instructional Content

The instructional content on uGames.com is organized intuitively, ensuring users can find what they need quickly. Guides are categorized by game type, difficulty level, and product number for easy navigation. Each section includes detailed step-by-step instructions, often supplemented with visual aids like diagrams and screenshots. For example, 3D crystal puzzles and preschool game packs have dedicated sections with lists of required parts and accessories. This clear structure makes it simple for users to locate and follow the instructions, enhancing their overall gaming experience.

Search Functionality for Specific Games

uGames.com offers a robust search functionality that allows users to quickly find instructions for specific games. By typing the game name or product number into the search bar, users can instantly access relevant guides. The system also features autocomplete suggestions to help narrow down searches efficiently. Additionally, filters can be applied to refine results by game type, difficulty level, or release date. This streamlined process ensures that gamers can locate the exact instructions they need without unnecessary delays, enhancing their overall experience on the platform.

Structure of uGames.com Instructions

uGames.com instructions are structured to provide clarity and ease of use. They typically include components like setup guides, gameplay rules, and troubleshooting tips, ensuring a seamless experience for users.

Components of a Typical Instruction Set

A typical instruction set on uGames.com includes detailed setup guides, gameplay rules, and troubleshooting tips. It lists all required parts and accessories, such as puzzle pieces or tokens, ensuring users have everything needed. Visual aids like diagrams and step-by-step images enhance clarity. Instructions are often provided in PDF format for easy access. The content is organized logically, starting with preparation, followed by gameplay mechanics, and ending with solutions for common issues. This structure ensures a smooth and enjoyable experience for players of all skill levels.

Clarity and Detail in Instructional Guides

uGames.com ensures instructional guides are clear and detailed, providing step-by-step walkthroughs for optimal understanding. Visual aids like diagrams and high-quality images complement text, making complex steps easier to follow. The language is concise and jargon-free, catering to both beginners and experienced players. Each guide is structured to address various skill levels, ensuring everyone can navigate the content effortlessly. This attention to detail enhances the gaming experience, helping users master their favorite titles without confusion or frustration.

Visual Aids and Diagrams in Instructions

uGames.com enhances instructional guides with high-quality visual aids and diagrams, ensuring clarity for all users. Detailed screenshots, step-by-step images, and interactive tutorials provide a clear understanding of gameplay mechanics. Diagrams illustrate complex strategies, while videos offer real-time demonstrations. These visuals cater to different learning styles, making instructions accessible to both visual and textual learners. The inclusion of zoomable images and annotated screenshots further simplifies troubleshooting, allowing users to grasp concepts quickly and effectively.

Troubleshooting Common Issues

uGames.com/Instructions offers guides to resolve game setup problems, addressing errors, and optimizing performance. Detailed solutions help users overcome challenges quickly for smoother gaming experiences.

Identifying and Solving Game Setup Problems

uGames.com/Instructions provides detailed guides to help users identify and resolve common game setup issues; From missing components to unclear instructions, step-by-step solutions ensure quick fixes. The platform also offers troubleshooting tips and FAQs to address installation errors, compatibility problems, and hardware requirements. Users can easily access these resources by searching specific game titles or browsing through categorized support sections. This comprehensive approach ensures a seamless gaming experience, allowing players to focus on enjoying their games without unnecessary delays or frustrations.

Addressing Errors in Instructional Guides

uGames.com/Instructions prioritizes accuracy in its guides, but if errors are found, users can report them via the website’s feedback system. The support team reviews and corrects inaccuracies promptly to ensure reliable information. Additionally, players can access FAQs or contact customer support for clarification on unclear instructions. Regular updates are made based on user feedback, ensuring instructional guides remain clear, detailed, and free from errors. This commitment to quality helps gamers navigate challenges with confidence and precision.

Community and Support Resources

uGames.com/Instructions offers robust community support through forums, FAQs, and direct customer support. Engage with fellow gamers, resolve queries, and access updates to enhance your gaming journey.

Role of Forums and FAQs

Forums and FAQs on uGames.com/Instructions serve as vital resources for gamers. Forums allow users to share tips, ask questions, and discuss challenges with the community. FAQs provide quick answers to common issues, ensuring players can resolve problems without delay. These tools foster collaboration, reduce frustration, and enhance the overall gaming experience. By engaging with these resources, users can troubleshoot, learn strategies, and stay updated on game instructions, making their journey smoother and more enjoyable. They are essential for both new and experienced players seeking assistance or insights.

Customer Support Contact Information

For any inquiries or assistance, uGames.com/Instructions provides comprehensive customer support contact information. Players can reach out via email, live chat, or phone for help with game instructions or technical issues. The support team is dedicated to addressing questions promptly, ensuring a smooth gaming experience. Visit the “Contact Us” section on the website for detailed contact options and response guidelines. Whether you need clarification on instructions or troubleshooting, the support team is available to assist, offering reliable solutions to enhance your gaming journey.

Updating and Maintaining Instructions

uGames.com/Instructions ensures guides stay current with game updates, regularly refreshing content for accuracy. User feedback helps refine and improve instructional quality over time.

Regular Updates to Instructional Content

uGames.com/Instructions prioritizes regular updates to ensure accuracy and relevance. The team continuously reviews and revises guides to reflect game updates, expansions, and user feedback. This proactive approach guarantees players access to the most current strategies and solutions, helping them stay ahead in their gaming journeys. By incorporating community insights and addressing emerging trends, uGames.com maintains its reputation as a trusted resource for gamers seeking reliable instructional content.

User Feedback in Improving Instructions

User feedback plays a vital role in enhancing the quality of instructional content on uGames.com. Players can submit suggestions, corrections, or ideas through forums, reviews, or support channels. The feedback is analyzed to identify common issues or areas needing clarification. This collaborative approach ensures that the guides remain accurate, relevant, and tailored to user needs. By actively incorporating community input, uGames.com continuously improves its instructional resources, fostering a better gaming experience for all players.

Newer posts »