Month: April 2026

hoover power max pet carpet cleaner instructions

The Hoover Dual Power Max Pet offers powerful cleaning, specifically designed for pet-related messes. Addressing leaks and proper maintenance, like filter cleaning, are key to optimal performance.

Overview of the Cleaner

The Hoover Dual Power Max Pet carpet cleaner is engineered to tackle deep-down dirt and stubborn pet stains. This model features HeatBoost Technology, delivering consistently warm water for enhanced cleaning power. It’s designed with dual tanks – one for clean water solution and another for dirty water – preventing cross-contamination.

Users have reported issues like water leaks upon tank placement, often resolved with careful attention to tank sealing. The cleaner isn’t intended for pet grooming, focusing solely on carpet and upholstery cleaning. Regular maintenance, including emptying and rinsing the dirty water tank, is crucial for longevity and performance. Remember to always unplug the device before any maintenance.

Key Features for Pet Owners

Specifically designed for households with pets, the Hoover Dual Power Max Pet excels at removing embedded pet hair, dander, and odors. Its powerful suction and specialized brush roll agitate carpets effectively, lifting even ground-in messes. The dual tank system prevents dirty water from being redistributed, maintaining cleanliness.

Addressing common concerns, the cleaner isn’t for grooming pets directly. Troubleshooting often involves checking for clogs and ensuring proper tank sealing to prevent leaks. Regular filter maintenance is vital for optimal suction and performance, contributing to a fresher, cleaner home environment for both you and your furry companions.

Setting Up Your Hoover Dual Power Max Pet

Proper setup involves assembling components, carefully filling the clean water tank, and understanding the solution mixing ratios for effective cleaning and optimal performance.

Assembling the Components

Begin by securely attaching the handle to the main body of the Hoover Dual Power Max Pet, ensuring it clicks firmly into place. Next, connect the power cord, verifying a snug fit. Carefully slide the dirty water tank into its designated slot, confirming it latches securely.

Attach any desired tools, such as the crevice tool or upholstery brush, to the hose. Double-check all connections before proceeding to avoid leaks or operational issues. Proper assembly is crucial for safe and effective cleaning. Refer to the user manual for detailed diagrams if needed, ensuring each component is correctly positioned.

Filling the Clean Water Tank

Carefully remove the clean water tank from the unit. Fill the tank with warm, clean water, ensuring not to exceed the “MAX” fill line indicated on the tank. Add the recommended amount of Hoover cleaning solution, following the instructions on the solution bottle.

Avoid overfilling, as this can cause leakage. Securely replace the tank’s cap, ensuring a tight seal. Gently reinsert the filled tank back into its designated slot on the Hoover Dual Power Max Pet. Proper filling ensures optimal cleaning performance and prevents potential damage to the machine.

Understanding the Solution Mixing

The Hoover Dual Power Max Pet requires proper solution mixing for effective cleaning. Always use Hoover-approved cleaning solutions to avoid damaging the machine. Refer to the solution bottle for the correct water-to-solution ratio; typically, a small amount of solution is added to the clean water tank.

Overusing solution can leave residue on carpets and potentially cause foaming. Ensure the solution is fully dissolved in the water before use. Never mix different cleaning solutions, as this could create harmful fumes or damage the cleaner’s internal components.

Operating Instructions

Begin by powering on the device and selecting the appropriate cleaning mode for your carpet type. Remember to turn power OFF and unplug when not in use.

Powering On and Off

To initiate operation, firmly plug the Hoover Dual Power Max Pet into a grounded electrical outlet. Ensure the power switch, typically located on the main unit, is in the “OFF” position before plugging it in. Press the power button to activate the cleaner; a light indicator will confirm it’s on.

When finished cleaning, or before performing any maintenance, always turn the power OFF and unplug the power cord from the outlet. This is a crucial safety precaution to prevent accidental activation and potential hazards. Double-check that the unit is completely powered down before handling any components or fluids.

Selecting Cleaning Modes

The Hoover Dual Power Max Pet typically features multiple cleaning modes to tackle various messes. These often include a “Quick Clean” mode for light, surface-level cleaning and a “Deep Clean” mode for more embedded dirt and stains. Some models offer a “Pet Mode” optimized for pet hair and odors.

To select a mode, locate the control panel and use the designated buttons or dial. The currently selected mode will usually be indicated by an illuminated light. Experiment with different modes to find the most effective setting for your specific carpet type and cleaning needs, ensuring optimal results.

Using the Attachments

The Hoover Dual Power Max Pet comes equipped with several attachments to enhance its versatility. A crevice tool is ideal for reaching tight spaces and edges, while a stair tool simplifies cleaning upholstery and steps. Some models include a specialized pet tool designed to effectively remove pet hair from furniture.

To use an attachment, first ensure the cleaner is turned off and unplugged. Locate the attachment connection point, usually on the handle or hose, and securely attach the desired tool. The cleaner may automatically adjust suction, or you may need to manually adjust settings for optimal performance.

Maintaining Your Hoover Dual Power Max Pet

Regular maintenance, including emptying and rinsing tanks, and filter checks, ensures peak performance and extends the life of your Hoover Dual Power Max Pet cleaner.

Emptying the Dirty Water Tank

To empty the dirty water tank on your Hoover Dual Power Max Pet, turn the power OFF and unplug the cord for safety. Grasp the handle and carefully lift the tank straight up to remove it from the unit. Unlatch the lid on the tank, and then remove it to access the interior.

Carefully remove the filter basket, ensuring any collected debris is discarded appropriately. Completely empty the dirty water from the tank, rinsing it thoroughly with clean water to remove any remaining residue. Allow all components – the tank, lid, and filter basket – to air dry completely before reassembling and using the cleaner again. This prevents mold and maintains optimal suction.

Cleaning the Dirty Water Tank Components

After emptying the dirty water tank, thorough cleaning of its components is crucial. Remove the filter basket and rinse it under running water, ensuring all debris is eliminated. Inspect the basket for any damage and replace if necessary. The tank itself should be rinsed well, removing any lingering dirt or cleaning solution residue.

Pay close attention to the tank’s lid, cleaning around the latch mechanism. Allow all parts to air dry completely before reassembly. Regular cleaning prevents odors and ensures optimal performance. Avoid using harsh chemicals, opting for mild soap and water instead.

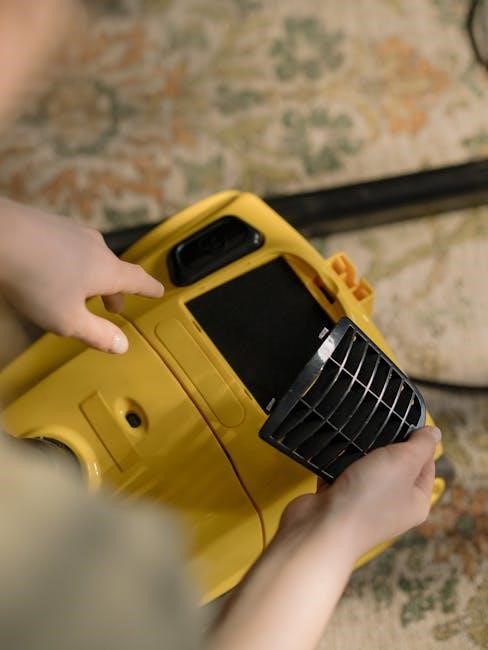
Filter Maintenance and Replacement

Maintaining a clean filter is vital for the Hoover Dual Power Max Pet’s performance. Regularly remove the filter basket from the dirty water tank and rinse it thoroughly under running water, eliminating all collected debris. Inspect the filter for tears or damage; a compromised filter reduces suction and cleaning effectiveness.

Over time, filters will become clogged and require replacement. The frequency depends on usage, but periodic checks are recommended. A clean filter ensures optimal suction and prevents motor strain. Refer to your user manual for the correct filter replacement part number and instructions.

Rinsing the Clean Water Tank

After each use, thoroughly rinse the clean water tank with warm water to prevent the buildup of detergent residue and potential mold or mildew growth. This simple step ensures optimal hygiene and maintains the cleaner’s performance. Avoid using harsh chemicals or abrasive cleaners, as these can damage the tank’s plastic components.

Ensure all traces of cleaning solution are removed before storing the unit. Leaving solution inside can lead to clogging and affect future cleaning results. Allow the tank to air dry completely before reassembling and storing the Hoover Dual Power Max Pet.

Troubleshooting Common Issues

Common problems include water leaks, lack of suction, and brush roll malfunctions. Always power off and unplug the device before attempting any troubleshooting steps.

Water Leaking from the Tank

Experiencing water leakage with your Hoover Dual Power Max Pet is a frequently reported issue. A Reddit user detailed a year-long struggle with this, discovering the problem stemmed from the tank itself. Before investigating, always turn the power OFF and unplug the cord for safety.

Carefully inspect the water tank for any cracks or damage. Ensure the tank is seated correctly and securely on the base unit. A poor seal can cause immediate leakage upon filling. Double-check that the tank lid is latched completely, as an unsealed lid will also result in water escaping during operation.

Cleaner Not Picking Up Water

If your Hoover Dual Power Max Pet isn’t picking up water during operation, several factors could be at play. First, turn the power OFF and unplug the cord. Begin by thoroughly inspecting the dirty water tank. Remove the filter basket and clear any debris or blockages that may be restricting water flow.

Ensure the dirty water tank is properly seated and the lid is securely latched. A loose connection prevents the vacuum from creating the necessary suction. Also, check for clogs within the hose or cleaning head, as these can impede water intake.

Brush Roll Not Rotating

If the brush roll on your Hoover Dual Power Max Pet isn’t rotating, turn the power OFF and unplug the cord immediately. Begin by checking for obstructions like hair, string, or debris wrapped around the brush roll itself. Carefully remove any tangled materials.

Next, inspect the brush roll motor for any visible damage. Ensure the brush roll is correctly installed and securely locked into place. A loose or improperly installed brush roll won’t engage. If the issue persists, there might be a problem with the belt driving the brush roll, requiring further inspection or replacement.

Loss of Suction

Experiencing a loss of suction with your Hoover Dual Power Max Pet? First, turn the power OFF and unplug the unit. Thoroughly check the dirty water tank – a full tank will drastically reduce suction. Ensure the filter basket within the dirty water tank is clean and free of debris; rinse it thoroughly.

Inspect the hose and attachments for any blockages. A clog anywhere in the system can cause suction loss. Finally, verify that all connections are secure and airtight. If problems continue, a deeper inspection of the internal pathways might be necessary.

Advanced Troubleshooting

Persistent issues may require addressing internal clogs or lingering odors. Motor overheating can also occur; contacting Hoover support is recommended for complex problems.

Addressing Clogs in the System

Clogs within the Hoover Dual Power Max Pet can significantly reduce suction and cleaning effectiveness. Begin by turning the power OFF and unplugging the device for safety. Carefully remove the dirty water tank and inspect the filter basket for debris, thoroughly rinsing it;

Next, detach the hose and wand, checking for obstructions. A flexible tool can help dislodge stubborn blockages. Inspect the brush roll area for tangled hair or fibers. If clogs persist, consult the user manual for detailed diagrams and further assistance. Regularly clearing these potential blockage points ensures optimal performance.

Dealing with Persistent Odors

Lingering odors within your Hoover Dual Power Max Pet can be addressed with diligent cleaning. After each use, thoroughly empty and rinse the dirty water tank, paying close attention to the interior surfaces. Allow all components to air dry completely before reassembly, preventing mildew growth.

Consider using a solution specifically designed to neutralize pet odors during cleaning. Regularly cleaning the filter basket is also crucial. If odors persist, a diluted vinegar solution can be used to sanitize the tank, followed by a thorough rinse. Proper maintenance minimizes odor buildup.

Motor Overheating Issues

If your Hoover Dual Power Max Pet experiences motor overheating, immediately turn the power OFF and unplug the device. Allow the unit to cool down completely before attempting to troubleshoot. Overheating can result from prolonged use, clogged filters, or restricted airflow.

Ensure the dirty water tank isn’t overfilled and the clean water tank has sufficient solution. Check for obstructions in the hose or brush roll. If the issue persists after these checks, contact Hoover customer service at 1-800-944-9200, as internal repairs may be needed.

Safety Precautions

Always unplug the device before maintenance. Never use it on pets directly, and avoid cleaning with flammable liquids to prevent damage or injury.

Electrical Safety Guidelines

To ensure safe operation of your Hoover Dual Power Max Pet, always adhere to these electrical safety guidelines. Never operate the cleaner with a damaged cord or plug; immediate replacement is crucial. Avoid using extension cords unless absolutely necessary, and if used, ensure they are appropriately rated for the appliance’s power requirements.

Always turn the power OFF and unplug the cord before performing any maintenance, cleaning, or troubleshooting. Do not immerse the cleaner, cord, or plug in water or other liquids. Keep the cord away from heated surfaces and avoid pulling it to disconnect from the outlet. If the appliance malfunctions or shows signs of electrical issues, discontinue use and contact Hoover customer service for assistance.

Proper Usage to Avoid Damage

To prolong the life of your Hoover Dual Power Max Pet, follow these usage guidelines. Avoid running the cleaner over power cords or sharp objects, as this can cause damage. Do not attempt to vacuum up hard or sharp items that could harm the brush roll or internal components.

Ensure the dirty water tank is properly secured before operation to prevent leaks. Regularly inspect and clean the brush roll to remove hair and debris. Avoid using the cleaner on delicate fabrics without testing a small, inconspicuous area first. Do not leave the cleaner unattended while in use.

What NOT to Clean With the Device

The Hoover Dual Power Max Pet is designed for carpet and upholstery cleaning, but certain materials should be avoided. Do not use this device for grooming pets directly, as it’s not intended for that purpose. Avoid cleaning hard surfaces like tile or wood floors, as excess water can cause damage.

Refrain from vacuuming up flammable liquids, corrosive chemicals, or combustible materials; Do not attempt to clean large debris or solid objects that could clog the system. Using inappropriate solutions can also cause damage; stick to recommended cleaning formulas.

Customer Support and Warranty

For assistance or questions, contact Hoover customer service at 1-800-944-9200. Warranty terms cover defects, but not damage from misuse or improper maintenance.

Contacting Hoover Customer Service

Reaching Hoover’s customer service team is readily available for any questions or concerns regarding your Dual Power Max Pet carpet cleaner. The primary method for direct assistance is via phone at 1-800-944-9200. Be prepared to have your model number and purchase date available to expedite the process.

While a dedicated online chat feature isn’t prominently advertised, checking the official Hoover website (hoover.com) is recommended for potential updates to their support channels. Additionally, exploring online forums like Reddit’s r/VacuumCleaners can provide community-based troubleshooting tips and shared experiences, though this isn’t an official support avenue.

Understanding the Warranty Terms

Hoover provides a warranty for the Dual Power Max Pet, though specific details vary. Generally, the warranty covers defects in materials and workmanship for a defined period from the date of purchase. It’s crucial to retain your proof of purchase to validate any claims.

However, the warranty doesn’t cover issues arising from misuse, accidental damage, or failure to perform recommended maintenance – like regular filter cleaning and tank rinsing. Attempting self-repair can also void the warranty. If your cleaner malfunctions, contact customer service before attempting any fixes to understand your coverage.

Deep Dive into the Brush Roll System

The brush roll effectively lifts dirt and pet hair; regular cleaning is vital. Selecting the appropriate brush for your floor type maximizes cleaning performance.

Brush Roll Types and Selection

The Hoover Dual Power Max Pet typically features brush rolls designed for versatile cleaning. Understanding the different types allows for optimal performance on various surfaces. Some models include a standard brush roll, effective on carpets and rugs, agitating fibers to release embedded dirt.

Additionally, a specialized brush roll may be available, often with stiffer bristles, ideal for tackling pet hair and stubborn messes on hard floors and high-traffic areas. When selecting a brush roll, consider your primary flooring type. For predominantly carpeted homes, the standard brush roll is sufficient, while pet owners with mixed flooring should consider the specialized option for enhanced cleaning power.

Cleaning and Maintaining the Brush Roll

Regular brush roll maintenance is crucial for maintaining the Hoover Dual Power Max Pet’s cleaning efficacy. After each use, or more frequently with heavy pet shedding, turn power OFF and unplug the power cord before inspecting the brush roll. Remove any tangled hair, strings, or debris wrapped around it.

A seam ripper or small scissors can aid in this process. Periodically, remove the brush roll entirely for a more thorough cleaning. Wash it with mild soap and water, ensuring it’s completely dry before reinstalling. Inspect the bristles for wear and tear; replace the brush roll if damaged to prevent scratching floors or reduced cleaning performance.

Understanding the Solution System

Utilize recommended cleaning solutions to avoid damaging the Hoover Dual Power Max Pet. Incorrect solutions can cause issues and void the warranty, so choose wisely!

Recommended Cleaning Solutions

To maintain the effectiveness and longevity of your Hoover Dual Power Max Pet Carpet Cleaner, selecting the appropriate cleaning solution is crucial. Hoover specifically recommends using solutions formulated for carpet cleaning machines, as these are designed to work harmoniously with the internal components.

Avoid using excessive amounts of soap, as residue buildup can lead to operational issues and potentially damage the machine. Always follow the dilution instructions provided on the cleaning solution packaging. Using harsh chemicals, like bleach or solvents, is strictly prohibited and will likely void your warranty. Opting for pet-specific solutions can effectively tackle odors and stains left behind by furry companions.

Avoiding Damage from Incorrect Solutions

Using the wrong cleaning solutions in your Hoover Dual Power Max Pet can lead to significant damage. Avoid harsh chemicals like bleach, ammonia, or solvents, as these can corrode internal parts and void your warranty. Excessive suds from non-carpet-specific detergents create residue, hindering performance and potentially causing motor issues.

Never mix different cleaning solutions, as unpredictable chemical reactions could occur. Always adhere to the recommended dilution ratios; concentrated solutions can damage the pump and other components. Regularly rinsing the clean water tank prevents buildup from previous solutions, ensuring optimal functionality and extending the cleaner’s lifespan.

Long-Term Storage

Thoroughly clean and dry all components before storing your Hoover Dual Power Max Pet. A cool, dry environment prevents mildew and ensures future operational readiness.

Preparing the Cleaner for Storage

Before long-term storage, complete a thorough cleaning cycle. First, empty both the clean and dirty water tanks, rinsing them meticulously to remove any remaining solution or debris. Remove and clean the filter basket within the dirty water tank, ensuring it’s free of obstructions. Allow all components – tanks, hoses, and attachments – to air dry completely. This prevents mold and mildew growth. Inspect the brush roll for tangled hair or fibers and remove them. Finally, ensure the power cord is neatly coiled and secured to prevent damage during storage.

Storage Environment Recommendations

Store your Hoover Dual Power Max Pet in a cool, dry, and well-ventilated area. Avoid locations exposed to freezing temperatures, as this can damage internal components. Protect the cleaner from direct sunlight, which may cause fading or deterioration of plastic parts. Ideally, store it indoors, such as a closet, garage, or utility room. Ensure the storage area is free from dust and excessive moisture. Keep the cleaner away from flammable materials. Covering the unit with a sheet can provide additional protection from dust accumulation.

hungry jack pancake instructions

Hungry Jack Pancake Instructions: A Comprehensive Guide

Hungry Jack offers a delightful range of pancake and waffle mixes, simplifying breakfast preparation․ This guide provides detailed instructions,
covering various mixes and recipes for consistently delicious results, ensuring a perfect start to your day with ease and enjoyment․

Understanding Hungry Jack Pancake Mix Varieties

Hungry Jack offers a diverse selection of pancake and waffle mixes designed to cater to various preferences․ The Complete Buttermilk Pancake & Waffle Mix delivers a classic, hearty flavor profile, utilizing bleached wheat flour and real buttermilk for a traditional taste․ For those seeking a lighter texture, the Complete Extra Light & Fluffy Pancake & Waffle Mix provides an airy and delicate result, perfect for a softer bite․

Adding a touch of sweetness, the Complete Chocolate Chip Pancake & Waffle Mix incorporates chocolate chips directly into the mix, creating a delightful treat․ All varieties are formulated as “complete” mixes, requiring only the addition of water and oil, simplifying the cooking process․ These mixes avoid artificial flavors, colors, and preservatives, appealing to consumers seeking more natural options․ Understanding these distinctions allows you to select the perfect Hungry Jack mix for your desired pancake experience․

Hungry Jack Complete Buttermilk Pancake & Waffle Mix: Overview

The Hungry Jack Complete Buttermilk Pancake & Waffle Mix is a beloved classic, celebrated for its authentic buttermilk flavor and convenient preparation․ This 32oz box requires only water and oil to create a hearty and delicious breakfast․ Its ingredient list features bleached wheat flour, sugar, leavening agents (baking soda, sodium aluminum phosphate, calcium phosphate), dextrose, and dried buttermilk, contributing to its signature taste and texture․

Notably, it contains no artificial flavors, colors, or preservatives, appealing to health-conscious consumers․ The mix may contain traces of egg and soybean ingredients, and is not suitable for those with milk or wheat allergies․ A basic recipe calls for 1 cup of mix and ¾ cup of water for 6-8 pancakes, easily scalable for larger servings․ It’s a versatile option for both pancakes and waffles, offering a consistently satisfying breakfast experience․

Hungry Jack Complete Extra Light & Fluffy Pancake & Waffle Mix: Overview

Hungry Jack’s Complete Extra Light & Fluffy Pancake & Waffle Mix, available in a 32oz package, promises an airy and delightful breakfast experience․ This mix is designed to deliver exceptionally fluffy pancakes and waffles with minimal effort․ To create waffles, combine 2 cups of mix with 1 ¼ cups of water and ¼ cup of vegetable oil․ For pancakes, simply pour approximately ¼ cup of batter onto a hot griddle․

Cooking time is around 1 ½ minutes per side, or until golden brown․ This mix simplifies breakfast preparation, offering a quick and easy solution for busy mornings․ It’s a versatile option, allowing you to choose between fluffy pancakes or golden waffles with the same convenient mix․ Enjoy a light and airy breakfast that’s sure to please the whole family, effortlessly prepared with Hungry Jack․

Hungry Jack Complete Chocolate Chip Pancake & Waffle Mix: Overview

Hungry Jack Complete Chocolate Chip Pancake & Waffle Mix, conveniently packaged in a 28oz box, elevates your breakfast with the irresistible addition of chocolate chips․ This mix offers the classic Hungry Jack convenience, requiring only the addition of water to create a delightful treat․ It’s perfect for those craving a touch of sweetness with their morning meal, providing a fun and flavorful experience for all ages․

While specific waffle instructions weren’t detailed, the mix functions similarly to other Hungry Jack varieties – simply add water and oil․ The basic pancake recipe allows for easy scaling, ensuring you can make enough for the entire family․ Enjoy the comforting taste of chocolate chips in every bite, whether you prefer fluffy pancakes or golden-brown waffles, all thanks to this easy-to-use mix․

Basic Pancake Recipe Instructions

Hungry Jack simplifies pancake making with straightforward recipes․ Adjust mix and water ratios to yield 6-8, 12-16, or 18-22 pancakes, catering to any appetite!

Standard Recipe: 6-8 Pancakes

For a classic batch of 6-8 pancakes, begin with 1 cup of Hungry Jack Complete Buttermilk Pancake & Waffle Mix․ Combine this with ¾ cup of water in a mixing bowl․ Gently stir the ingredients together until just combined; avoid overmixing, as this can result in tougher pancakes․ A few small lumps are perfectly acceptable – in fact, they’re desirable!

Next, heat a lightly oiled griddle or skillet over medium-high heat, aiming for a temperature of approximately 375°F․ Once the griddle is hot, pour ¼ cup of batter onto the heated surface for each pancake․ Cook for approximately 1 ½ to 2 minutes per side, or until golden brown and bubbles begin to form and pop on the surface․ Flip carefully and cook for another 1 ½ to 2 minutes, ensuring both sides are beautifully browned․ Serve immediately with your favorite toppings and enjoy a delightful breakfast!

Scaling the Recipe: 12-16 Pancakes

To prepare a larger batch of 12-16 pancakes, simply double the standard recipe; You’ll need 2 cups of Hungry Jack Complete Buttermilk Pancake & Waffle Mix, combined with 1 ½ cups of water; As before, gently stir the mixture until just combined, being careful not to overmix the batter․ Remember, a few lumps are perfectly fine and contribute to a lighter, fluffier texture․

Heat your lightly oiled griddle or skillet to 375°F․ Pour approximately ¼ cup of batter onto the hot surface for each pancake․ Cook for around 1 ½ minutes per side, watching for bubbles to form and pop, indicating readiness to flip․ Continue cooking for another 1 ½ minutes, or until both sides achieve a golden-brown color․ This scaled recipe is perfect for families or gatherings, ensuring everyone enjoys a stack of warm, delicious pancakes!

Scaling the Recipe: 18-22 Pancakes

For a truly substantial batch, yielding 18-22 pancakes, increase the recipe further․ Combine 3 cups of Hungry Jack Complete Buttermilk Pancake & Waffle Mix with 2 ¼ cups of water in a large bowl․ Employ the same gentle stirring technique as before – mix only until just combined, accepting a few lumps to maintain a tender pancake texture․ Overmixing can lead to tougher pancakes, so restraint is key․

Ensure your griddle or skillet is preheated to 375°F and lightly greased․ Pour approximately ¼ cup of batter onto the hot surface for each pancake․ Cook for approximately 1 ½ minutes on the first side, until bubbles begin to form and pop․ Flip and cook for another 1 ½ minutes, or until golden brown․ This larger quantity is ideal for large families, brunch gatherings, or meal prepping!

Ingredients & Measurements

Hungry Jack pancake and waffle mixes primarily require just three ingredients: the mix itself, water, and a small amount of oil for cooking, ensuring simplicity and convenience․

Required Ingredients: Mix, Water, and Oil

Hungry Jack pancake and waffle mixes are celebrated for their simplicity, demanding only three core ingredients for a delightful breakfast experience․ Naturally, the Hungry Jack mix itself forms the foundation of your pancakes or waffles, providing the dry components necessary for structure and flavor․ Water is the crucial liquid element, activating the leavening agents within the mix and binding the ingredients together to create a smooth, pourable batter․

Finally, a small addition of oil – canola or vegetable oil are commonly recommended – plays a vital role in achieving tender, golden-brown results․ The oil contributes to the texture, preventing sticking to the griddle or waffle iron, and enhancing the overall flavor profile․ While these three ingredients are fundamental, some recipes may suggest optional additions like milk for a richer taste, but they aren’t strictly required for a successful outcome; These basic components ensure a quick and easy preparation process, making Hungry Jack a convenient choice for any breakfast occasion․

Mix to Water Ratio: Buttermilk Variety

For the classic Hungry Jack Complete Buttermilk Pancake & Waffle Mix, achieving the perfect batter consistency relies on a precise mix-to-water ratio․ To create a batch of 6-8 pancakes, begin with 1 cup of the pancake mix and combine it with ¾ cup of water․ If you’re planning a larger breakfast for 12-16 people, scale up the recipe to 2 cups of mix paired with 1 ½ cups of water․

For even larger gatherings, aiming for 18-22 pancakes, utilize 3 cups of the Hungry Jack mix and 2 ¼ cups of water․ It’s important to note that these ratios are guidelines; slight adjustments may be needed based on desired thickness․ Remember to combine the mix and water gently, avoiding overmixing, which can result in tough pancakes․ Following these ratios will ensure a light, fluffy, and flavorful buttermilk pancake experience every time․

Mix to Water Ratio: Chocolate Chip Variety

When preparing pancakes using Hungry Jack Complete Chocolate Chip Pancake & Waffle Mix, maintaining the correct mix-to-water ratio is crucial for optimal results․ While specific ratios weren’t explicitly detailed for the chocolate chip variety in the provided sources, the general principle of consistency applies․ It’s reasonable to assume a similar starting point as the buttermilk variety, though slight adjustments may be necessary due to ingredient differences․

Begin with 1 cup of chocolate chip mix and ¾ cup of water for a small batch (6-8 pancakes)․ For a larger batch of 12-16 pancakes, use 2 cups of mix and 1 ½ cups of water․ And for 18-22 pancakes, combine 3 cups of mix with 2 ¼ cups of water․ Gently combine, avoiding overmixing to preserve the fluffy texture and evenly distribute those delicious chocolate chips․ Observe the batter’s consistency and adjust water accordingly for desired thickness․

Cooking Instructions

Cooking Hungry Jack pancakes involves preparing a heated griddle, pouring batter, and flipping when bubbles form․ Achieve golden-brown perfection with careful timing and temperature control!

Preparing the Griddle or Skillet

Achieving the perfect pancake starts with a properly prepared cooking surface․ Whether you’re using a griddle or a skillet, ensuring even heat distribution is crucial for consistently golden-brown pancakes․ Begin by heating your griddle or skillet over medium-high heat, aiming for an optimal temperature of 375°F․ A light greasing is essential to prevent sticking; a small amount of oil – canola or vegetable oil works well – should be spread evenly across the surface․

Avoid using excessive oil, as this can result in greasy pancakes․ A light coating is all that’s needed․ For electric griddles, utilize the temperature control settings to maintain a consistent 375°F throughout the cooking process․ If using a stovetop skillet, adjust the burner heat as needed to maintain the desired temperature․ Testing the heat is simple: flick a few drops of water onto the surface; they should sizzle and evaporate quickly, indicating readiness․ A well-prepared surface guarantees fluffy, delicious pancakes every time․

Optimal Cooking Temperature (375°F)

Maintaining a consistent cooking temperature of 375°F is paramount for achieving perfectly cooked Hungry Jack pancakes․ This temperature ensures that the pancakes cook evenly, developing a golden-brown exterior while remaining fluffy and tender inside․ Too low a temperature will result in pale, potentially soggy pancakes, while too high a temperature can lead to burnt exteriors and undercooked interiors․

For electric griddles, utilize the temperature control settings to precisely maintain 375°F․ Regularly check the temperature with a thermometer if your griddle lacks clear indicators․ When using a stovetop skillet, adjust the burner heat as needed, monitoring closely to prevent overheating․ Remember that skillet temperatures can fluctuate more readily than those of electric griddles․ Consistent temperature control is key to unlocking the full potential of your Hungry Jack pancake mix, guaranteeing a delightful breakfast experience․

Pouring the Batter: Pancake Size

Achieving uniform pancake size is crucial for even cooking and a visually appealing stack․ For standard-sized pancakes, approximately ¼ cup of batter per pancake is recommended․ This yields pancakes that are neither too thick nor too thin, ensuring optimal texture and cook time․ However, feel free to adjust the amount slightly based on your personal preference – a little more for larger pancakes, a little less for smaller ones․

Pour the batter onto the preheated griddle or skillet, leaving some space between each pancake to allow for spreading․ Avoid overcrowding the cooking surface, as this can lower the temperature and result in unevenly cooked pancakes․ Use a spoon or ladle for precise pouring, and gently spread the batter into a circular shape if desired․ Consistent pouring technique will contribute to a beautifully presented and deliciously cooked batch of Hungry Jack pancakes․

Cooking Time: First Side

Once the batter hits the hot griddle, observe closely for the first visual cues of cooking․ Typically, the first side requires approximately 1 ½ to 2 minutes․ You’ll notice bubbles beginning to form on the surface of the pancake – this is a key indicator that it’s time to flip․ These bubbles are a result of the leavening agents releasing gas, creating the light and fluffy texture Hungry Jack is known for․

Avoid the temptation to flip too early! Allowing the first side to cook sufficiently develops a golden-brown color and provides structural integrity․ Gently lift the edge of the pancake with a spatula to check for doneness; if it slides easily and is golden brown, proceed to the next step; Patience is key to achieving perfectly cooked pancakes, so resist the urge to rush the process․

Cooking Time: Second Side & Browning

After carefully flipping the pancake, the second side generally requires less cooking time – around 1 to 1 ½ minutes․ Continue to monitor the color, aiming for a similar golden-brown hue as the first side․ The pancake will puff up slightly more as it finishes cooking, indicating that it’s nearly done․

Gentle pressure with a spatula can help ensure even cooking․ If the pancake is browning too quickly, reduce the griddle temperature slightly․ Conversely, if it’s taking too long to brown, increase the heat․ Achieving that perfect balance of golden-brown color and fluffy interior is the hallmark of a well-made Hungry Jack pancake; Remove from the griddle and serve immediately for optimal enjoyment!

Waffle Instructions

For delicious waffles, preheat your iron and combine 2 cups of mix with 1 ¼ cups of water and ¼ cup of oil, creating a smooth batter․

Waffle Iron Preparation

Before embarking on waffle creation, proper preparation of your waffle iron is paramount for achieving golden-brown perfection․ Begin by ensuring the iron is clean and free of any residual batter from previous uses; a gentle wipe-down usually suffices․ Next, plug in the waffle iron and allow it to fully heat up – most models have an indicator light to signal readiness․

Crucially, lightly grease the waffle iron’s surface with cooking spray or a small amount of oil to prevent sticking and facilitate easy waffle removal․ This step is especially important for the first waffle of each batch․ Different waffle irons may require varying levels of preheating and greasing, so consulting your iron’s manual is always a good practice․ A well-prepared waffle iron is the foundation for consistently delightful waffles, ensuring a satisfying breakfast experience․

Waffle Batter Recipe (2 cups mix, 1-1/4 cups water, 1/4 cup oil)

For a consistently delicious waffle experience using Hungry Jack Complete Pancake & Waffle Mix, adhere to this simple yet effective batter recipe․ In a large mixing bowl, combine precisely 2 cups of the pancake mix with 1 and 1/4 cups of water․ Gently incorporate 1/4 cup of vegetable oil into the mixture․

Whisk the ingredients together until just combined; avoid overmixing, as this can result in tough waffles․ A few small lumps are perfectly acceptable․ The batter should have a smooth, pourable consistency․ Once prepared, immediately pour the batter onto your preheated and lightly greased waffle iron, following the iron’s specific instructions for batter quantity․ This ratio yields wonderfully fluffy and flavorful waffles, perfect for a satisfying breakfast or brunch․

Ingredient Breakdown

Hungry Jack mixes typically contain flour, sugar, leavening agents, and often buttermilk or malted barley flour․ Common additions include salt, canola, and soybean oil for enhanced flavor․

Common Ingredients: Flour, Sugar, Leavening Agents

Hungry Jack pancake mixes rely on a foundational blend of key ingredients to achieve their signature texture and rise․ Bleached wheat flour forms the base, providing structure to the pancakes․ Sugar isn’t merely for sweetness; it also contributes to browning and tenderness during cooking․ The inclusion of leavening agents – baking soda, sodium aluminum phosphate, and calcium phosphate – is crucial for creating light and fluffy pancakes․

These agents react with liquids in the batter, producing carbon dioxide bubbles that expand when heated, resulting in the desired airy texture․ Dextrose is also present, contributing to both sweetness and aiding in the Maillard reaction, enhancing browning․ The precise proportions of these ingredients are carefully balanced in each Hungry Jack mix to ensure consistent results, making it easy to create delicious pancakes every time․

Additional Ingredients: Buttermilk, Salt, Oil

Beyond the core components, Hungry Jack pancake mixes incorporate additional ingredients to enhance flavor and texture․ Dried buttermilk, particularly prominent in the Complete Buttermilk variety, lends a characteristic tang and contributes to a softer crumb․ Salt plays a vital role, balancing the sweetness and amplifying the other flavors within the pancake․ The inclusion of canola and/or soybean oil adds moisture, resulting in a more tender and less dry final product․

Corn starch is also utilized, helping to create a smoother batter consistency and contributing to the overall texture․ Malted barley flour, present in smaller quantities, aids in browning and adds a subtle depth of flavor․ These carefully selected additions work synergistically with the foundational ingredients to deliver the consistently delicious Hungry Jack pancake experience․

Potential Allergens: Milk, Wheat, Egg, Soybean

Individuals with food allergies should exercise caution when consuming Hungry Jack pancake and waffle mixes․ These products contain wheat and milk ingredients, making them unsuitable for those with gluten or dairy sensitivities․ Furthermore, the mixes are manufactured in facilities that also process egg and soybean products, presenting a potential cross-contamination risk for individuals with egg or soy allergies․

The ingredient list explicitly states “Contains milk and wheat ingredients” and includes a “May contain egg and soybean ingredients” disclaimer․ It’s crucial to carefully review the packaging and ingredient information before consumption, especially if you have known allergies or sensitivities․ Always prioritize safety and consult with a healthcare professional if you have any concerns regarding potential allergic reactions․

10 year anniverary nonprofit pdf

Article Plan: 10 Year Anniversary Nonprofit PDF

Crafting a compelling PDF report commemorates a decade of service, showcasing impact, financial stability, and future goals to stakeholders and the wider community.

As we mark our 10-year anniversary, this PDF report encapsulates a journey of dedication, growth, and transformative impact. For a decade, our nonprofit has strived to fulfill its mission, adapting to evolving community needs and consistently delivering vital services. This document isn’t merely a retrospective; it’s a testament to the collective efforts of our staff, volunteers, donors, and beneficiaries.

Within these pages, we’ll explore our founding story, key achievements over the past ten years, and a transparent overview of our financial health. We aim to demonstrate accountability and inspire continued support as we look towards the future. This anniversary PDF serves as a celebration of past successes and a roadmap for sustained impact in the years to come.

II. The Significance of a 10-Year Anniversary

Reaching a 10-year milestone is a pivotal moment for any nonprofit organization. It signifies sustained commitment, resilience, and a proven track record of service. This anniversary isn’t just about acknowledging the past; it’s about solidifying our position as a trusted community partner and demonstrating long-term viability to stakeholders.

A decade of operation allows for a comprehensive evaluation of impact, showcasing quantifiable results and compelling success stories. It provides an opportunity to reaffirm our mission, articulate future goals, and strengthen relationships with donors and volunteers. This milestone also fosters internal pride and motivates continued dedication among staff. The anniversary PDF will highlight this journey, building confidence and inspiring further investment in our cause.

III. Why Create a PDF Report for the Anniversary?

A dedicated PDF report serves as a powerful, centralized communication tool for our 10-year anniversary. Unlike fleeting social media posts or website updates, a PDF offers a lasting, shareable record of our achievements and impact. It allows for a detailed, visually engaging presentation of complex information – financial data, program outcomes, and beneficiary stories – in a professional format;

This report transcends simple celebration; it’s a strategic document for fundraising and stakeholder engagement. It demonstrates accountability and transparency, building trust with donors and potential partners. The PDF’s portability ensures easy distribution via email, website downloads, and direct mail, maximizing reach and impact. It’s a tangible representation of a decade’s dedication.

IV. Key Elements of a 10-Year Anniversary Nonprofit PDF

A successful anniversary PDF requires careful planning. Essential components include a compelling introduction outlining the decade’s journey, a clear mission statement evolution, and detailed impact reports segmented by timeframes (Years 1-5 & 6-10). Financial transparency is crucial – showcasing revenue sources and responsible allocation of funds.

Humanizing the impact through beneficiary testimonials and recognizing volunteers/staff builds emotional connection. A forward-looking section detailing future goals and vision demonstrates continued commitment. Strong visual design – a cohesive color palette, impactful imagery – enhances engagement. Accessibility features are vital, alongside legal disclaimers. Finally, clear calls to action encourage continued support and involvement.

V. Content Section 1: Our Mission & History

This section establishes the foundation of your nonprofit’s journey. Begin with a captivating founding story – the initial spark and vision that led to its creation. Detail the core problem you aimed to solve and the community need you addressed. Trace the evolution of your mission statement, highlighting any significant shifts or refinements over the past decade.

Explain how your understanding of the issue deepened and how your approach adapted to maximize impact. Include key milestones and early challenges overcome. This narrative should convey passion, dedication, and a clear sense of purpose. Emphasize the organization’s core values and guiding principles from inception to present day.

A. Founding Story & Initial Vision

Relate the compelling origin story of your nonprofit. Describe the specific moment or series of events that inspired its creation. Introduce the founding members and their initial motivations – what gap in services did they identify? What was the original, core vision for addressing this need? Paint a vivid picture of the early days: the challenges, the initial resources, and the unwavering belief in the cause.

Detail the initial scope of work and the target population. What were the first programs or initiatives undertaken? Highlight any pivotal early successes or learning experiences. This narrative should be emotionally resonant, showcasing the passion and dedication that fueled the organization’s beginnings. Include quotes from founders, if available, to add authenticity.

B. Evolution of the Nonprofit’s Mission

Trace the development of your mission over the past decade. While the core values likely remained consistent, how did the organization’s approach adapt to changing community needs and emerging challenges? Detail any significant shifts in focus or strategic direction. Explain the reasoning behind these changes – were they driven by impact data, feedback from beneficiaries, or shifts in the external landscape?

Illustrate how the nonprofit broadened its scope or deepened its impact. Did new programs emerge to address previously unmet needs? Did the organization expand its geographic reach or target population? Highlight key milestones in this evolution, demonstrating a commitment to continuous improvement and responsiveness. Show how the initial vision matured into a more refined and impactful mission.

VI. Content Section 2: Impact & Achievements (Years 1-5)

Detail the foundational years (1-5), showcasing early programs and initiatives. Focus on the initial challenges overcome and the first successes achieved. Present quantifiable results – numbers of people served, resources distributed, or milestones reached. Supplement these with compelling success stories illustrating the tangible impact on beneficiaries.

Use visuals like photos and charts to enhance engagement. Highlight any pivotal moments or early wins that set the stage for future growth. Emphasize how these initial efforts laid the groundwork for the organization’s long-term sustainability. This section should demonstrate the nonprofit’s early commitment to its mission and its ability to deliver positive change, building trust with stakeholders.

A. Key Programs & Initiatives (Early Years)

Describe the core programs launched during the nonprofit’s first five years. Detail their objectives, target audiences, and operational models. Explain how these initiatives addressed identified community needs and aligned with the organization’s founding vision. Include specifics about program implementation – staffing, resources utilized, and partnerships established.

Highlight any unique or innovative approaches employed. Showcase early pilot programs and their evolution based on initial feedback and outcomes. Use concise descriptions and compelling visuals to illustrate the scope and impact of each initiative. This section should demonstrate a clear understanding of the organization’s early programmatic focus and its commitment to effective service delivery.

B. Quantifiable Results & Success Stories

Present concrete data demonstrating the impact of early programs. Include key metrics like the number of beneficiaries served, percentage improvements in relevant indicators, and cost-effectiveness ratios. Supplement these statistics with compelling success stories – individual narratives illustrating the positive change experienced by those impacted.

Focus on stories that resonate emotionally and demonstrate the tangible benefits of the nonprofit’s work. Use quotes and photographs to personalize these accounts. Clearly link success stories back to specific programs and initiatives. This section should establish a strong evidence base for the organization’s effectiveness and build trust with stakeholders. Prioritize clarity and accessibility when presenting data.

VII. Content Section 3: Impact & Achievements (Years 6-10)

Detail program expansion and new initiatives launched during the latter half of the decade. Highlight any strategic shifts or adaptations made in response to evolving community needs. Showcase increased reach, quantifying the growth in beneficiaries served and geographic areas covered. Emphasize enhanced community engagement through partnerships, volunteer recruitment, and outreach efforts.

Present quantifiable results demonstrating the impact of these newer programs, mirroring the format used for the earlier years. Include compelling success stories illustrating the benefits experienced by those reached through expanded initiatives. Demonstrate how the organization leveraged lessons learned from the first five years to achieve greater impact and sustainability.

A. Program Expansion & New Initiatives

Detail the strategic growth of programs beyond the initial scope, outlining new services or approaches implemented between years six and ten. Describe any pilot programs launched and their subsequent scaling based on demonstrated success. Explain how the organization responded to emerging community needs, adapting its offerings to address evolving challenges. Highlight any innovative partnerships forged to expand program reach and impact.

Specifically, showcase the rationale behind each new initiative, connecting it to the organization’s core mission and long-term goals. Include information on funding sources secured to support program expansion, demonstrating financial sustainability. Quantify the increase in program capacity and the number of individuals served through these new efforts.

B. Increased Reach & Community Engagement

Illustrate the expansion of the nonprofit’s influence within the community during years six through ten. Detail strategies employed to broaden outreach, such as targeted marketing campaigns, community events, or collaborations with local organizations. Quantify the growth in the number of beneficiaries served, volunteers engaged, and donors contributing. Showcase any geographic expansion of services, reaching new populations or regions.

Highlight initiatives designed to foster deeper community involvement, like advisory boards, focus groups, or participatory program design; Demonstrate how the organization actively sought and responded to community feedback, ensuring programs remained relevant and impactful. Include metrics related to social media engagement and website traffic, reflecting increased online visibility.

VIII. Content Section 4: Financial Overview & Sustainability

Present a transparent and comprehensive financial picture of the nonprofit over the past decade. Detail diverse revenue streams, including grants, individual donations, corporate sponsorships, and fundraising events. Illustrate the evolution of the fundraising strategy, highlighting successful campaigns and donor cultivation efforts. Include key financial metrics like annual revenue, expenses, and net assets, presented in clear charts and graphs.

Emphasize the organization’s commitment to financial accountability and responsible stewardship of funds. Showcase any independent audits or financial reviews conducted. Outline strategies for long-term financial sustainability, such as endowment building, planned giving programs, or diversification of funding sources. Demonstrate how financial resources directly support the nonprofit’s mission and impact.

A. Revenue Sources & Fundraising Strategies

Detail the diverse funding landscape supporting the nonprofit’s ten-year journey. Categorize revenue sources – grants (foundation, government), individual donations (major gifts, recurring giving), corporate sponsorships, and earned income (events, programs). Illustrate the percentage contribution of each source over time, showcasing shifts in funding patterns.

Describe key fundraising strategies employed, including annual giving campaigns, peer-to-peer fundraising, online donation platforms, and special events. Highlight successful initiatives and lessons learned. Explain how fundraising efforts aligned with the organization’s mission and growth. Include examples of compelling fundraising appeals and donor recognition programs. Demonstrate a commitment to ethical fundraising practices and donor stewardship.

B. Financial Transparency & Accountability

Emphasize responsible financial management as a cornerstone of the nonprofit’s success. Present a clear and concise overview of key financial data over the past decade, including annual revenue, expenses, and net assets. Showcase adherence to accounting standards and independent audit practices.

Include a simplified income statement and balance sheet, highlighting key financial ratios and trends. Demonstrate how funds were allocated to programs, administration, and fundraising. Articulate the organization’s commitment to financial transparency by referencing publicly available financial reports (e.g., Form 990). Explain internal controls and risk management procedures. Build trust with stakeholders by demonstrating responsible stewardship of donor funds and a dedication to accountability.

IX. Content Section 5: Stories from the Field – Beneficiary Testimonials

Humanize the impact of the nonprofit’s work through compelling beneficiary stories. Feature firsthand accounts of individuals or communities positively affected by programs and initiatives. Include high-quality photographs or short video clips alongside each testimonial to create an emotional connection with readers.

Focus on diverse perspectives and experiences, showcasing the breadth of the nonprofit’s reach. Ensure testimonials are authentic, respectful, and obtain informed consent from participants. Highlight the transformative power of the organization’s services, demonstrating tangible outcomes and lasting change. These narratives should vividly illustrate the ‘why’ behind the nonprofit’s mission, resonating deeply with donors and supporters.

X. Content Section 6: Volunteer & Staff Recognition

Acknowledge the dedication of those who power the nonprofit’s success. Dedicate a section to recognizing the invaluable contributions of volunteers and staff members throughout the past decade. Feature photos and brief profiles of long-serving individuals, highlighting their commitment and impact.

Consider including quotes from leadership expressing gratitude for their tireless efforts. Showcase volunteer hours accumulated and significant staff achievements. This section fosters a sense of community and appreciation, reinforcing the importance of human capital. Publicly celebrating these individuals strengthens morale and inspires continued involvement. It demonstrates the organization values its people, a key element of sustainability and positive organizational culture.

XI. Content Section 7: Looking Ahead – Future Goals & Vision

Articulate a compelling vision for the next chapter. This section should detail the nonprofit’s strategic goals for the coming years, building upon past successes and addressing evolving community needs. Outline specific, measurable, achievable, relevant, and time-bound (SMART) objectives.

Present a clear roadmap for program expansion, increased impact, and enhanced sustainability. Discuss potential new initiatives and partnerships. Emphasize the organization’s commitment to innovation and adaptation. This forward-looking perspective inspires confidence in stakeholders and demonstrates a proactive approach to long-term success. Include a call to action, inviting continued support and collaboration to realize the ambitious vision.

XII. Design & Branding for the Anniversary PDF

Visual appeal is crucial. The anniversary PDF demands a design that reflects the nonprofit’s brand identity and celebrates its milestone. Establish a consistent color palette and visual theme evoking emotion and professionalism. High-quality imagery and compelling graphics are essential to engage readers and illustrate impact.

Ensure the design is clean, modern, and easy to navigate. Utilize whitespace effectively and prioritize readability. Incorporate the organization’s logo prominently, but tastefully. Maintain brand consistency throughout the document. A visually stunning PDF enhances credibility and leaves a lasting impression, reinforcing the nonprofit’s value and dedication to its mission.

A. Color Palette & Visual Theme

Selecting a cohesive color palette is paramount for the anniversary PDF. Draw inspiration from the nonprofit’s existing branding, ensuring consistency. Consider colors that evoke feelings of trust, hope, and impact – blues and greens often work well. A visual theme should emerge, perhaps centered around growth, community, or the organization’s core values.

Limit the palette to 3-5 core colors to avoid visual clutter. Use color strategically to highlight key data and achievements. The theme should be reflected in imagery, typography, and overall layout. A well-defined visual identity strengthens brand recognition and creates a professional, memorable document that effectively communicates the nonprofit’s decade of dedication.

B. Use of Imagery & Graphics

High-quality imagery is crucial for an engaging anniversary PDF. Prioritize authentic photographs showcasing the nonprofit’s work and the people it serves. Avoid generic stock photos; instead, opt for images that tell a story and evoke emotion. Infographics and charts are excellent for presenting quantifiable results in a visually appealing manner.

Graphics should complement the color palette and visual theme, enhancing readability and understanding. Use consistent styling for all visual elements. Consider incorporating a timeline visually representing the organization’s evolution over the past decade. Ensure all images are high-resolution and properly optimized for PDF format to maintain clarity and minimize file size, creating a polished and impactful report.

XIII. PDF Creation Tools & Software Options

Numerous tools facilitate PDF creation for your anniversary report. Adobe InDesign offers professional layout and design capabilities, ideal for complex documents. Microsoft Word, while simpler, can create basic PDFs suitable for less visually intensive reports. Canva provides user-friendly templates and design elements, perfect for nonprofits with limited design resources.

For advanced features like interactive elements and form creation, consider Adobe Acrobat Pro. Online PDF converters are available for quick conversions from other file formats. Evaluate software based on budget, design complexity, and accessibility needs. Prioritize tools that ensure PDF/A compliance for long-term archiving and preservation of your valuable anniversary document.

XIV. Optimizing the PDF for Accessibility

Ensuring accessibility is crucial for inclusivity. Tag the PDF with appropriate headings, lists, and alternative text for images, enabling screen readers to interpret content effectively. Use a clear, readable font size and sufficient color contrast for visually impaired readers. Avoid relying solely on color to convey information.

Verify the reading order is logical and consistent. Utilize PDF creation software features to check accessibility compliance; Consider adding captions to videos and transcripts for audio content. A fully accessible PDF demonstrates your nonprofit’s commitment to reaching all stakeholders, fostering broader engagement with your decade of impact and achievements. Prioritize universal design principles throughout the document.

XV. Distribution Strategies for the Anniversary PDF

Maximize reach through a multi-channel distribution plan. Embed the PDF on your nonprofit’s website for easy download, creating a prominent landing page. Leverage email marketing to notify subscribers, segmenting lists for targeted messaging. Share the PDF link across all social media platforms, utilizing compelling visuals and concise descriptions.

Consider partnerships with related organizations to expand distribution. Explore online PDF hosting platforms for increased visibility. Track download statistics to gauge engagement. Ensure the PDF is mobile-friendly for optimal viewing on various devices. A well-executed distribution strategy amplifies your 10-year anniversary message, reaching a wider audience and reinforcing your impact.

XVI. Promoting the PDF on Social Media

Elevate visibility of your 10-year anniversary PDF through strategic social media promotion. Create visually appealing graphics and short video teasers highlighting key achievements featured within the report. Utilize platform-specific best practices – compelling captions for Facebook, impactful images for Instagram, and concise summaries for Twitter/X.

Employ relevant hashtags to broaden reach, such as #NonprofitAnniversary, #10YearsOfImpact, and tags related to your cause. Run targeted ad campaigns to reach new audiences. Encourage sharing by staff, volunteers, and beneficiaries. Monitor engagement metrics – likes, shares, comments – to refine your strategy. Consistent and creative social media promotion maximizes the PDF’s impact and celebrates your decade of service.

XVII. Email Marketing & Newsletter Integration

Leverage your existing email list to announce and distribute the 10-year anniversary PDF. Craft a compelling email campaign with a captivating subject line and personalized message. Highlight key milestones and impactful stories featured in the report. Include a prominent call-to-action button leading directly to the PDF download.

Segment your audience for targeted messaging – donors, volunteers, beneficiaries. Integrate the PDF announcement into your regular newsletter schedule. Track email open rates, click-through rates, and PDF downloads to measure campaign effectiveness. Consider creating a dedicated landing page for the PDF to gather additional data. Email marketing ensures direct reach to your most engaged supporters, maximizing report visibility.

XVIII. Website Integration & Download Availability

Make the anniversary PDF easily accessible on your nonprofit’s website. Create a dedicated page celebrating the 10-year milestone, prominently featuring the PDF download link. Ensure the page is visually appealing and mobile-responsive. Consider embedding a PDF viewer directly on the page for immediate access without download.

Promote the PDF through website banners and homepage announcements. Optimize the PDF file name and alt text for search engines. Integrate the download link into relevant sections of your website, such as the “About Us” or “Impact” pages. Track website traffic to the PDF page using analytics tools. A central, easily-found location on your website maximizes reach and accessibility.

XIX. Measuring the Impact of the PDF Report

Assessing the PDF’s effectiveness requires tracking key metrics. Monitor download numbers to gauge initial interest and reach. Utilize PDF analytics tools (if available through your creation software) to track page views within the document, identifying sections that resonate most with readers.

Integrate UTM parameters into the download link to track traffic sources – social media, email campaigns, website placements. Analyze this data to understand which channels drive the most engagement. Combine PDF metrics with website analytics to assess the report’s impact on overall website traffic and donor activity. This data-driven approach informs future communication strategies and demonstrates the report’s value.

XX. Tracking Downloads & Engagement Metrics

Robust tracking is crucial. Employ a dedicated PDF hosting platform or utilize link shortening services with built-in analytics to monitor download counts accurately. Implement UTM parameters in all shared links to pinpoint the source of each download – social media, email, website banners, etc.

Beyond downloads, consider engagement. If your PDF platform allows, track time spent on each page, indicating reader interest. Monitor website traffic following PDF distribution; a spike suggests increased engagement. Analyze donation patterns – did donations increase after the PDF’s release? Correlate data to demonstrate the report’s impact on fundraising efforts and stakeholder engagement, proving its return on investment.

XXI. Gathering Feedback from Stakeholders

Actively solicit feedback to refine future reports and demonstrate responsiveness. Distribute a short, targeted survey via email following PDF distribution, asking about clarity, content relevance, and overall design. Include open-ended questions for qualitative insights.

Consider focus groups with key stakeholders – donors, volunteers, beneficiaries – to gather more in-depth perspectives. Analyze social media comments and direct messages related to the anniversary and the PDF. This feedback loop isn’t just about the PDF itself; it’s about understanding stakeholder perceptions of your nonprofit’s impact and future direction, strengthening relationships and fostering continued support.

XXII. Legal Considerations & Disclaimers

Ensure full legal compliance within your anniversary PDF. Include a standard disclaimer stating the report’s information is current as of a specific date and is for informational purposes only. Verify all financial data adheres to accounting standards and reporting regulations.

Obtain necessary permissions for using beneficiary testimonials and images, respecting privacy rights. Review the PDF for any potentially libelous or defamatory statements. Consult with legal counsel to confirm compliance with relevant nonprofit laws and regulations in your jurisdiction. A clear copyright notice protecting your organization’s intellectual property is also crucial, safeguarding your brand and content.

XXIII. Examples of Successful Nonprofit Anniversary PDFs

Analyzing exemplary PDFs reveals key strategies. Look at reports from organizations like Charity: Water, known for visually compelling storytelling and impact metrics. Habitat for Humanity often showcases beneficiary stories alongside financial transparency. Consider PDFs from larger NGOs like Save the Children, noting their detailed program breakdowns and donor recognition sections.

Examine how these organizations integrate timelines, infographics, and compelling photography. Pay attention to their use of color palettes and branding consistency. Successful PDFs often feature interactive elements, like clickable links to program pages or donation portals. Studying these examples provides valuable inspiration for structuring your own impactful anniversary report.

XXIV. Conclusion: A Decade Down, Many More to Come

This anniversary PDF serves as more than a retrospective; it’s a launchpad for the next chapter. Celebrating ten years of impact isn’t merely about acknowledging past achievements, but reaffirming our commitment to the mission. The PDF’s distribution will strengthen stakeholder relationships and attract new supporters, fueled by demonstrated success and transparent financials.

By effectively communicating our story, we aim to inspire continued investment in our programs. This document encapsulates a decade of dedication, resilience, and community collaboration. Looking ahead, we envision expanded reach, innovative initiatives, and sustained positive change. The future is bright, and we invite you to join us on this continuing journey.

mablethorpe to skegness bus timetable pdf

Mablethorpe to Skegness Bus Timetable: Overview

Stagecoach and SLI jointly operate the Route 59 service‚ connecting Mablethorpe and Skegness Interchange. A downloadable PDF timetable is conveniently available on Moovit‚ offering comprehensive journey planning.

The current Stagecoach 59 timetable‚ detailing services between Mablethorpe and Skegness‚ is officially valid from November 3‚ 2025‚ and remains in effect until further notice is published by Stagecoach Lincolnshire & SLI. This information is crucial for passengers planning travel‚ ensuring they have the most up-to-date schedule.

However‚ it’s important to note that this timetable was last processed on November 20‚ 2025‚ at 01:16‚ indicating potential for minor adjustments. For the most reliable and current information‚ especially around bank holidays or special events‚ consulting the PDF timetable available on platforms like Moovit is highly recommended. The timetable effective date originally began on October 31‚ 2022‚ but has been updated since then. Always verify the date before travel.

Service Operator: Stagecoach Lincolnshire & SLI

The Mablethorpe to Skegness bus service‚ designated Route 59‚ is a collaborative operation between two prominent transport providers: Stagecoach Lincolnshire and SLI. Stagecoach‚ a well-established name in UK bus travel‚ contributes significantly to the service’s operation‚ while SLI also plays a vital role in ensuring comprehensive coverage along the route.

Passengers can access detailed timetable information‚ including the PDF version available on Moovit‚ directly from both operators’ websites. Stagecoach provides regional information through stagecoachbus.com‚ while SLI’s contributions are integrated into the overall Route 59 schedule. This partnership ensures a reliable and frequent service connecting Mablethorpe and Skegness Interchange. Checking both operator’s websites can provide the most comprehensive and up-to-date details regarding any service alterations.

Route Number: 59

Route 59 is the designated number for the bus service connecting Mablethorpe and Skegness Interchange. This number is crucial for identifying the correct service when checking timetables‚ whether viewing the schedule online via Stagecoach or SLI websites‚ or accessing the downloadable PDF timetable on platforms like Moovit.

Throughout various online resources‚ including traveline.cymru and bususers.org‚ the service is consistently referenced as Route 59. Passengers should always confirm they are boarding the correct bus by verifying the route number displayed on the vehicle. The timetable data‚ effective from October 31‚ 2022‚ and updated as of November 20‚ 2025‚ specifically pertains to Route 59. Utilizing this number ensures accurate journey planning and avoids confusion with other local bus services.

Key Stops: Mablethorpe & Skegness Interchange

Mablethorpe and Skegness Interchange represent the primary termini for Route 59. These locations are prominently featured in all timetable information‚ including the PDF version available on Moovit and the schedules published by Stagecoach and SLI. Mablethorpe stops include North End Car Park and the Bus Station‚ serving as crucial starting points for journeys towards Skegness.

Skegness Interchange functions as the central hub for onward connections‚ making it a vital destination for passengers. Timetables detail departure and arrival times at both locations‚ facilitating seamless travel planning. The route serves 73 stops in the Mablethorpe direction‚ highlighting the comprehensive coverage of the service. Passengers utilizing the PDF timetable should specifically note the times associated with these key stops for efficient route navigation.

Timetable Details: Monday to Friday

Route 59 operates with a consistent schedule Monday to Friday‚ excluding bank holidays; the complete timetable‚ including a PDF‚ is readily accessible online.

Morning Services from Mablethorpe

Morning services from Mablethorpe commence early‚ providing convenient transport for commuters and early risers traveling towards Skegness. According to the timetable effective from October 31‚ 2022‚ and updated as of November 20‚ 2025‚ departures begin around 07:15 and 07:30 from North End Car Park and Mablethorpe Bus Station respectively.

Several services are scheduled throughout the morning‚ including departures at 07:36‚ 08:40‚ and 09:40. These services‚ operated by Stagecoach Lincolnshire and SLI‚ cater to varying travel needs. Passengers can access a detailed PDF version of the timetable on platforms like Moovit for comprehensive planning. The Route 59 ensures a reliable connection‚ with timings subject to potential updates – always verify the latest schedule before travel. Utilizing the Stagecoach website also provides access to the most current information.

Midday Services from Mablethorpe

Midday services on the Route 59 from Mablethorpe to Skegness offer frequent connections for those traveling during the afternoon. The timetable‚ valid from November 3‚ 2025‚ showcases departures around 10:40‚ 11:40‚ and 12:40 from North End Car Park. Corresponding departures from Mablethorpe Bus Station occur at 10:46‚ 11:46‚ and 12:46‚ ensuring convenient access for all passengers.

These services‚ provided by Stagecoach Lincolnshire and SLI‚ maintain a consistent schedule throughout the midday period. A comprehensive PDF timetable is readily available on Moovit‚ facilitating easy journey planning. Passengers are encouraged to consult the Stagecoach website for the most up-to-date information‚ as timings may be subject to change. The Route 59 provides a dependable link between the two towns‚ with frequent services catering to diverse travel requirements. Always confirm the schedule before commencing your journey.

Afternoon Services from Mablethorpe

Afternoon services on the Route 59‚ operating from Mablethorpe towards Skegness‚ provide regular connections for commuters and travelers. According to the timetable‚ valid from November 3‚ 2025‚ departures from North End Car Park are scheduled around 13:40‚ 14:40‚ and 15:36. Corresponding departures from Mablethorpe Bus Station occur at 13:46‚ 14:46‚ and 15:42‚ offering convenient access points.

These services‚ a collaboration between Stagecoach Lincolnshire and SLI‚ maintain a consistent frequency throughout the afternoon. A detailed PDF timetable is accessible on Moovit‚ simplifying journey planning. Passengers should verify timings on the Stagecoach website‚ as schedules are subject to updates. The Route 59 ensures a reliable connection between the two towns‚ with frequent afternoon services accommodating various travel needs. It’s advisable to double-check the timetable before your trip to ensure a smooth journey.

Evening Services from Mablethorpe

Evening services on the Route 59‚ travelling from Mablethorpe to Skegness‚ cater to those returning from work or leisure activities. The timetable‚ currently valid until further notice (last processed November 20‚ 2025)‚ features departures from North End Car Park at 18:05‚ 19:05‚ and 20:05. Corresponding departures from Mablethorpe Bus Station are scheduled shortly after.

Operated jointly by Stagecoach Lincolnshire and SLI‚ these services provide a vital link between the two towns during the later hours. A comprehensive PDF version of the timetable is readily available on Moovit for easy access and planning. Passengers are encouraged to consult the Stagecoach website for the most up-to-date information‚ as schedules can be subject to change. The Route 59 ensures a dependable evening connection‚ though verifying timings before travel is always recommended for a hassle-free experience.

Timetable Details: Specific Dates

Good Friday sees service on Route 59‚ and the timetable is valid from November 3‚ 2025; the PDF is available online.

Good Friday Service

Route 59‚ operated by Stagecoach Lincolnshire and SLI‚ maintains service on Good Friday‚ providing a vital transport link between Mablethorpe and Skegness Interchange. Passengers intending to travel on this day should consult the specific Good Friday timetable‚ differing from the standard Monday to Friday schedule.

This specialized timetable ensures continued connectivity during the bank holiday period. The PDF version of the Good Friday timetable is readily accessible via Moovit‚ allowing for convenient pre-trip planning and ensuring passengers are fully informed about departure times and potential service adjustments. It’s crucial to check this dedicated schedule‚ as regular timetables do not apply.

The PDF document details all stops and timings for Good Friday‚ enabling a smooth and stress-free journey. Accessing the timetable beforehand is highly recommended to avoid any potential disruptions or delays. Remember to verify the timetable’s effective date to ensure you are using the most current information.

Timetable Valid From: November 3‚ 2025

The current Mablethorpe to Skegness (Route 59) bus timetable‚ operated by Stagecoach Lincolnshire and SLI‚ became effective on November 3‚ 2025. This updated schedule reflects any service adjustments or route modifications implemented by the operators. Passengers are strongly advised to utilize the latest timetable to ensure accurate journey planning and avoid potential inconveniences.

A comprehensive PDF version of this timetable is readily available for download on platforms like Moovit‚ providing a convenient offline resource. This PDF document details all stops‚ departure times‚ and service frequencies‚ allowing passengers to plan their trips with confidence. It’s essential to discard any older versions of the timetable and rely solely on the one dated November 3‚ 2025‚ or later updates.

Regularly checking for updates on the Stagecoach website is also recommended‚ as timetables are subject to change. Utilizing the current timetable guarantees a smooth and efficient travel experience between Mablethorpe and Skegness.

Last Processed Date: November 20‚ 2025

The Mablethorpe to Skegness (Route 59) bus timetable information was last officially processed and updated by Stagecoach on November 20‚ 2025‚ at 01:16. This signifies that the data currently available‚ including the PDF versions on platforms like Moovit and the Stagecoach website‚ reflects the service details as of this date.

While the timetable is valid from November 3‚ 2025‚ the November 20‚ 2025 processing date confirms that the information has been recently reviewed and verified for accuracy. Passengers should be aware that minor adjustments may occur after this date‚ so checking for the most up-to-date information before travel is always advisable.

This processing date assures users that the PDF timetable and online resources are currently aligned with Stagecoach’s operational plans for Route 59‚ facilitating reliable journey planning between Mablethorpe and Skegness.

Accessing the Timetable

The Mablethorpe to Skegness bus timetable is readily available as a PDF on Moovit‚ and can also be conveniently accessed via the official Stagecoach website.

PDF Availability on Moovit

Moovit provides a readily accessible PDF version of the Mablethorpe to Skegness (Route 59) bus timetable‚ enhancing journey planning convenience for passengers. This offline PDF allows users to view schedules without requiring an active internet connection‚ proving invaluable for those with limited data or travelling in areas with poor connectivity.

The PDF document comprehensively details all scheduled services‚ including departure times from Mablethorpe and arrival times at Skegness Interchange. It encompasses services operating on Mondays to Fridays‚ and specifically highlights the Good Friday service schedule. Users can easily download and save this PDF to their devices for quick and reliable access.

Moovit’s integration of the Stagecoach timetable ensures the PDF remains updated‚ reflecting any changes to the service. To locate the PDF‚ simply search for Route 59 within the Moovit app or on their website (moovitapp.com)‚ and select the option to view the downloadable timetable.

Stagecoach Website Access

The Stagecoach East Midlands website (stagecoachbus.com/regional-help-and-contact/east-midlands) serves as a primary source for accessing the Mablethorpe to Skegness (Route 59) bus timetable information. While a direct PDF download isn’t explicitly highlighted‚ the website provides detailed timetable data‚ including schedules effective from October 31‚ 2022‚ and updated as of March 23‚ 2026.

Users can navigate the site to find specific departure and arrival times for various stops along the route‚ such as Mablethorpe‚ North End Car Park and Mablethorpe Bus Station. The website also offers real-time bus tracking features‚ allowing passengers to monitor the location of vehicles and anticipate arrival times.

Although a single‚ comprehensive PDF may not be readily available‚ the detailed online timetable provides equivalent information. The website’s timing points and all stops sections offer a granular view of the service‚ complementing the information found on Moovit and other travel planning platforms.

Timetable Effective Date: October 31‚ 2022

The Mablethorpe to Skegness (Route 59) bus timetable‚ as operated by Stagecoach and SLI‚ became effective on October 31‚ 2022. This date marks a significant update to the service schedule‚ impacting departure and arrival times at key stops like Mablethorpe‚ North End Car Park‚ and Skegness Interchange.

While newer updates exist (with the last processing date being November 20‚ 2025‚ and validity extending to November 3‚ 2025)‚ the foundational timetable structure originates from this 2022 revision. Passengers referencing older schedules should be aware of potential discrepancies.

Accessing the timetable in PDF format‚ via platforms like Moovit‚ or directly through the Stagecoach website‚ will reveal the schedules based on this effective date. It’s crucial to confirm the timetable version when planning journeys‚ ensuring alignment with the current operational schedule. The PDF provides a static record of the service as it was configured on that date.

Additional Information

Moovit offers offline PDF access to the Route 59 timetable‚ alongside real-time vehicle tracking and detailed timing points for all stops along the route.

Timing Points & All Stops

Detailed timing information and a complete list of stops for the Route 59 service‚ operating between Mablethorpe and Skegness Interchange‚ are readily accessible. Stagecoach East Midlands provides comprehensive timetable data‚ current as of March 23‚ 2026. Key stops include Mablethorpe North End Car Park and Mablethorpe Bus Station‚ with frequent departures throughout the day.

The timetable outlines specific arrival and departure times at each location‚ allowing passengers to plan their journeys effectively. Information regarding Jacklin Crescent in Mablethorpe is also included. Accessing the full schedule‚ including all 73 stops in the Mablethorpe direction‚ is possible via the Stagecoach website (stagecoachbus.com) or through the downloadable PDF available on Moovit. This ensures passengers have complete visibility of the route and can anticipate their travel times accurately.

Vehicle Tracking

Real-time vehicle tracking is available for the Route 59 service‚ connecting Mablethorpe and Skegness Interchange‚ enhancing passenger convenience and journey planning. Stagecoach East Midlands provides a map displaying the location of up to two buses currently operating on the route. This feature allows users to monitor the progress of their bus and estimate arrival times with greater accuracy.

Passengers can access this tracking information through the Stagecoach website‚ providing a dynamic view of bus locations. The downloadable PDF timetable‚ available on platforms like Moovit‚ complements this real-time data‚ offering a static schedule for reference. Utilizing both resources – the live tracking map and the PDF timetable – ensures passengers are well-informed and can optimize their travel arrangements. This combination provides a robust and reliable travel experience.

Route Direction: Mablethorpe to Skegness

The Route 59 service operates directly from Mablethorpe towards Skegness‚ serving a total of 73 stops along the way. Passengers travelling in this direction can utilize the Moovit app to pinpoint the nearest bus station and ascertain upcoming arrival times. A comprehensive line schedule details departure times from Mablethorpe‚ starting as early as 06:30 and continuing until 18:35.

For detailed planning‚ a downloadable PDF timetable is readily accessible on moovitapp.com‚ providing an offline resource for journey preparation. This PDF complements the real-time information available through Stagecoach’s website and tracking features. Key stops include North End Car Park and the Mablethorpe Bus Station. Understanding the route direction and utilizing the available timetable resources – both dynamic and static – ensures a smooth and efficient journey from Mablethorpe to Skegness.

Service Frequency

The Route 59‚ connecting Mablethorpe and Skegness‚ offers a varied service frequency‚ particularly on Mondays to Fridays. Several departures are scheduled throughout the day‚ beginning with a 07:15 service from North End Car Park in Mablethorpe‚ followed by services at 08:40‚ 09:40‚ 10:40‚ and continuing at hourly intervals until 15:36. Later services depart at 16:55‚ 18:05‚ 19:05‚ and 20:05.

Passengers can access a detailed timetable‚ including specific departure times‚ via a downloadable PDF available on platforms like Moovit and the Stagecoach website. This PDF resource is particularly useful for offline journey planning. While the frequency may vary‚ especially on weekends or bank holidays‚ the consistent provision of multiple daily services ensures convenient transportation between these two coastal towns. Checking the latest timetable – available as a PDF – is recommended for the most up-to-date information.

battery tender charger instructions

Battery Tender Charger Instructions: A Comprehensive Guide

Maintaining optimal battery health is crucial for vehicle reliability‚ and automatic chargers simplify this process․ These devices ensure your battery remains fully charged‚ extending its lifespan and guaranteeing starting power․

Understanding Battery Tender Chargers

Battery tender chargers are specialized devices designed for long-term battery maintenance‚ differing from traditional chargers intended for quick‚ full charges․ They deliver a low‚ consistent current‚ preventing overcharging which can damage batteries over time․ This makes them ideal for seasonal vehicles like motorcycles or boats‚ or for batteries in cars that aren’t driven frequently․

Unlike standard chargers‚ tenders switch to a “float” mode once the battery is full‚ maintaining that charge without boiling off electrolyte․ They’re built to be left connected for extended periods‚ automatically adjusting to the battery’s needs․ Understanding this core function is key to maximizing battery life and ensuring reliable performance when you need it most․

What is a Battery Tender?

A Battery Tender is essentially a smart charger focused on maintaining‚ rather than rapidly charging‚ a battery․ It’s designed to counteract the natural self-discharge rate of batteries‚ especially those left unused for weeks or months․ This prevents sulfation – the buildup of lead sulfate crystals that reduce battery capacity and lifespan․

Think of it as a long-term health support system for your battery․ While a regular charger gets you going‚ a Battery Tender keeps you going․ It provides a controlled‚ low-amperage charge‚ switching to a maintenance mode once fully charged․ This ensures the battery remains at peak condition‚ ready for immediate use when required‚ avoiding frustrating starting issues․

Benefits of Using a Battery Tender

Employing a Battery Tender offers numerous advantages for battery longevity and performance․ Primarily‚ it prevents battery degradation during periods of inactivity‚ crucial for seasonal vehicles like motorcycles or classic cars․ By maintaining a full charge‚ sulfation is minimized‚ extending the battery’s usable life significantly․

Furthermore‚ a Battery Tender ensures reliable starting power‚ eliminating the need for jumpstarts and potential damage from repeated low-voltage attempts․ It’s a cost-effective solution‚ saving you money on battery replacements․ Consistent maintenance also improves overall electrical system health‚ providing peace of mind and dependable operation․

Types of Battery Tender Chargers

Battery Tender chargers come in various forms‚ catering to diverse needs and applications․ Standard Battery Tenders provide a consistent‚ low-amp charge‚ ideal for maintaining fully charged batteries․ Smart Battery Tenders‚ however‚ incorporate advanced features like multi-stage charging‚ automatic voltage detection‚ and desulfation capabilities‚ optimizing battery health and recovery․

Portable Battery Tenders offer convenience and flexibility‚ perfect for travel or remote locations․ These compact units often utilize USB connectivity or are designed for direct connection to a vehicle’s 12V outlet․ Choosing the right type depends on your specific requirements‚ battery type‚ and desired level of automation and portability․

Standard Battery Tenders

Standard Battery Tenders represent the foundational approach to battery maintenance‚ delivering a continuous‚ low-amperage charge․ These chargers are exceptionally simple to use‚ making them a great entry point for those new to battery maintenance․ They excel at keeping a fully charged battery at its peak voltage‚ compensating for natural self-discharge over time․

While lacking the sophisticated features of smart chargers‚ their reliability and affordability are significant advantages․ They are best suited for batteries that are already in good condition and require only maintenance charging‚ not deep recovery․ Expect a consistent‚ steady charge without complex adjustments or monitoring․

Smart Battery Tenders (with advanced features)

Smart Battery Tenders elevate battery maintenance with intelligent charging algorithms and a suite of advanced features․ These chargers dynamically adjust the charging process based on the battery’s condition‚ switching between bulk‚ absorption‚ and float modes for optimal results․ They often include desulfation modes to attempt recovery of neglected batteries․

Beyond basic charging‚ smart tenders offer features like automatic voltage detection and short-circuit protection‚ enhancing safety and convenience․ Many models display detailed information via LED indicators or digital displays‚ showing charging status‚ voltage‚ and current․ They are ideal for batteries needing both maintenance and recovery‚ providing a comprehensive solution for diverse battery needs․

Portable Battery Tenders

Portable Battery Tenders offer a convenient solution for maintaining battery charge on the go‚ perfect for motorcycles‚ ATVs‚ or seasonal vehicles stored remotely․ These compact chargers are often lightweight and can be powered by a standard AC outlet or even a DC power source like a vehicle’s cigarette lighter․

Their smaller size doesn’t compromise functionality; many portable tenders still incorporate smart charging features‚ ensuring safe and efficient charging․ They are ideal for roadside assistance or maintaining batteries during extended periods of inactivity․ Look for models with built-in protection against reverse polarity‚ short circuits‚ and overcharging for added peace of mind during mobile battery maintenance․

Setting Up Your Battery Tender Charger

Proper setup is essential for safe and effective charging․ This involves securely connecting the charger to both the battery and a suitable power source‚ following all guidelines․

Connecting to the Battery

Establishing a solid connection to your battery is the first critical step․ Before connecting‚ always ensure the battery is in a well-ventilated area․ Identifying the correct terminals is paramount; the positive terminal is typically marked with a “+” symbol and is often red‚ while the negative terminal is marked with a “-” symbol and is usually black․

You have two primary options for connecting the charger: alligator clips or ring terminals․ Alligator clips offer a quick and easy connection‚ ideal for temporary charging․ Ring terminals‚ however‚ provide a more secure and permanent connection‚ minimizing the risk of accidental disconnection․ When using clips‚ ensure a firm grip on the battery posts․ For ring terminals‚ proper crimping and secure attachment are vital for optimal conductivity and safety․

Identifying Positive and Negative Terminals

Accurately identifying the positive and negative battery terminals is absolutely essential to prevent damage to both the charger and the battery itself․ Incorrect polarity can lead to serious consequences‚ including sparking‚ overheating‚ and even battery explosion․ The positive (+) terminal is generally larger in diameter and often covered with a red cap or marked with a “+” symbol․ Conversely‚ the negative (-) terminal is typically smaller and covered with a black cap or marked with a “-“․

If markings are unclear or absent‚ a voltmeter can be used to confirm polarity․ Connecting the voltmeter’s red lead to the positive terminal should yield a positive voltage reading‚ while connecting the black lead will show a negative reading․ Always double-check before connecting the charger!

Using Alligator Clips vs․ Ring Terminals

Battery Tender chargers often come with both alligator clips and ring terminals for connecting to the battery․ Alligator clips offer a quick and temporary connection‚ ideal for infrequent charging or testing․ They are easy to attach and detach‚ but may not provide the most secure or consistent contact over extended periods․

Ring terminals‚ on the other hand‚ require a more permanent connection․ They are crimped or bolted directly onto the battery posts‚ creating a robust and reliable connection․ This is the preferred method for long-term maintenance charging‚ as it minimizes resistance and ensures optimal charging efficiency․ Secure connections are vital for consistent power delivery and preventing potential hazards․

Connecting to a Power Source

Once the battery connections are secure‚ plug your Battery Tender into a suitable power outlet․ Most chargers are designed for standard household current‚ but it’s crucial to verify the voltage requirements․ Many models operate on 120V‚ common in North America‚ while others may require 240V‚ prevalent in other regions․

When using an extension cord‚ prioritize a heavy-duty gauge to prevent voltage drop and overheating․ A thinner cord can restrict power flow‚ impacting charging efficiency and potentially damaging the charger․ Ensure the outlet is easily accessible and protected from the elements․ Avoid using damaged or frayed cords‚ as they pose a significant safety risk․

Voltage Requirements (120V vs․ 240V)

Understanding your local voltage standard is paramount before connecting your Battery Tender․ North America predominantly utilizes 120V power outlets‚ while many other countries operate on 240V․ Using the incorrect voltage can severely damage the charger and potentially create a fire hazard․

Check the label on your Battery Tender itself; it will clearly state the input voltage requirement․ Some universal models include a voltage selector switch‚ allowing adaptation to different power systems․ Never attempt to modify the charger’s plug or wiring to fit a different outlet – this voids the warranty and is extremely dangerous․ Always prioritize safety and correct voltage matching․

Extension Cord Considerations

When a direct power outlet isn’t accessible‚ using an extension cord with your Battery Tender is often necessary․ However‚ selecting the right cord is critical for safe and efficient charging․ Opt for a heavy-duty extension cord rated for outdoor use‚ especially if the charger is exposed to the elements․

The cord’s gauge (thickness) is crucial; a thinner gauge restricts current flow‚ potentially overheating the cord and reducing charging efficiency․ A 16-gauge or 14-gauge cord is generally recommended for Battery Tenders․ Avoid excessively long cords‚ as they increase voltage drop․ Regularly inspect the cord for damage‚ and never use one with exposed wires or a frayed insulation․

Using Your Battery Tender Charger

Proper operation involves selecting the appropriate charging mode and monitoring the process․ Understanding these modes ensures optimal battery health and prevents overcharging issues;

Charging Modes Explained

Battery tenders typically offer several charging modes tailored to different battery conditions․ Standard Charging Mode delivers a consistent current to replenish the battery’s charge‚ ideal for initially bringing a depleted battery back to full capacity․ Maintenance (Float) Mode‚ once the battery is charged‚ provides a low‚ sustaining current to offset self-discharge‚ keeping the battery at 100% without overcharging․

Some advanced tenders include a Boost/Desulfation Mode․ This mode attempts to recover deeply discharged batteries by applying a higher voltage pulse‚ breaking down sulfate crystals that build up on the plates․ However‚ this mode isn’t always effective and should be used cautiously․ Selecting the correct mode is vital for maximizing battery life and performance‚ ensuring your vehicle is always ready to go․

Standard Charging Mode

Standard Charging Mode is the foundational process for replenishing a battery’s charge․ This mode delivers a consistent‚ controlled current to the battery‚ gradually increasing its state of charge from a depleted level․ It’s the ideal setting for initially charging a battery that has been deeply discharged‚ such as after winter storage or prolonged inactivity․

The charger monitors the battery’s voltage and current‚ automatically adjusting the charging rate to optimize the process․ This ensures a safe and efficient charge without risking overcharging or damaging the battery․ Typically‚ the charger will transition to Maintenance Mode once the battery reaches full capacity‚ providing a trickle charge to maintain optimal performance․ This mode is a reliable starting point for most battery charging needs․

Maintenance (Float) Mode

Maintenance‚ or Float‚ Mode is designed for long-term battery upkeep once a full charge is achieved․ Unlike standard charging‚ this mode delivers a very low‚ continuous current – just enough to counteract the natural self-discharge rate of the battery․ This prevents sulfation‚ a common cause of battery failure during storage‚ and ensures the battery remains at 100% readiness․

It’s perfect for vehicles or equipment that are used infrequently‚ like motorcycles‚ classic cars‚ or seasonal tools․ Leaving a battery in Float Mode for extended periods won’t harm it; in fact‚ it significantly extends its lifespan․ The charger intelligently monitors the voltage‚ providing only the necessary power to maintain peak condition‚ offering peace of mind and reliable starting power when needed․

Boost/Desulfation Mode (if applicable)

Some advanced Battery Tender chargers feature a Boost or Desulfation mode‚ intended for deeply discharged or sulfated batteries․ This mode applies a higher voltage pulse to break down lead sulfate crystals that build up on the battery plates‚ hindering performance․ It’s a recovery attempt‚ but success isn’t guaranteed‚ especially with severely damaged batteries․

Desulfation is a slower process‚ often taking several hours or even days‚ and isn’t suitable for all battery types․ Always consult your charger’s manual before using this mode‚ as improper application can cause further damage․ Boost mode provides a quick‚ high-current charge for batteries that need a rapid jumpstart‚ but shouldn’t be used continuously as it can overheat the battery․

Monitoring the Charging Process

Effectively monitoring the charging process is key to ensuring your battery receives the correct charge and avoids potential issues․ Most Battery Tender chargers utilize LED indicators to communicate the charging status․ Typically‚ a red light signifies charging‚ green indicates full charge (maintenance mode)‚ and flashing lights often signal an error or a different charging stage․

More sophisticated models may include digital displays showing voltage and current readings‚ providing a more precise understanding of the charging cycle․ Regularly checking these indicators allows you to confirm the charger is functioning correctly and the battery is responding as expected; Understanding these signals helps prevent overcharging or undercharging‚ maximizing battery life․

LED Indicators and What They Mean

Decoding the LED indicators on your Battery Tender charger is essential for understanding its operation․ A solid red LED generally signifies the charger is actively charging the battery‚ delivering power to replenish its capacity․ Once the battery reaches full charge‚ the LED typically switches to solid green‚ indicating maintenance or float mode – maintaining the battery’s charge without overcharging․

However‚ flashing LEDs often denote specific conditions․ A flashing red light could indicate a reversed polarity connection (positive to negative)‚ while a flashing green might signal a battery that won’t accept a charge․ Refer to your charger’s manual for a precise interpretation of each LED pattern‚ as variations exist between models․

Voltage and Current Readings (on some models)

More advanced Battery Tender chargers feature digital displays providing voltage and current readings‚ offering deeper insight into the charging process․ Voltage readings indicate the battery’s state of charge; a fully charged 12V battery should read around 13․2-13․8 volts․ Current readings‚ measured in amps‚ show the rate at which the charger is delivering power․

Monitoring these values can help diagnose battery issues․ A consistently low voltage despite charging suggests a failing battery․ A rapidly decreasing current indicates the battery is nearing full capacity․ Understanding these readings empowers you to assess battery health and charger performance‚ ensuring optimal charging and extending battery life․

Safety Precautions and Troubleshooting

Prioritizing safety and addressing potential issues are vital when using a battery tender․ Proper ventilation and avoiding short circuits are paramount for safe operation․

Safety Guidelines

Working with batteries involves inherent risks‚ so adhering to safety guidelines is paramount․ Always ensure adequate ventilation during charging‚ as batteries can release explosive hydrogen gas․ Never charge in an enclosed‚ unventilated space․ Carefully inspect the charger and battery cables for any damage before each use; replace frayed or cracked components immediately․

Avoiding short circuits is critical․ Never allow the positive and negative terminals to touch‚ as this can cause sparks‚ overheating‚ and potentially a fire․ Disconnect the charger from the power source before connecting or disconnecting it from the battery․ Do not use the charger in wet or damp conditions․ Always follow the manufacturer’s instructions provided with your specific battery tender model for optimal and safe operation․

Ventilation Requirements

Proper ventilation is non-negotiable when charging batteries with a tender․ During the charging process‚ batteries release hydrogen gas‚ which is highly flammable and potentially explosive․ A well-ventilated area allows this gas to dissipate‚ minimizing the risk of ignition․

Charge batteries outdoors or in a garage with open windows and doors․ Avoid enclosed spaces like closets or sealed sheds․ Ensure airflow isn’t obstructed․ A fan can further assist in dispersing the gas‚ but it must be spark-proof to avoid creating an ignition source․ Never smoke or use open flames near a charging battery․ Prioritizing ventilation safeguards against potential hazards and ensures a safe charging environment․

Avoiding Short Circuits

Short circuits pose a significant danger when using a battery tender‚ potentially damaging the charger‚ the battery‚ and even causing a fire․ A short circuit occurs when there’s an unintended connection between the positive and negative terminals․ Always double-check polarity before connecting the charger – red to positive‚ black to negative․

Ensure the alligator clips or ring terminals don’t touch each other or any metallic surfaces․ Use insulated tools and avoid loose connections․ If using alligator clips‚ ensure they have a firm grip on the battery terminals․ Never work on a wet surface‚ as water can conduct electricity․ A damaged charger or frayed wires increase the risk of a short circuit; inspect equipment regularly․ Prioritizing careful connection practices is paramount for safety․

Common Issues and Solutions

Encountering problems with your battery tender is common‚ but many are easily resolved․ If the charger isn’t turning on‚ check the power source and ensure the outlet is functioning correctly․ Inspect the fuse within the charger – a blown fuse is a frequent culprit․ If the battery isn’t charging‚ verify the connections are secure and the polarity is correct․

Some chargers display error codes; consult the manual to decipher their meaning․ A flashing LED might indicate a reversed polarity or a faulty battery․ If the battery is severely discharged or sulfated‚ a boost or desulfation mode (if available) might be necessary․ Always disconnect the charger before inspecting or troubleshooting․ If issues persist‚ consult a qualified technician․

Charger Not Turning On

If your Battery Tender charger fails to power on‚ systematic troubleshooting is key․ First‚ confirm the AC power source is active by testing the outlet with another device․ Next‚ inspect the charger’s power cord for any visible damage – cuts or fraying can interrupt the connection․ Many chargers include an internal fuse; locate and check its condition‚ replacing it if blown․

Ensure the charger’s on/off switch is fully engaged․ Some models have a standby mode that may appear as “off․” Finally‚ verify the unit isn’t receiving a signal indicating a fault‚ such as reversed polarity‚ which can prevent operation․ If these steps don’t resolve the issue‚ professional assistance may be needed․

Battery Not Charging

When a Battery Tender isn’t charging‚ several factors could be at play․ Begin by meticulously checking the connections to the battery terminals – corrosion or looseness can impede current flow․ Confirm correct polarity; reversed connections will prevent charging and could damage the charger․ Inspect the battery itself for signs of damage‚ like swelling or cracks‚ indicating it may be beyond recovery․

Verify the battery voltage is within the charger’s acceptable range․ Severely discharged batteries might not register initially․ Try a different battery to rule out a charger malfunction․ If the charger displays an error‚ consult the manual for specific troubleshooting steps․ A failing battery may simply not accept a charge‚ even with a functional charger․

Error Codes and Their Meanings

Modern Battery Tender chargers often utilize LED indicators or digital displays to communicate error codes․ These codes pinpoint specific issues‚ streamlining troubleshooting․ A flashing red light might signal a reversed polarity connection‚ demanding immediate correction to prevent damage․ Other codes could indicate a short circuit‚ overvoltage‚ or a faulty battery cell․

Always refer to your charger’s manual for a comprehensive list of error codes and their corresponding solutions․ Ignoring error messages can lead to further complications or even battery failure․ Some chargers offer online resources or support forums for decoding less common errors․ Understanding these codes empowers users to diagnose and resolve problems efficiently‚ maximizing the charger’s lifespan and battery health․