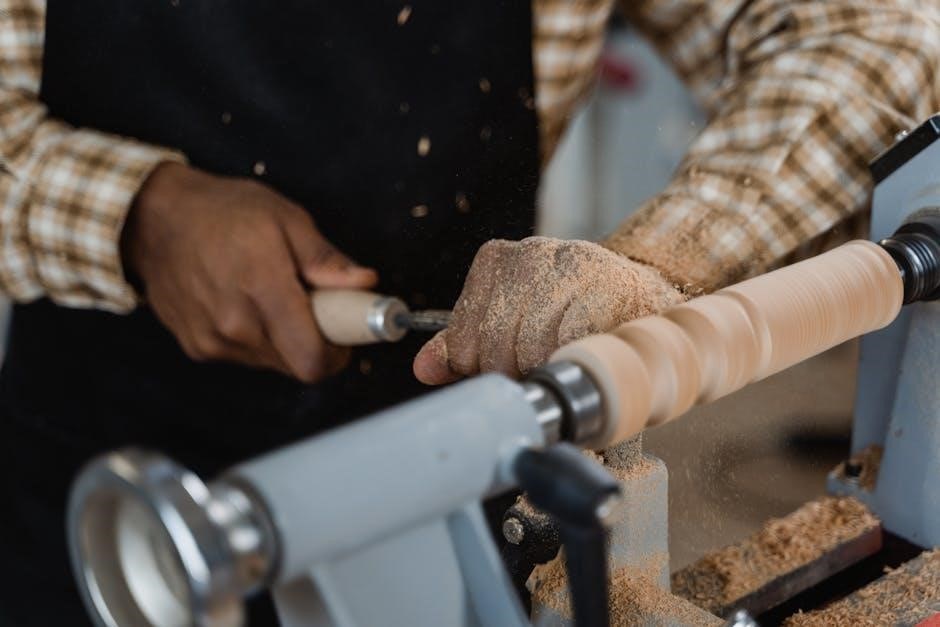
Category: Manuals (Page 2 of 6)

gigabyte b650 aorus elite ax manual pdf

Welcome to the Gigabyte B650 Aorus Elite AX Manual, your comprehensive guide to unlocking the full potential of this powerful motherboard. Designed for both novice and advanced users, this manual provides detailed insights into installation, configuration, and optimization. Discover how to harness its cutting-edge features, troubleshoot common issues, and maximize performance. The PDF manual is available for download, offering a convenient resource for setup and maintenance.

1;1 Overview of the Motherboard and Its Features

The Gigabyte B650 Aorus Elite AX is a high-performance motherboard designed for AMD Ryzen 7000 series processors. It features PCIe 5.0 support, DDR5 memory compatibility, and robust power delivery. The board includes advanced connectivity options like Wi-Fi 6, USB 3.2 Gen 2, and high-quality audio capacitors. Its durable design and intuitive BIOS make it ideal for both casual users and enthusiasts. The PDF manual details these features extensively.

1.2 Importance of the Manual for Effective Use

The Gigabyte B650 Aorus Elite AX manual is crucial for unlocking the motherboard’s full potential. It provides detailed guidance on installation, configuration, and troubleshooting, ensuring users avoid common mistakes. The manual also explains advanced features, BIOS settings, and optimization techniques. By following the instructions, users can achieve optimal performance, stability, and customization. Referencing the manual is essential for both novice and experienced users to maximize their setup’s efficiency and longevity.

Key Features of the Gigabyte B650 Aorus Elite AX

The Gigabyte B650 Aorus Elite AX is a high-performance motherboard featuring the AMD B650 chipset, supporting Ryzen 7000 series processors. It offers PCIe 5.0, DDR5 memory, dual M.2 slots, USB 3.2 Gen 2, and robust power delivery for overclocking. Designed for gamers and enthusiasts, it combines cutting-edge technology with durability and reliability.

2.1 Detailed Specifications and Hardware Capabilities

The Gigabyte B650 Aorus Elite AX features the AMD B650 chipset, supporting Ryzen 7000 series processors with PCIe 5.0. It offers dual-channel DDR5 memory, USB 3.2 Gen 2, and dual M;2 slots for NVMe SSDs. The motherboard includes HDMI 2.1, RGB Fusion lighting, Wi-Fi 6, and Bluetooth 5.2 for enhanced connectivity. Its robust VRM design ensures stable power delivery, making it ideal for gaming and overclocking.

2.2 Unique Technologies Integrated into the Motherboard

The Gigabyte B650 Aorus Elite AX boasts exclusive technologies like RGB Fusion for customizable lighting and Smart Fan 6 for intelligent cooling. It features DDR5 memory support and PCIe 5.0 for blazing-fast storage. The motherboard also includes Wi-Fi 6 and Bluetooth 5.2 for seamless wireless connectivity. Additionally, USB 3.2 Gen 2 and HDMI 2.1 ensure high-speed data transfer and 4K display support, enhancing both productivity and entertainment experiences.

Installation Guide from the Manual

The manual provides a detailed installation guide for the Gigabyte B650 Aorus Elite AX, covering unpacking, static protection, CPU installation, and hardware connections. Follow step-by-step instructions for a smooth setup.

3.1 Step-by-Step Physical Installation Process

The manual outlines a detailed step-by-step installation process for the Gigabyte B650 Aorus Elite AX. Begin by unpacking and grounding yourself to prevent static damage. Carefully remove the motherboard from its packaging and align it with the case. Secure the board using screws, ensuring proper mounting. Next, install the CPU, RAM, and storage devices, following the manual’s specific instructions for each component;

3.2 Software and Driver Installation Instructions

After physical installation, the manual guides you through software and driver setup. Download the latest drivers from Gigabyte’s official website or use the provided installation disc. Install the chipset driver first, followed by GPU, audio, and LAN drivers. Use Gigabyte’s utility tools for automatic updates and configurations. Ensure all components are recognized and functioning properly before proceeding to OS installation and additional software setups for optimal performance.

BIOS Setup and Configuration

The manual provides detailed steps for accessing and configuring the BIOS. Navigate through menus to set up hardware, optimize performance, and ensure system stability.

4.1 Navigating the BIOS Interface

The manual guides users through accessing and navigating the BIOS interface. Press Del or F2 during startup to enter BIOS. Use arrow keys to explore menus like System Info and Boot Options. The interface allows users to configure hardware settings, set boot priorities, and enable advanced features. Refer to the PDF manual for detailed instructions on utilizing BIOS tools effectively.

4.2 Customizing Settings for Optimal Performance

The manual provides detailed guidance on customizing BIOS settings for enhanced performance. Enable XMP profiles to optimize RAM speeds and configure CPU voltage for stable overclocking. Adjust cooling profiles to balance thermals and noise. Explore advanced options like PBO settings and memory timing adjustments to fine-tune your system. Refer to the PDF manual for step-by-step instructions on maximizing performance without compromising stability.

Troubleshooting Common Issues

The manual offers solutions for common problems, such as boot failures or hardware incompatibility. Follow diagnostic steps to identify and resolve issues efficiently using the guide.

5.1 Diagnosing Hardware and Software Conflicts

The manual provides detailed steps to identify hardware and software conflicts. Use BIOS tools to check compatibility and system logs to pinpoint issues. Ensure all components are properly connected and drivers are updated. Perform a clean boot to isolate software-related problems and test each hardware component individually to confirm functionality. This systematic approach helps in resolving conflicts effectively.

5.2 Resolving Common Problems as per the Manual

The manual offers practical solutions for common issues, such as BIOS updates, driver installations, and hardware compatibility checks. Reset BIOS to default settings, ensure proper component connections, and reinstall drivers. For persistent issues, refer to the troubleshooting guide or contact Gigabyte support. Regularly update firmware and software to maintain optimal performance and resolve conflicts efficiently.

Frequently Asked Questions (FAQs)

Where can I find the Gigabyte B650 Aorus Elite AX manual? How do I update the BIOS? What are the compatible components? The FAQ section provides answers to these and other common queries, ensuring a smooth user experience with the motherboard.

6.1 General Inquiries About the Motherboard

What are the key features of the Gigabyte B650 Aorus Elite AX? Is it compatible with my CPU? Where can I find detailed specifications? This section addresses common questions about the motherboard’s compatibility, features, and performance. It also provides guidance on where to locate specific information in the PDF manual for troubleshooting and optimization, ensuring a seamless user experience.

6.2 Solutions to Frequently Encountered Challenges

Experiencing issues with BIOS setup or driver installation? This section provides solutions to common challenges, such as compatibility problems or overheating concerns. Learn how to resolve hardware conflicts and optimize system performance. The PDF manual offers detailed troubleshooting guides, while FAQs address frequently reported issues, ensuring users can overcome obstacles and maximize their motherboard’s potential effectively.

Optimizing Performance Using the Manual

Maximize your system’s potential with the Gigabyte B650 Aorus Elite AX manual. Learn to fine-tune BIOS settings, install drivers, and configure hardware for peak performance and stability.

7.1 Enhancing System Stability and Speed

Enhance your system’s stability and speed by following the manual’s expert guidance. Optimize BIOS settings, install the latest drivers, and configure hardware for peak performance. Ensure proper cooling, enable XMP profiles for RAM, and adjust power management settings. Regularly update firmware and monitor system temperatures to maintain optimal functionality. These steps ensure your Gigabyte B650 Aorus Elite AX runs smoothly and efficiently.

7.2 Overclocking and Fine-Tuning Capabilities

Unleash the full potential of your Gigabyte B650 Aorus Elite AX with precision overclocking tools. The manual guides you through BIOS settings for CPU and RAM tuning. Adjust voltage, frequencies, and multipliers to achieve stable performance gains. Utilize stress-testing tools to ensure system reliability. Fine-tuning options allow you to optimize for gaming, content creation, or multitasking, ensuring your system performs at its best under any workload.

Warranty and Support Information

The manual includes detailed warranty terms and conditions, ensuring your Gigabyte B650 Aorus Elite AX is protected. Contact Gigabyte support for assistance via their official website or support hotline. Supplementary materials and downloads are also available for further guidance and troubleshooting.

8.1 Understanding the Warranty Terms and Conditions

The manual outlines the warranty terms for the Gigabyte B650 Aorus Elite AX, providing clear details on coverage duration, conditions, and exclusions. Users can find information on warranty validity periods, regional-specific terms, and procedures for claiming warranty services. This section ensures users understand their entitlements and how to maintain warranty validity, offering peace of mind for their investment.

8.2 Contacting Gigabyte Support for Assistance

For assistance, users can contact Gigabyte Support through various channels, including email, support tickets, or phone. The manual directs users to the official Gigabyte website for regional support contacts and resources. Additionally, the support page offers FAQs, downloads, and troubleshooting guides to address common issues. The manual also provides guidance on preparing required information for a smoother support experience.

The Gigabyte B650 Aorus Elite AX Manual is an essential resource for maximizing motherboard performance. It provides clear guidance for installation, configuration, and troubleshooting, ensuring optimal use of its advanced features. By following the manual, users can unlock the full potential of their system and enjoy a seamless computing experience.

9.1 Summary of the Manual’s Key Points

The Gigabyte B650 Aorus Elite AX Manual serves as a crucial resource for users, detailing installation, BIOS setup, troubleshooting, and optimization. It covers hardware specifications, unique technologies, and step-by-step guides for maximizing performance. The manual also includes FAQs and warranty information, ensuring comprehensive support. Supplementary materials and downloads are available, making it an indispensable guide for both novice and experienced users to unlock the motherboard’s full potential.

9.2 Final Recommendations for Users

For optimal use of the Gigabyte B650 Aorus Elite AX, thoroughly review the manual to understand its features and capabilities. Regularly update BIOS and drivers for enhanced performance. Explore advanced settings like overclocking carefully. Utilize the manual’s troubleshooting section for resolving issues. Visit Gigabyte’s official website for additional resources and support. By following these guidelines, users can fully maximize their motherboard’s potential and ensure a seamless computing experience.

Additional Resources and Downloads

For further assistance, visit the official Gigabyte website for supplementary guides, driver downloads, and additional support resources. Explore the FAQ section and user forums for detailed insights.

10.1 Accessing the Latest Manual and Guides

To access the Gigabyte B650 Aorus Elite AX Manual (PDF), visit the official Gigabyte website. Navigate to the support section and select your motherboard model under the Motherboards category. Download the latest manual, installation guides, and driver updates directly from the Gigabyte server. Ensure you have the most up-to-date resources for optimal performance and troubleshooting. The manual is highly rated by users and provides comprehensive instructions.

10.2 Supplementary Materials for Advanced Users

For advanced users, Gigabyte offers supplementary materials such as detailed hardware specifications, BIOS configuration guides, and driver updates. Access technical notes, FAQs, and diagnostic tools through the official Gigabyte website. These resources provide in-depth insights for troubleshooting, optimization, and customization, ensuring users can fully leverage the motherboard’s capabilities for enhanced performance and stability.

Final Note on the Importance of the Manual

The Gigabyte B650 Aorus Elite AX Manual is essential for guiding users through installation, configuration, and troubleshooting. It ensures optimal functionality and performance, serving as a vital resource for all users.

11.1 Why the Manual is Essential for Maximizing Motherboard Potential

The Gigabyte B650 Aorus Elite AX Manual is crucial for unlocking the motherboard’s full potential. It provides a comprehensive guide to installation, configuration, and troubleshooting, ensuring optimal functionality. By following the manual, users can explore advanced features, customize settings, and resolve issues efficiently. This resource is indispensable for both novice and experienced users, helping them achieve peak performance and stability from their system.

frigidaire self cleaning oven owner’s manual

Discover the convenience of Frigidaire’s self-cleaning oven, designed to simplify maintenance with high temperatures that turn food residue into ash, making cleaning effortless and efficient for a spotless cooking environment.

Overview of the Self-Cleaning Feature

The Frigidaire self-cleaning oven is equipped with an innovative feature that simplifies oven maintenance by using high temperatures to eliminate food residue and grime. During the self-cleaning cycle, the oven heats to a temperature exceeding normal cooking levels, converting tough spills and splatters into a fine ash that can easily be wiped away. This process is both efficient and time-saving, as it reduces the need for harsh chemicals or extensive scrubbing. The feature is designed with safety in mind, as the oven door automatically locks during the cycle to prevent accidental burns or injuries. To ensure optimal results, the oven allows users to select cleaning times ranging from 2 to 4 hours, depending on the soil level. This feature is perfect for homeowners seeking a hassle-free way to maintain their oven’s cleanliness and performance. Proper preparation, such as removing racks and utensils, is essential for a successful cleaning experience.

Benefits of Using the Self-Cleaning Oven

Using the Frigidaire self-cleaning oven offers numerous benefits that make kitchen maintenance easier and more efficient. The high-temperature cleaning cycle eliminates the need for harsh chemicals, providing a safer and more environmentally friendly alternative to traditional cleaning methods. This feature also saves time, as it handles tough food residue and grime without manual scrubbing. The automatic door lock ensures safety by preventing accidental burns during the cleaning process. Additionally, the self-cleaning function helps maintain the oven’s performance and appearance, preserving its value over time. By reducing the effort and hazard associated with manual cleaning, the self-cleaning oven is a practical solution for busy homeowners who want a spotless cooking environment without the hassle. This feature is a standout advantage for those seeking convenience and effectiveness in their kitchen appliances.

Preparing for the Self-Cleaning Cycle

Before starting, remove oven racks and utensils, ensure the oven is empty, and confirm all safety precautions are in place to avoid hazards during the high-temperature cleaning process.

Removing Oven Racks and Utensils

Before initiating the self-cleaning cycle, it is essential to remove all oven racks, pans, and utensils to prevent damage during the high-temperature cleaning process. This step ensures the oven cleans evenly and avoids any potential hazards. Gently pull out the racks and place them in a safe location for cleaning separately. Additionally, remove any food or cookware stored inside the oven; This precaution prevents items from melting or warping due to extreme heat. For racks, wash them with mild soap and water or place them in the dishwasher for a thorough clean. Once the self-cleaning cycle is complete and the oven has cooled, the racks can be reinstalled. Always refer to your Frigidaire self-cleaning oven manual for specific instructions tailored to your model.

Ensuring Safety Before Cleaning

Before starting the self-cleaning cycle, ensure all safety precautions are in place to avoid accidents. Remove all racks, pans, and utensils from the oven, as they may warp or melt during high-temperature cleaning. Close the oven door securely and ensure it is locked to prevent accidental opening. Avoid using abrasive cleaners or metal scourers, as they can damage the oven’s interior. Keep the area well-ventilated to prevent fumes from building up. Never leave the self-cleaning cycle unattended, especially if there are children or pets nearby. Additionally, do not clean the oven door gasket, as it may be damaged by heat or cleaning products. Always refer to your Frigidaire self-cleaning oven manual for model-specific safety guidelines to ensure a safe and effective cleaning process.

Activating the Self-Cleaning Cycle

Press the Self-Clean button on the control panel, select the desired cleaning time or soil level, and ensure the oven door is fully closed and locked before starting the cycle.

Step-by-Step Instructions for Starting the Cycle

To activate the self-cleaning cycle on your Frigidaire oven, start by ensuring the oven door is fully closed and the clock is set to the correct time of day. Press the Self-Clean button on the control panel until the display shows “Clean.” Next, select the desired cleaning time using the up or down arrow keys—typically 2 to 4 hours, depending on soil level. Alternatively, choose the cleaning level: light, medium, or heavy soiled. Once your selection is made, press Start to begin the cycle. The oven door will lock automatically, and the cycle will start. The oven will heat to a high temperature, turning food residue into ash. Allow the cycle to complete, then let the oven cool completely before opening the door. Once cooled, wipe away the ash with a damp cloth. Always follow the instructions in your owner’s manual for specific model details.

Selecting Cleaning Time or Soil Level

When using your Frigidaire self-cleaning oven, selecting the appropriate cleaning time or soil level is crucial for effective results. Start by assessing the oven’s interior: light soil requires a shorter cycle, while heavy buildup needs more time. Use the control panel to choose between a 2- to 4-hour cleaning time or select the soil level—light, medium, or heavy. Press the Self-Clean button, then use the arrow keys to adjust your selection. For a delay start, ensure the clock is set correctly. Once satisfied with your choice, press Start. The oven will lock and begin the cycle, using high heat to turn residue into ash. Remember, the door remains locked until the cycle completes and the oven cools. Always refer to your manual for specific guidance tailored to your model.

Post-Cleaning Procedures

After the self-cleaning cycle, allow the oven to cool completely before opening. Wipe away ash with a damp cloth and replace oven racks, ensuring a clean and safe cooking environment.

Allowing the Oven to Cool Down

After the self-cleaning cycle completes, it’s essential to let the oven cool down entirely before proceeding. This step ensures safety and prevents accidental burns or damage. The oven door will remain locked until it has cooled sufficiently, indicated by the “Lock” light turning off. Avoid opening the door prematurely, as the interior will still be extremely hot. Allow at least 1-2 hours for the oven to cool down naturally. During this time, keep the kitchen well-ventilated to eliminate any lingering odors from the cleaning process. Once the oven has cooled and the door unlocks, you can safely proceed to wipe away ashes and restore the oven racks. Patience is key to ensure a smooth and safe post-cleaning experience.

Wiping Away Ashes and Replacing Racks

Once the oven has cooled completely, it’s time to remove the ash residue left behind from the self-cleaning cycle. Use a damp cloth or sponge to gently wipe away the ashes, working from the top down to prevent them from spreading. Avoid using abrasive cleaners or scrubbers, as they may damage the oven’s finish. For tougher residue, a soft brush can be used to loosen the particles before wiping. After cleaning, dispose of the ashes properly. Finally, reinstall the oven racks and any utensils you removed earlier. Ensure they are clean and dry before placing them back to prevent water spots. Once everything is in place, your oven is ready for its next use. Regularly wiping away ashes and replacing racks helps maintain your oven’s performance and appearance.

manual honeywell alarm

The Honeywell Alarm System is a reliable security solution designed to protect homes and offices with advanced technology and user-friendly controls, ensuring comprehensive safety and peace of mind always.

Overview of the Honeywell Alarm System

The Honeywell Alarm System is a cutting-edge security solution designed to provide reliable protection for homes and businesses. It features advanced sensors and detectors that monitor for unauthorized entry, fire, and gas leaks, ensuring early detection and swift response. The system includes a user-friendly control panel, wireless capabilities, and integration with smart devices for seamless monitoring. With customizable zones and remote access, it offers flexibility and adaptability to meet diverse security needs. Honeywell’s commitment to innovation ensures high performance, making it a trusted choice for comprehensive security solutions. Its robust design and intuitive operation make it ideal for both residential and commercial use.

Importance of the User Manual

The user manual is essential for understanding and effectively using the Honeywell Alarm System. It provides detailed instructions on installation, operation, and troubleshooting, ensuring users can maximize the system’s features. The manual explains how to set up zones, program codes, and integrate sensors, helping users customize their security setup. It also outlines maintenance tips and software updates, crucial for system longevity. By following the manual, users can avoid common issues and ensure optimal performance. Accessing the manual online at www.honeywell.com/manuals allows users to stay informed and make the most of their Honeywell Alarm System for enhanced security and peace of mind.

Key Features of the Honeywell Alarm System

The Honeywell Alarm System offers advanced security solutions with intelligent sensors, real-time notifications, and customizable settings. It includes smoke, heat, and motion detectors for comprehensive protection. The system supports remote access via Total Connect 2.0, enabling users to monitor and control their security from anywhere. Key features also include programmable zones, multiple user codes, and integration with smart home devices. The system’s scalability allows it to adapt to various property sizes and security needs. With its robust architecture and user-friendly interface, Honeywell ensures reliable protection against intruders, fires, and environmental hazards, providing peace of mind for homes and businesses alike.

System Components and Architecture

The Honeywell Alarm System comprises a control panel, sensors, detectors, sounders, and communication modules, working together to provide comprehensive security through advanced detection and alert mechanisms seamlessly.

Control Panel and Its Functions

The control panel is the central hub of the Honeywell Alarm System, managing all components and ensuring seamless operation. It processes signals from sensors and detectors, enabling precise responses to security breaches. Equipped with a user-friendly interface, the control panel allows for easy arming and disarming of the system. It also monitors multiple zones, stores event logs, and interfaces with keypads and remote controls. The control panel plays a vital role in enhancing security by processing alarm triggers and coordinating system responses effectively. Refer to the manual for detailed instructions on configuring and operating the control panel for optimal performance.

Sensors and Detectors: Types and Roles

Sensors and detectors are the backbone of the Honeywell Alarm System, ensuring timely detection of potential threats. Smoke detectors identify elevated smoke levels, while heat detectors sense abnormal temperature rises. Motion detectors monitor unauthorized movement, and panic buttons enable manual alarm activation. Carbon monoxide detectors alert users to dangerous gas levels, and door/window sensors trigger alarms upon unauthorized entry. These components integrate seamlessly with the control panel, providing real-time alerts and enabling prompt responses. Proper installation and configuration, as outlined in the manual, are crucial for optimal performance and reliable security. Regular maintenance ensures sensors remain accurate and responsive to threats.

Alarm Indicators and Sounders

Alarm indicators and sounders are crucial components of the Honeywell Alarm System, ensuring clear and immediate notification of threats. Sounders emit a loud, interrupted pulsed tone to alert users of an alarm condition, while strobe lights provide visual signals for enhanced awareness. These devices are strategically placed throughout the premises to ensure maximum visibility and audibility. The system integrates seamlessly with smoke and heat detectors, triggering alarms upon detection of fire or unauthorized entry. Proper installation and configuration, as outlined in the manual, are essential for optimal performance. Regular testing of sounders and indicators ensures reliability and compliance with safety standards.

Installation and Setup

The Honeywell Alarm System requires careful preparation and a step-by-step installation process to ensure proper setup and functionality. Initial configuration is essential for optimal performance.

Preparing the System for Installation

Before installing the Honeywell Alarm System, ensure all components are carefully unpacked and inspected for damage. Verify the control panel, sensors, and detectors are included. Charge any rechargeable devices and ensure power sources are available. Review the user manual to understand the system’s requirements and compatibility. Plan the layout of sensors and detectors based on the property’s dimensions and security needs. Disable any existing alarms to avoid interference during setup. Familiarize yourself with the installation process outlined in the manual to ensure a smooth and efficient setup. Proper preparation ensures the system operates effectively and provides reliable security.

Step-by-Step Installation Guide

Begin by mounting the control panel in a central, easily accessible location. Connect all sensors and detectors to the panel, ensuring secure wiring. Follow the manual’s wiring diagram for accurate connections. Install motion detectors in high-traffic areas and smoke detectors in every room. Program the system by entering user codes and configuring zones. Test each sensor to ensure proper functionality. Finally, review the setup to confirm all components are operational and integrated correctly. Refer to the user manual for specific instructions tailored to your Honeywell model. Proper installation ensures reliable performance and maximum security for your property.

Initial System Configuration

After installation, power on the system and enter the installer code to access configuration mode. Assign user codes and configure zones according to sensor types. Program each zone with a unique identifier and set sensitivity levels for motion detectors. Ensure all devices integrate seamlessly with the control panel. Test each sensor to confirm proper functionality and adjust settings as needed. Save the configuration and exit setup mode. Finally, review the system to ensure all components are operational and configured correctly. This step ensures your Honeywell alarm system is tailored to your security needs and operates efficiently from the start.

Operating the Honeywell Alarm System

Enter your 4-digit code to arm or disarm the system. Use the keypad or remote control for easy operation. Understand alarm triggers and responses to ensure proper security management.

Arming and Disarming the System

To arm the Honeywell Alarm System, enter your 4-digit code followed by the “Set” button. Disarm by re-entering the code. Use the keypad or remote control for convenience. In “Set” mode, all sensors are active, and any unauthorized entry triggers the alarm. Tamper alarms in “Set” mode cause a full alarm condition. Silence alarms by entering your code and pressing “OFF.” Ensure all doors and windows are closed before arming to avoid false triggers. The system provides clear feedback through LEDs and sounders, making it easy to confirm its status. Regularly test arming and disarming to ensure smooth operation. Always keep your code secure.

Understanding Alarm Triggers and Responses

The Honeywell Alarm System detects unauthorized entry, fire, or gas leaks through its advanced sensors and detectors. When a trigger occurs, the system activates audible alarms and visual indicators, ensuring immediate awareness; Smoke and heat detectors trigger alarms and send signals to the control panel, which then alerts users and external sounders. In emergency situations, the system provides clear feedback, such as a loud, interrupted pulsed sound from keypads and external devices. Users can reset the system by entering their code. Prompt action is essential to address triggers effectively. The system’s response ensures safety and allows for quick resolution of potential threats.

Using the Keypad and Remote Controls

The Honeywell Alarm System provides user-friendly control through its keypad and remote controls. The keypad allows users to arm or disarm the system, silence alarms, and monitor the status of all sensors. By entering a 4-digit code, users can securely manage their security settings. Remote controls offer added convenience, enabling users to operate the system from a distance. Both the keypad and remote controls ensure easy navigation and quick responses to alerts. For advanced features or troubleshooting, users can refer to the system’s user manual for detailed instructions and commands, ensuring seamless operation and enhanced security.

Troubleshooting and Maintenance

Troubleshooting the Honeywell Alarm System involves identifying common issues like sensor malfunctions and connectivity problems. Regular maintenance, such as cleaning detectors and updating software, ensures optimal performance and reliability.

Common Issues and Solutions

Troubleshooting your Honeywell Alarm System often involves addressing common issues like false alarms, sensor malfunctions, or low battery warnings. To resolve these, ensure sensors are clean and free from dust, as dirt can trigger false alarms. For low battery alerts, replace batteries promptly and restart the system. If keypad errors occur, check for correct code entry and ensure the keypad is synchronized with the control panel. If issues persist, refer to the user manual or contact Honeywell support for assistance. Regular system checks and updates can prevent many problems, ensuring your security system operates smoothly and reliably.

Regular Maintenance Tips

Regular maintenance is crucial to ensure your Honeywell Alarm System operates efficiently. Start by cleaning smoke and heat detectors with a soft brush or vacuum to remove dust and debris. Check battery levels monthly and replace them every 3-5 years or as indicated by low-battery alerts. Inspect wiring for damage or wear and secure any loose connections. Update system software periodically to access the latest features and security patches. Test your system monthly by triggering a test alarm to ensure all components function properly. Finally, review user codes and settings to maintain system security and performance over time.

Updating System Software

Regular software updates are essential for maintaining the performance and security of your Honeywell Alarm System. To update, log into your Total Connect 2;0 account and check for available updates. Follow the on-screen instructions to download and install the latest version. Ensure the system is connected to a stable power source during the update to avoid interruptions. For advanced models like the VISTA-21iP or LYNX Touch L5200, updates can be performed via USB or wirelessly if enabled. Always refer to the user manual for specific instructions, as update methods may vary depending on the system model and configuration.

pt legend manual

Welcome to the PT Legend Manual, your comprehensive guide to understanding and utilizing the PT Legend device effectively. This manual provides detailed instructions, tips, and troubleshooting solutions to ensure optimal performance and user satisfaction. Refer to it regularly for the best experience with your PT Legend.

1.1 Overview of the PT Legend Device

The PT Legend is a cutting-edge wireless headset designed for seamless communication and comfort. With advanced noise-canceling technology, ergonomic design, and intuitive voice controls, it offers an exceptional user experience. Its extended battery life and Bluetooth connectivity make it ideal for professionals seeking reliability and performance. Built for durability, the PT Legend is perfect for those needing a high-quality headset for extended use in various environments.

1.2 Importance of the Manual for Users

This manual is essential for users to maximize the potential of their PT Legend device. It provides clear instructions for setup, operation, and troubleshooting, ensuring optimal performance. Understanding the features and settings through this guide enhances user experience, resolves common issues, and extends the device’s lifespan. Referencing this manual helps users unlock all functionalities and maintain their PT Legend in top condition for years to come.

Key Features of the PT Legend

The PT Legend boasts an ergonomic design, advanced noise-canceling technology, and seamless Bluetooth connectivity. It also features intuitive voice controls and customizable settings for enhanced functionality and comfort.

2.1 Design and Comfort

The PT Legend features an ergonomic design with interchangeable ear gels to ensure a perfect fit. Its lightweight frame and soft cushions provide all-day comfort, making it ideal for extended use. The sleek design not only enhances durability but also allows for easy storage and portability, ensuring a seamless experience for users in various settings.

2.2 Advanced Noise-Canceling Technology

The PT Legend incorporates cutting-edge noise-canceling technology to deliver crystal-clear audio. Its advanced microphone system minimizes ambient noise, ensuring sharp voice quality during calls. The ergonomic design, paired with noise-sealing ear gels, enhances sound isolation for an immersive experience. Whether in loud environments or quiet spaces, the PT Legend ensures uninterrupted communication and rich, distortion-free sound, making it a standout in its class.

Setup and Installation

Setting up your PT Legend is straightforward. Charge the device, turn it on, and pair it with your preferred Bluetooth-enabled device for seamless connectivity and use.

3.1 Step-by-Step Installation Guide

Step 1: Charge the PT Legend using the provided USB-C cable until the indicator light turns green, ensuring a full battery for initial setup.
Step 2: Power on the device by holding the power button for 3 seconds until the LED blinks blue.
Step 3: Enable Bluetooth on your phone or computer, search for “PT Legend,” and select it to pair.
Step 4: Once connected, you’ll hear a confirmation tone and see a solid blue light. Your PT Legend is now ready for use.

3.2 Pairing the Device with Bluetooth

Pairing your PT Legend: Ensure Bluetooth is enabled on your device. Put the PT Legend in pairing mode by pressing and holding the power button until the LED flashes blue. Open your device’s Bluetooth settings, select “PT Legend” from the available options, and confirm the connection. Once paired, the LED will turn solid blue, indicating successful pairing. For multiple devices, repeat the process and switch using your device’s Bluetooth menu.

Usage and Controls

Masters the PT Legend’s intuitive controls, including play/pause, volume adjustment, and noise-canceling activation. Use voice commands for hands-free operation and customize settings via the companion app.

4.1 Navigating the Control Buttons

The PT Legend features intuitive control buttons for seamless operation. The play/pause button doubles as a call answer/end key. Volume controls are located on the side for easy adjustment. The noise-canceling button toggles between modes, enhancing audio clarity. Use the voice command button for hands-free interactions. Familiarize yourself with these buttons to optimize your user experience and streamline device functionality effectively.

4.2 Customizing Settings for Optimal Performance

Customize your PT Legend experience by tailoring settings to your preferences. Adjust equalizer settings for enhanced sound quality and activate noise-canceling modes to suit your environment. Enable voice prompts for hands-free notifications and personalize button functions for convenience. Use the companion app to explore advanced options, ensuring your device performs at its best for every scenario, from calls to music playback, enhancing overall satisfaction and usability.

Troubleshooting Common Issues

Troubleshoot common issues with your PT Legend device, such as connectivity problems or sound quality concerns. This section provides practical solutions to ensure smooth operation and optimal performance.

5.1 Resolving Connectivity Problems

Experiencing connectivity issues with your PT Legend? Start by restarting your device and ensuring Bluetooth is enabled. Check for firmware updates and reset pairing settings if needed. Ensure no interference from nearby devices. If problems persist, refer to the manual for advanced troubleshooting steps to restore a stable connection and enjoy uninterrupted use.

5.2 Addressing Sound Quality Concerns

Ensure optimal sound quality by selecting the right ear gel size for a snug fit, which enhances noise cancellation. Reset your PT Legend by turning it off and on. Check for firmware updates to resolve audio glitches. Clean the earbuds and microphone regularly to maintain clarity. If issues persist, refer to the troubleshooting section for advanced solutions to restore premium sound performance.

Maintenance and Care

Regularly clean your PT Legend with a soft cloth and avoid exposure to extreme temperatures. Store it in a dry place to preserve functionality and longevity.

6.1 Cleaning and Storage Tips

Use a soft, dry cloth to wipe the PT Legend, avoiding harsh chemicals or moisture. Store it in a cool, dry place, ideally in its original case. Regularly inspect and clean the ear gels and speakers to ensure sound quality. Avoid extreme temperatures and humidity to maintain functionality. Proper care extends the lifespan and performance of your device.

6.2 Extending Battery Life

To maximize battery longevity, ensure the PT Legend is turned off when not in use and avoid overcharging. Update firmware regularly for optimized power management. Use the power-saving mode when possible and store the device in a cool, dry environment. Avoid exposing it to extreme temperatures, as this can drain the battery faster. Proper charging habits will extend the overall battery life.

Warranty and Support

Your PT Legend device is backed by a comprehensive warranty program; For more details, visit the official support page or contact customer service for assistance.

7.1 Understanding the Warranty Terms

The PT Legend device is protected by a limited warranty that covers manufacturing defects for a specified period. To understand your warranty terms, visit the official support page. Ensure your device is registered to validate the warranty. The terms and conditions are outlined in the product support section for your convenience.

7.2 Accessing Customer Support

To access customer support for your PT Legend device, visit the official product support page. Enter your serial number to check warranty status and view available resources. You can contact support through live chat, email, or phone for assistance. The knowledgeable team is ready to help with any questions or issues you may have, ensuring a smooth and satisfactory experience with your device.

Advanced Features and Customization

Explore advanced features and customization options to tailor your PT Legend experience. Discover how to optimize settings, use voice controls, and update firmware for enhanced functionality and personalization.

8.1 Using Voice Controls Effectively

Maximize your experience with the PT Legend by utilizing voice controls. Activate commands with a simple voice prompt, allowing hands-free operation. Common commands include play, pause, and volume adjustment. Ensure clear speech for accurate recognition. Troubleshoot by recalibrating the voice assistant or checking microphone settings. Regularly update firmware to enhance voice control functionality and responsiveness for seamless integration into your daily use.

8.2 Updating Firmware for Enhanced Performance

Regular firmware updates are essential for unlocking new features, improving performance, and fixing bugs. Connect your PT Legend to a computer, launch the official software, and follow on-screen instructions to update. Ensure the device remains connected until the process completes. The system will restart automatically, confirming the update. Always check for the latest firmware to maintain peak functionality and security.

9.1 Summary of Key Takeaways

The PT Legend Manual offers a detailed guide to optimizing your device experience. Key takeaways include proper setup, effective use of noise-canceling technology, and troubleshooting tips. Regular maintenance and utilizing advanced features like voice controls enhance performance. Understanding warranty terms and accessing support ensures longevity. By following this manual, users can maximize their PT Legend’s potential and enjoy a seamless, high-quality experience.

9.2 Benefits of Using the PT Legend

The PT Legend offers superior comfort, advanced noise-canceling technology, and intuitive voice controls, enhancing your audio experience. Its ergonomic design ensures all-day wearability, while seamless connectivity provides uninterrupted performance. With features like customizable settings and extended battery life, the PT Legend is designed to meet your needs, delivering crystal-clear sound and effortless functionality, making it an indispensable tool for everyday use.

hotpoint oven instruction manuals

Hotpoint Oven Instruction Manuals Overview

Your Hotpoint oven manual provides essential guidance for safe installation, operation, and maintenance․ It includes detailed instructions for using cooking modes, troubleshooting, and understanding error codes․ Always refer to it for optimal performance and to ensure warranty compliance․ The manual also offers tips for cleaning and replacing parts, helping you maintain your appliance effectively․ Downloading the manual online is quick and convenient, ensuring you have all the information needed at your fingertips․ By following the guidelines, you can enjoy efficient and safe cooking experiences with your Hotpoint oven․

Hotpoint oven manuals are comprehensive guides designed to help users understand and utilize their appliances effectively․ These manuals cover essential topics such as installation, operation, and maintenance, ensuring safe and efficient use of the oven․ They provide detailed instructions for selecting cooking modes, setting timers, and troubleshooting common issues․ Additionally, the manuals include safety precautions and guidelines for proper care to extend the appliance’s lifespan․ Whether you’re a new user or seeking to optimize your cooking experience, the manual serves as an invaluable resource․ Digital versions are readily available for easy access, making it simple to navigate and apply the instructions provided․

Importance of Reading the Manual

Reading the Hotpoint oven manual is crucial for ensuring safe and efficient appliance operation․ It provides critical information on proper installation, electrical requirements, and gas connections, preventing potential hazards․ The manual outlines safety precautions, such as child safety features and error code interpretations, which are essential for user protection․ Understanding operating modes, timer functions, and maintenance tips helps maximize the oven’s performance and longevity․ Failure to follow guidelines can void warranties and lead to unsafe conditions․ By reviewing the manual, users can avoid common mistakes and enjoy a seamless cooking experience․ It serves as a vital resource for troubleshooting and maintaining the appliance effectively․

Installation and Setup

Proper installation ensures safe and efficient oven operation․ Follow the manual’s instructions for electrical and gas connections, and ensure all setup steps are completed by a qualified technician to prevent hazards and maintain warranty validity․

Electrical Connection Requirements

Ensure your Hotpoint oven is installed by a qualified technician to meet local electrical regulations․ The appliance must be connected to a grounded outlet with a voltage rating matching the oven’s specifications, typically 230V or 240V․ Avoid using extension cords and ensure the power supply is stable․ Proper grounding is essential for safety and to prevent electrical hazards․ Refer to the manual for specific wiring instructions and diagrams․ Failure to follow these guidelines may void the warranty or pose safety risks․ Always double-check connections before first use to guarantee reliable operation and compliance with safety standards․

Gas Connection Guidelines

When installing a gas-powered Hotpoint oven, ensure all connections are made by a qualified technician to comply with local regulations․ Use only approved gas hoses and pipes, ensuring compatibility with your appliance․ The gas tap or valve should be easily accessible for shutdown during emergencies․ Before connecting, turn off the main gas supply and conduct a leak test using a soapy water solution to ensure airtight seals․ Refer to the manual for specific pressure requirements and connection diagrams․ Always follow the manufacturer’s instructions for gas line installation to prevent hazards․ Proper installation ensures safe and efficient operation of your Hotpoint oven․

Safety Precautions

Always follow the Hotpoint oven manual’s safety guidelines to prevent accidents․ Keep children away, use protective gear, avoid flammable materials, and ensure proper installation and ventilation․

General Safety Instructions

Adhering to the general safety instructions in your Hotpoint oven manual is crucial for safe operation․ Ensure the appliance is installed by a qualified technician and grounded properly․ Always read the manual before first use to understand safety features and guidelines․ Keep children aged under 8 away from the oven while it is in operation․ Avoid wearing loose clothing near the oven and never leave cooking unattended․ Regularly inspect the appliance for damage and ensure proper ventilation to prevent carbon monoxide buildup․ Follow all safety precautions to enjoy a safe and efficient cooking experience with your Hotpoint oven․

Child Safety Features

Hotpoint oven manuals emphasize child safety features to protect young users․ These features include child locks and secure controls to prevent accidental operation․ The manual recommends keeping children under 8 years old away from the oven while it is in use․ Ensure the appliance is installed with safety locks activated to avoid unintended access․ Regularly check the locks to ensure they are functioning properly․ Supervision is key when children are near the oven․ By following these guidelines, you can create a safer kitchen environment for your family while maintaining the functionality and efficiency of your Hotpoint oven․

Oven Operation Modes

Hotpoint ovens offer multiple operation modes, including manual cooking and timer functions, allowing precise control․ The manual guides selecting the ideal mode for various recipes efficiently․

Manual Cooking Mode

The manual cooking mode on your Hotpoint oven allows you to set the temperature and cooking time independently, giving you full control over your cooking process․ This mode is ideal for recipes that require specific conditions․ To use it, simply select the desired temperature using the control panel and set the timer․ The oven will maintain the chosen temperature until the timer expires․ The default temperature settings vary depending on the selected mode, such as conventional or fan-assisted cooking․ Always refer to the manual for precise instructions to ensure optimal results and safe operation․ This feature is perfect for achieving consistent cooking outcomes tailored to your needs․

Using the Timer Function

The timer function on your Hotpoint oven allows you to set a specific cooking duration, ensuring your dishes are cooked to perfection․ To use it, select the timer icon on the control panel and adjust the cooking time using the plus or minus buttons․ Once set, press ‘OK’ to start the timer․ The oven will automatically shut off when the timer reaches zero, preventing overcooking․ This feature is particularly useful for recipes that require precise timing․ Always ensure the timer is set correctly before starting to avoid any issues․ The timer function is a convenient tool that enhances your cooking experience by providing greater control and efficiency in the kitchen․

Maintenance and Care

Regular maintenance ensures your Hotpoint oven operates efficiently․ Clean surfaces regularly, check seals for wear, and replace parts as needed․ Use recommended cleaning products and schedule professional servicing annually․

Cleaning the Oven

To maintain your Hotpoint oven’s performance, regular cleaning is essential․ Always switch off and let the oven cool before cleaning․ Use gentle, non-abrasive cleaners or steam cleaning functions to avoid damaging surfaces․ For tough stains, apply a specialized oven cleaner and follow instructions carefully․ Avoid using harsh chemicals near heating elements․ Remove racks and shelves, washing them separately with soap and warm water․ Clean the oven door and seals thoroughly to ensure proper closure․ Wipe down all surfaces with a damp cloth after cleaning․ Regular maintenance prevents grime buildup, ensuring efficient cooking and longevity of your appliance․ Refer to your manual for specific cleaning recommendations․

Replacing Oven Parts

Replacing oven parts is crucial for maintaining performance and safety․ Always use genuine Hotpoint parts to ensure compatibility and reliability․ Identify the correct part number from your manual or the manufacturer’s website․ Turn off power and let the oven cool before starting․ Follow the manual’s step-by-step instructions for removal and installation․ Wear protective gloves to avoid injury․ If unsure, consult a qualified technician to avoid damaging the appliance or voiding the warranty․ Regularly inspect and replace worn-out parts like seals or racks to prevent leaks and maintain efficiency․ Keep track of replacement dates to ensure optimal functioning․ Refer to the troubleshooting section for common part issues and solutions․

Troubleshooting Common Issues

Troubleshooting your Hotpoint oven involves identifying error codes and addressing common problems like uneven heating or malfunctioning timers․ Refer to the manual for diagnostic guidance and solutions․

Identifying Error Codes

Your Hotpoint oven manual includes a section dedicated to error codes, helping you diagnose issues quickly․ Codes like E01 or E02 indicate specific problems, such as sensor malfunctions or heating element failures․ Refer to the manual for a detailed list of codes and their meanings․ Understanding these codes allows you to address issues effectively, whether it’s adjusting settings or requiring professional assistance․ The manual also provides step-by-step solutions for common errors, ensuring your oven operates smoothly․ By referencing the error code section, you can troubleshoot efficiently and avoid unnecessary repairs․ This feature enhances your overall cooking experience by minimizing downtime and ensuring safety․

Resolving Common Problems

Your Hotpoint oven manual includes a troubleshooting section to help resolve common issues․ Problems like uneven heating or malfunctioning timers can often be fixed by checking the oven’s calibration or ensuring proper power supply․ The manual provides step-by-step solutions for issues such as error codes, faulty sensors, or interrupted cooking cycles․ It also guides you on how to reset the oven or replace faulty parts․ For more complex problems, the manual advises when to contact a professional․ By following the troubleshooting guide, you can quickly identify and resolve issues, ensuring your oven operates efficiently․ This section is designed to help you maintain your appliance and extend its lifespan․ Regular reference to this guide ensures optimal performance and safety․

Additional Resources

Additional resources for your Hotpoint oven include downloadable user manuals and access to customer support․ Visit the official website to find these tools and ensure optimal appliance performance․ For further assistance, contact Hotpoint support directly․

Downloading the Manual

Downloading your Hotpoint oven manual is a straightforward process․ Visit the official Hotpoint website or authorized portals to access the PDF version․ Use the model number search tool for quick retrieval․ Ensure you download from trusted sources to avoid counterfeit documents․ Once downloaded, save the manual for easy reference․ It contains detailed instructions, troubleshooting guides, and diagrams․ Regularly check for updates to ensure you have the latest version․ The manual is a valuable resource for understanding your oven’s features, error codes, and maintenance tips․ Keep it handy to resolve issues efficiently and make the most of your appliance’s capabilities․

Contacting Hotpoint Support

For assistance with your Hotpoint oven, visit the official website to access the support section․ Use the self-help tool by entering your appliance’s model number to find specific guidance․ If further help is needed, contact Hotpoint support via phone, email, or live chat․ The website also provides a comprehensive FAQ section and troubleshooting guides․ Ensure you have your model number ready for faster assistance․ Hotpoint’s customer service team is available to address queries related to installation, operation, and maintenance․ Additionally, you can find authorized service centers for professional help․ Visit Hotpoint’s official website to explore these support options and resolve any issues efficiently․

mcculloch power mac 310 manual

The McCulloch Power Mac 310 is a popular chainsaw model known for its durability and performance․ This manual provides essential guidance for safe operation, maintenance, and troubleshooting to ensure optimal functionality and longevity of the tool․

1․1 Overview of the McCulloch Power Mac 310 Chainsaw

The McCulloch Power Mac 310 is a reliable and efficient chainsaw designed for various cutting tasks․ It is part of a series that includes models like the 320 and 330, offering durability and ease of use․ This chainsaw is ideal for homeowners and professionals needing a versatile tool for logging, pruning, or firewood preparation․ Its design emphasizes safety and performance, with resources like the PDF manual available for detailed guidance․

1․2 Importance of the Manual for Safe and Effective Use

The manual is crucial for ensuring safe and effective operation of the McCulloch Power Mac 310․ It provides detailed safety protocols, starting procedures, and maintenance tips to prevent accidents and prolong the chainsaw’s lifespan․ By following the guide, users can optimize performance and avoid common mistakes, making it an essential resource for both novice and experienced operators․

Model Identification and Specifications

The McCulloch Power Mac 310 is identified by its model number (e․g․, 600042) and suffix letters, which indicate specific parts variations․ This section details its key features and technical specs, ensuring proper identification and understanding of the chainsaw’s capabilities for optimal use․

2․1 Understanding Model Numbers and Suffix Letters

The McCulloch Power Mac 310 is identified by a unique model number, such as 600042, followed by a suffix letter (e․g․, A, B, C)․ These letters denote variations in parts or assemblies, indicating specific configurations or updates․ Understanding this system helps in identifying the exact model and its specifications, which is crucial for maintenance, repair, and ordering replacement parts accurately․

2․2 Key Features and Technical Specifications

The McCulloch Power Mac 310 features a powerful two-cycle engine, delivering efficient cutting performance․ It includes a high-quality chain and bar, designed for durability and precision․ The chainsaw is lightweight, ergonomic, and equipped with safety features like a chain brake․ Technical specifications ensure reliable operation, making it suitable for various cutting tasks, from trimming to heavy-duty logging, while adhering to McCulloch’s commitment to quality and engineering excellence․

Safety Guidelines and Precautions

The McCulloch Power Mac 310 requires adherence to safety guidelines to prevent accidents․ Always wear protective gear, ensure proper chain tension, and follow operational protocols for safe use․

3․1 General Safety Protocols for Chainsaw Operation

Always wear protective gear, including gloves, safety glasses, and sturdy footwear․ Ensure a firm grip and maintain a safe distance from bystanders․ Avoid cutting nearflammable materials and keep loose clothing tied back․ Regularly inspect the chainsaw for damage or wear․ Follow proper starting procedures and never operate the saw while fatigued or in unsafe conditions․

3․2 Safety Features of the McCulloch Power Mac 310

The McCulloch Power Mac 310 features a chain brake system for emergency stops, reducing kickback risks․ It includes a protective chain guard and handguards to prevent injury․ The saw is designed with a secure grip handle and a balanced structure to enhance control and stability during operation, ensuring safer cutting experiences for users․

Operating Instructions

This section provides step-by-step guidance on starting, stopping, and safely operating the McCulloch Power Mac 310, ensuring efficient and precise cutting experiences for users․

4․1 Starting and Stopping the Chainsaw

To start the McCulloch Power Mac 310, ensure the chain brake is engaged, prime the engine, and pull the starter rope firmly․ Once running, disengage the brake and adjust the throttle as needed; To stop, switch off the ignition and allow the chain to come to a complete stop before storing the saw․

4․2 Basic Cutting Techniques and Best Practices

For effective cutting, maintain proper posture and grip․ Plan your cut, ensuring the area is clear of debris․ Use a steady, controlled motion, applying consistent pressure without forcing the saw․ Keep the chain sharp and well-lubricated for optimal performance․ Always cut on the pull stroke and avoid overreaching․ Follow safety guidelines and use protective gear to minimize risks․

Maintenance and Servicing

Regular maintenance is crucial for optimal performance and longevity․ Key activities include checking and replacing worn parts, ensuring proper chain lubrication, and following guidelines․

5․1 Routine Maintenance Tasks

Regular maintenance ensures optimal performance and extends the chainsaw’s lifespan․ Tasks include checking and tightening the chain tension, lubricating the bar and chain, cleaning the air filter, and inspecting for worn or damaged parts․ Follow the manual’s guidelines for proper servicing to maintain efficiency and safety while operating the McCulloch Power Mac 310․

5․2 Advanced Servicing Techniques

Advanced servicing involves detailed disassembly, carburetor adjustment, and spark plug replacement․ Refer to the manual for specific torque settings and guidelines․ Proper tools and expertise are required to ensure safety and correctness․ Regular advanced servicing prolongs the chainsaw’s performance and reliability, preventing costly repairs and downtime․ Always follow the manufacturer’s recommendations for optimal results․

Troubleshooting Common Issues

Identify issues like poor performance or startup problems by checking fuel, spark plugs, and air filters․ Refer to the manual for diagnostic steps and solutions to ensure proper functionality and safety․

6․1 Diagnosing and Resolving Operating Problems

Identify operating issues by checking for symptoms like poor performance or difficulty starting․ Inspect fuel lines, spark plugs, and air filters for blockages or damage․ Clean or replace components as needed․ Consult the manual for troubleshooting charts to diagnose problems accurately․ Address issues promptly to maintain efficiency and safety․ If unresolved, contact McCulloch customer support for professional assistance․

6․2 Addressing Common Maintenance Challenges

Common maintenance challenges include clogged air filters, dull chains, and worn spark plugs․ Regularly inspect and clean these components․ Lubricate moving parts to prevent friction․ Replace worn or damaged elements promptly․ Use genuine McCulloch parts for optimal performance․ Refer to the PDF manual for detailed maintenance schedules and procedures․ Proper care ensures reliability and extends the saw’s lifespan․

Parts Diagram and Components

This section provides a detailed breakdown of the Power Mac 310’s components, including the engine, chain, bar, and safety features, with a visual diagram for easy identification․

7․1 Detailed Breakdown of Chainsaw Components

The McCulloch Power Mac 310 chainsaw consists of key components like the powerhead, which houses the engine and gearbox, and the cutting system, including the chain and bar․ Additional parts include the air filter, muffler, and ignition system․ Safety features like the chain brake and kickback mechanism are also highlighted, along with controls such as the throttle and stop switch, ensuring efficient and safe operation․

7․2 Identifying and Ordering Replacement Parts

To identify replacement parts for the McCulloch Power Mac 310, refer to the detailed parts diagram in the manual․ Use the model number and suffix letter to ensure accuracy․ Order genuine McCulloch parts through authorized dealers or online retailers․ Verify compatibility using the parts list and consult customer support if unsure․ This ensures proper fitment and maintains the chainsaw’s performance and safety standards․

PDF Manual and Additional Resources

The McCulloch Power Mac 310 manual is available as a free PDF download, providing detailed instructions for safe operation and maintenance․ Additional resources include service manuals and supplementary guides, accessible online for comprehensive support․

8․1 Accessing the McCulloch Power Mac 310 PDF Manual

The McCulloch Power Mac 310 PDF manual is easily accessible online․ Visit the official McCulloch website or platforms like ManualsLib to download the manual for free․ Simply search for “McCulloch Power Mac 310” and follow the download instructions․ The PDF format ensures compatibility with most devices, providing quick access to safety guidelines, operating instructions, and maintenance tips․

8․2 Supplementary Guides and Documentation

Supplementary guides for the McCulloch Power Mac 310 include detailed parts diagrams, advanced servicing techniques, and technical specifications․ These resources are available on the official McCulloch website or through authorized dealers․ They provide in-depth information for complex repairs and maintenance, ensuring users can fully utilize their chainsaw’s capabilities while adhering to safety and performance standards․

McCulloch’s Commitment to Quality and Innovation

McCulloch is committed to quality and innovation, continuously improving their chainsaws through advanced design and engineering to enhance performance and user satisfaction․

9․1 The History and Evolution of McCulloch Chainsaws

McCulloch, a renowned brand in power tools, has a rich history dating back to the 1940s when it first introduced innovative chainsaws․ The company revolutionized the industry with its first chainsaw, the “McCulloch Model 3-10,” setting a standard for durability and performance․

Over the years, McCulloch has evolved, incorporating advanced technologies and ergonomic designs into its products, such as the Power Mac 310, ensuring reliability and efficiency for users worldwide․

9․2 Continuous Improvement in Design and Engineering

McCulloch consistently updates its chainsaws, including the Power Mac 310, to reflect advancements in technology and user feedback․ This commitment ensures improved performance, safety, and ergonomics․ The company integrates innovative materials and engineering solutions to enhance durability and efficiency, making its tools more reliable for professionals and homeowners alike․

Customer Support and Service

10․1 Contacting McCulloch Customer Service

For inquiries or assistance, users can contact McCulloch customer service through their official website, where they can find contact forms, phone numbers, or email options․ Representatives are available to address questions, provide troubleshooting guidance, or assist with warranty claims․ Additionally, the website offers downloadable resources, including manuals and FAQs, to help users resolve common issues independently․ Support is available during specified business hours․

10․2 Warranty Information and Repair Options

The McCulloch Power Mac 310 is backed by a limited warranty covering defects in materials and workmanship․ For warranty claims, contact McCulloch customer service with proof of purchase․ Repairs can be performed by authorized service centers․ The manual provides detailed warranty terms and conditions, ensuring users understand coverage and repair processes to maintain their chainsaw effectively․

Environmental and Safety Compliance

The McCulloch Power Mac 310 complies with emissions standards and safety regulations, ensuring eco-friendly performance while meeting international safety requirements for reliable and secure operation․

11․1 Eco-Friendly Design and Emissions Standards

The McCulloch Power Mac 310 is designed with eco-friendly features to minimize environmental impact․ It adheres to rigorous emissions standards, ensuring reduced carbon footprint and compliance with global regulations․ The chainsaw’s efficient engine technology and sustainable design promote environmentally responsible use, aligning with McCulloch’s commitment to producing eco-conscious power tools for a greener future․

11․2 Compliance with International Safety Regulations

The McCulloch Power Mac 310 complies with international safety regulations, ensuring user protection and reliability․ Rigorous testing and certification processes guarantee adherence to global safety standards․ The chainsaw’s design incorporates multiple safety features, aligning with McCulloch’s reputation for producing reliable and secure power tools that meet or exceed industry requirements worldwide․

User Feedback and Reviews

Users consistently praise the McCulloch Power Mac 310 for its ease of starting, ergonomic design, reliable performance, and versatility, making it a top choice for professionals and homeowners alike․

12․1 Customer Experiences and Satisfaction

The McCulloch Power Mac 310 has received positive feedback for its reliability and ease of use․ Many users highlight its powerful performance, lightweight design, and user-friendly features․ Customers appreciate its versatility for various cutting tasks, making it a popular choice for both professionals and homeowners․ Overall, the chainsaw is praised for its durability and value for money․

12․2 Common Praise and Areas for Improvement

Users often praise the McCulloch Power Mac 310 for its robust engine, easy handling, and reliable performance․ However, some note that chain tensioning can be tricky, and maintenance requires frequent bar oil checks; Overall, it is a solid choice for medium-duty tasks, though minor design tweaks could enhance user experience and longevity․

The McCulloch Power Mac 310 manual emphasizes safety, proper maintenance, and efficient operation․ By following its guidelines, users can ensure optimal performance and longevity of their chainsaw․

13․1 Summary of Key Takeaways

The McCulloch Power Mac 310 manual highlights the importance of safety, proper maintenance, and effective operation․ Key takeaways include adhering to safety protocols, regular servicing, and understanding troubleshooting steps․ By following the guidelines, users can optimize performance, ensure longevity, and maintain environmental standards․ Proper use and maintenance are crucial for reliability and eco-friendly operation․

13․2 Encouragement for Proper Use and Maintenance

Proper use and maintenance of the McCulloch Power Mac 310 are crucial for ensuring safety, efficiency, and longevity․ By following the manual’s guidelines, users can maximize performance while minimizing wear and tear․ Regular servicing and adherence to safety protocols not only protect the operator but also maintain environmental standards․ Responsible ownership and care will ensure years of reliable service from this durable chainsaw․

gx430t manual

Product Specifications

The Zebra GX430t offers a 300 x 300 DPI print resolution and a 4 ips print speed. It supports thermal transfer and direct thermal printing, with ZPL and ZBI 2.0 compatibility. Connectivity includes USB, RS-232, and Bluetooth options.

1.1 Print Resolution and Speed

The Zebra GX430t delivers high-quality labels with a 300 x 300 DPI print resolution, ensuring crisp and clear output. It offers a print speed of up to 4 inches per second (ips), making it efficient for high-volume printing tasks. This combination of resolution and speed ensures precise and rapid label production, ideal for various industrial and commercial applications.

1.2 Thermal Transfer and Direct Thermal Printing

The Zebra GX430t supports both thermal transfer and direct thermal printing modes. Thermal transfer is ideal for durable, long-lasting labels using ribbon, while direct thermal eliminates the need for ribbon, making it cost-effective for temporary labels. Both modes operate at 300 dpi and 4 ips, ensuring high-quality output for diverse printing needs.

1.3 Supported Printing Languages (ZPL, EPL)

The Zebra GX430t supports ZPL (Zebra Programming Language) and EPL (EPL2), ensuring compatibility with various printing needs. ZPL enables advanced customization and control, while EPL provides simplicity for basic printing tasks. This dual-language support enhances flexibility, allowing users to optimize their printing operations for diverse applications and environments, making the GX430t a versatile choice for label printing solutions.

1.4 Connectivity Options

The Zebra GX430t offers versatile connectivity options, including USB, RS-232 (serial), and Bluetooth for wireless printing. These options ensure seamless integration with various systems and devices. The printer also supports Ethernet connectivity through an optional network interface, enabling efficient network-based printing solutions. This flexibility makes the GX430t suitable for diverse environments, from small offices to large enterprises, enhancing its adaptability and usability.

Manual Overview

The Zebra GX430t manual is a comprehensive guide for operating and maintaining the printer. It is available for free download on Zebra’s official website, providing detailed instructions for setup, troubleshooting, and optimal use of the device.

2.1 Where to Download the GX430T Manual

The Zebra GX430T manual can be downloaded for free from Zebra’s official website. It is categorized under Label Printers and is available in PDF format. The manual has received an average rating of 6 from users and contains proprietary information for operating and maintaining the printer. Visit the official Zebra support page to access the download link.

2.2 Key Sections of the Manual

The Zebra GX430T manual includes essential sections like initial setup instructions, troubleshooting, and maintenance tips. It provides detailed guides for installing drivers, configuring printer settings, and resolving common issues. Additionally, the manual covers media calibration and advanced features like ZBI 2.0 programming, ensuring comprehensive support for optimal printer operation and customization.

Installation and Setup

Install the Zebra Setup Utilities before connecting the printer. Follow on-screen instructions to configure settings and install drivers. Power on the printer after initial setup completes.

3.1 Initial Setup Instructions

Start by installing the Zebra Setup Utilities and connecting the printer. Power on the device after completing the initial setup. Press and hold the feed button until the green LED flashes three times, then send the XAXZ command to initialize. Ensure the printer is properly configured for your system using the provided drivers and connectivity options like USB, RS-232, or Bluetooth.

3.2 Media Calibration Process

The media calibration process involves manually adjusting the printer to detect the media type and length. The printer runs extensive tests to set media sensors and ensure proper alignment. This ensures accurate label printing and prevents issues. Follow the on-screen instructions or refer to the manual for detailed steps to complete the calibration successfully and maintain optimal print quality.

Troubleshooting

Common issues include media calibration and connectivity problems. Reset the printer by holding the feed button until the LED flashes. Refer to the manual for detailed solutions and troubleshooting steps to resolve errors and restore functionality quickly.

4.1 Common Issues and Solutions

Common issues with the Zebra GX430t include media calibration errors, connectivity problems, and print quality issues. Resetting the printer by holding the feed button until the status LED flashes three times often resolves calibration errors. For connectivity, ensure all cables are securely connected and Bluetooth is enabled. Poor print quality can be addressed by cleaning the printhead or adjusting print settings in the driver.

4.2 Printer Maintenance Tips

Regular cleaning of the printhead and print rollers prevents dust buildup and ensures consistent print quality. Replace the printhead when worn or damaged. Update the printer firmware to the latest version for optimal performance. Check and clean the media sensors to avoid calibration issues. Use only Zebra-approved supplies to maintain reliability and extend printer lifespan.

Compliance and Safety

The Zebra GX430t meets regulatory certifications for safe operation. Always follow safety standards to avoid hazards. Ensure proper electrical grounding and use approved power sources only.

5.1 Regulatory Certifications

The Zebra GX430t adheres to global regulatory standards, ensuring compliance and safety. It meets FCC, CE, and UL certifications. The printer is also ENERGY STAR certified, promoting energy efficiency. Compliance with CB and CCC standards ensures safe operation in various regions. These certifications guarantee the printer’s adherence to environmental and safety regulations, making it a reliable choice for diverse applications.

5.2 Safety Precautions

When operating the Zebra GX430t, ensure proper handling of the print head and rollers to avoid burns. Keep the printer out of reach of children and avoid direct contact with electrical components. Use only approved supplies to prevent damage or fire hazards. Always unplug the printer before performing maintenance. Follow all safety guidelines in the manual to ensure safe and efficient operation.

Drivers and Software

The GX430t supports ZPL and EPL programming languages. Install Zebra Setup Utilities for seamless driver installation. Additional software tools optimize printer performance and integration with Zebra technologies.

6.1 How to Install Drivers

To install the Zebra GX430t drivers, download the latest version from Zebra’s official website. Run the Zebra Setup Utilities installer and follow the on-screen instructions. Connect the printer to your PC after starting the installation process. Ensure the printer is powered on and properly detected by the system. This process is compatible with Windows operating systems and provides a seamless setup experience.

6.2 Zebra Printer Software Tools

The Zebra GX430t is supported by various software tools, including Zebra Setup Utilities for easy configuration and ZebraDesigner for label design. The printer also features ZBI 2.0, enabling custom applications. These tools enhance functionality, ensuring seamless integration with your system and improving printing efficiency. They are available for download on Zebra’s official website, providing comprehensive support for your printing needs.

Warranty and Support

Zebra offers a limited warranty for the GX430t, with support available until the service discontinuation date. Contact Zebra Authorized Service Providers for post-warranty assistance and repairs.

7.1 Warranty Information

The Zebra GX430t is covered by a limited warranty, providing coverage for defects in materials and workmanship. The warranty period varies by region but typically covers the printer for one year from the date of purchase. For specific details, including terms and conditions, refer to the official Zebra website or contact their customer support team directly.

7.2 Contacting Customer Support

For assistance with the Zebra GX430t, visit the official Zebra website and navigate to the support section. Use the contact forms, email, or phone options provided to reach their customer support team. Additionally, the Zebra Developer Portal offers resources for technical inquiries. Ensure to have your printer’s serial number ready for efficient support. The support team is available to address any questions or issues related to your printer.

User Guide

The Zebra GX430t User Guide provides comprehensive instructions for printer operation, including setup, installation, and troubleshooting. It is available for download on Zebra’s official website in English.

8.1 Purpose of the User Guide

The Zebra GX430t User Guide serves as an essential resource for users to understand and optimize printer functionality. It details installation steps, operational procedures, and troubleshooting techniques, ensuring smooth and efficient use of the printer. The guide is designed to help users maximize productivity while maintaining the printer’s performance and longevity.

8.2 Navigating the User Guide

The Zebra GX430t User Guide is structured into clear, numbered sections for easy navigation. It includes detailed instructions, diagrams, and troubleshooting tips. Users can quickly locate specific information using the table of contents or index. Key sections cover installation, operation, and maintenance, ensuring users can efficiently master the printer’s functionality and resolve common issues.

Accessories and Consumables

The Zebra GX430t supports various accessories, including high-quality ribbons, labels, and rolls. It uses thermal transfer ribbons and direct thermal media. Compatible consumables ensure optimal printing performance and durability.

9.1 Compatible Accessories

The Zebra GX430t supports a range of compatible accessories, including high-quality thermal transfer ribbons, direct thermal labels, and durable printheads. Additional accessories such as USB cables, power cords, and mounting brackets are available. These ensure seamless integration and optimal performance. The printer is designed to work with Zebra-approved consumables for consistent output and extended printhead life. Always use genuine Zebra accessories for best results.

9.2 Recommended Consumables

For optimal performance, the Zebra GX430t requires high-quality consumables. Genuine Zebra thermal transfer ribbons, direct thermal labels, and printheads are recommended. These ensure crisp, durable prints and extend the printer’s lifespan. Using certified consumables guarantees compatibility and consistent output. Always choose Zebra-approved products to maintain print quality and avoid potential damage to the printer. This ensures reliable operation and minimizes downtime.

Discontinuation Details

  • Printer discontinuation dates vary by region, with final sales ending in late 2021 or early 2022.
  • Support discontinuation is scheduled for April 30, 2025, in most regions.

10.1 Discontinuation Dates

  • The Zebra GX430t was discontinued for sale in APAC on December 31, 2021, and in EMEA, North, and Latin America on January 31, 2022.
  • Customer support for the printer ended on April 30, 2025, with no further assistance available after this date.

10.2 Alternative Models

Zebra recommends considering the GX420t as a direct replacement for the GX430t. Other alternatives include the ZD500 and ZT510 series, which offer enhanced features and compatibility. These models provide similar functionality with improved durability and advanced printing capabilities. Users can find detailed specifications and comparisons on Zebra’s official support page for streamlined transition and upgraded performance.

Advanced Features

The Zebra GX430t features the Zebra BASIC Interpreter (ZBI 2.0) for custom applications and supports ZPL and EPL programming languages. It also offers mobile printing capabilities for enhanced flexibility.

11.1 Zebra BASIC Interpreter (ZBI 2.0)

The Zebra BASIC Interpreter (ZBI 2.0) enables users to create custom applications for the GX430t printer. It supports ZPL and EPL programming languages, allowing for tailored solutions. ZBI 2.0 enhances printer functionality by enabling advanced scripting and integration with external systems, making it ideal for specific printing needs in various industries.

11.2 Mobile Printing Capabilities

The GX430t supports Bluetooth connectivity, enabling seamless mobile printing. It is compatible with iOS and Android devices, allowing users to print labels wirelessly. The printer also integrates with the Zebra Printer Setup Utility app, simplifying mobile configuration and enhancing productivity in dynamic environments. This feature ensures flexibility and convenience for on-the-go printing solutions.

Environmental Considerations

The Zebra GX430t is designed with energy efficiency in mind, using minimal power during operation. It is constructed from recyclable materials, promoting sustainability and adhering to environmental regulations.

12.1 Energy Efficiency

The Zebra GX430t is engineered to optimize energy consumption, ensuring low power usage during standby and operation. Its efficient design reduces environmental impact while maintaining high performance, making it an eco-friendly choice for businesses. Energy-saving features help minimize electricity costs and contribute to a sustainable printing solution.

12.2 Recycling Information

Zebra encourages responsible disposal of the GX430t through authorized recycling centers. Proper recycling helps reduce environmental impact and ensures compliance with regulations. Users are advised to contact local e-waste facilities or Zebra-authorized partners for safe disposal. This initiative supports sustainable practices and aligns with Zebra’s commitment to environmental stewardship.

The Zebra GX430t is a robust and reliable printer designed for high-quality label printing. With its advanced features and user-friendly design, it meets the needs of various industries. While the printer is discontinued, its durability and performance ensure continued productivity. Users are encouraged to explore newer models for updated technology, but the GX430t remains a solid choice for efficient labeling solutions.

mighty mule mm371w manual

Welcome to the Mighty Mule MM371W Gate Opener, a reliable solution for residential gate automation. Designed for single-swing gates, it offers durability, safety, and smart features. This manual ensures proper installation and operation, maximizing performance and longevity. Explore its benefits, features, and setup guidelines to enhance your property’s security and convenience.

1.1 Overview of the MM371W Model

The Mighty Mule MM371W is a medium-duty single-swing gate opener designed for residential use, compatible with gates up to 16 feet and 550 lbs. It meets Class I safety standards, ensuring reliable operation and security. Featuring smart technology and solar capability, this model offers convenience and energy efficiency. Ideal for homeowners seeking a durable, user-friendly solution for automated gate access, the MM371W combines strength, safety, and modern functionality.

1.2 Importance of the Manual for Proper Installation and Use

The manual is essential for correct installation, safe operation, and maximizing the MM371W’s performance. It provides step-by-step instructions, safety guidelines, and troubleshooting tips. Proper setup ensures reliability and longevity, while ignoring manual instructions can lead to accidents or system malfunctions. The manual helps users understand features, resolve issues, and maintain the gate opener effectively, ensuring optimal functionality and user safety over time.

Key Features of the Mighty Mule MM371W

The Mighty Mule MM371W features Dual Sense Technology for safety, solar capability, and compatibility with the Mighty Mule app for smart control, ensuring robust performance.

2.1 Dual Sense Technology for Enhanced Safety

Dual Sense Technology ensures advanced safety by stopping and reversing the gate upon encountering an obstruction. This feature meets Class I Residential Vehicular Gate Operator standards, providing reliable protection for people and vehicles. The technology enhances user confidence, knowing their gate operates safely and efficiently, adhering to rigorous safety protocols for residential use.

2.2 Solar Capability and Energy Efficiency

The MM371W features solar capability, enabling eco-friendly and cost-effective operation. With an included battery, it harnesses solar power for reliable performance without the need for wiring. Ideal for rural or off-grid properties, this energy-efficient solution reduces environmental impact while providing consistent gate operation. Compatible with solar panels, it offers a sustainable option for homeowners seeking to lower energy costs and carbon footprint.

2.3 Smart Features and Compatibility with Mighty Mule App

The MM371W integrates seamlessly with the Mighty Mule app, offering remote monitoring and control of your gate. This smart feature allows users to open, close, or check the gate’s status from anywhere using their smartphone. The app also provides notifications for gate activity, ensuring enhanced security and convenience. Compatible with multiple locations and devices, it simplifies gate management, making it a modern and efficient solution for homeowners.

System Components and Accessories

The MM371W includes a control box, transformer, remote controls, mounting hardware, and an instruction manual; Optional accessories like keypads, exit sensors, and solar kits enhance functionality.

3.1 Gate Opener Hardware and Included Parts

The MM371W gate opener system includes a control box, transformer, mounting hardware, and remote controls. Additional components like a battery, wiring, and sensors are provided for seamless installation. The package also contains an instruction manual, ensuring a smooth setup process. These parts are designed to work together, offering reliable performance and easy integration with optional accessories like solar panels and keypads for enhanced functionality.

3.2 Recommended Accessories for Optimal Performance

To maximize the functionality of your MM371W gate opener, consider adding recommended accessories. A solar panel kit (FM123) provides eco-friendly power, while the wireless keypad (FM137) adds secure entry without remotes. Exit wands (FM140) ensure safe detection of vehicles, and the automatic gate lock (FM143) enhances security. These accessories integrate seamlessly, offering convenience, energy efficiency, and robust performance tailored to your needs.

Installation and Setup Guidelines

Install your MM371W gate opener using the BILT app for guided instructions. Most installations take 2-3 hours with online videos and easy-to-read manuals provided for smooth setup.

4.1 Pre-Installation Checklist and Preparation

Before starting, ensure your gate is in good condition, properly aligned, and balanced. Verify the gate type and weight to confirm compatibility with the MM371W. Gather all tools and hardware provided in the kit. Check for any obstructions and ensure the area is clear. Review the manual thoroughly and prepare the necessary electrical connections. Ensure all safety precautions are understood to avoid accidents during installation.

4.2 Step-by-Step Installation Process

Start by attaching the control box to the gate post and installing the arm on the gate. Connect the wiring to the control box and sensors, ensuring proper alignment. Secure the solar panel (if using) for optimal energy efficiency. Follow the BILT app or manual for detailed guidance. Test the gate opener to ensure smooth operation and adjust settings as needed for reliable performance.

4.3 Initial Setup and Configuration

After installation, turn on the gate opener and install 2 AA batteries in the transmitter module. Use the remote control to test the gate’s operation. Adjust the sensitivity settings as needed for smooth performance. Ensure all safety features are activated. Refer to the manual for detailed configuration steps. Proper setup ensures reliable functionality and safety. If issues arise, consult the troubleshooting section or contact support for assistance.

Safety Guidelines and Precautions

The MM371W meets Class I Residential Vehicular Gate Operator safety standards. Ensure proper installation and maintenance to avoid accidents. Use Dual Sense Technology for obstacle detection and auto-close features for added security. Always follow manual instructions and test gate operation regularly.

5.1 Safety Requirements for Residential Use

The Mighty Mule MM371W is designed for single-family residential use, meeting UL 325 standards for Class I Residential Vehicular Gate Operators. It ensures safe operation with features like obstacle detection and automatic reversal. Proper installation and regular maintenance are crucial to prevent accidents. Always follow the manual’s guidelines for testing and ensure gate functionality aligns with residential safety regulations.

5.2 Best Practices for Avoiding Accidents

Ensure the gate area is clear of obstacles and people before operation. Regularly test safety features like obstacle detection and auto-reverse. Educate all users about proper gate operation and safety protocols. Maintain the gate and opener system as per the manual to prevent malfunctions. Always monitor the gate’s movement, especially when children or pets are nearby, to avoid potential hazards.

Troubleshooting Common Issues

Identify symptoms like gate not opening or unusual noises. Check sensors, wiring, and battery levels. Consult the manual for diagnostic steps or contact support for assistance.

6.1 Diagnosing and Resolving Common Problems

Start by identifying symptoms, such as the gate not opening or unusual noises. Check sensors, wiring, and battery levels. Ensure proper alignment and functionality of safety features. Use the BILT app for guided troubleshooting. Consult the manual for detailed diagnostic steps or contact Mighty Mule support for professional assistance. Regular maintenance and inspections can prevent recurring issues and ensure smooth operation.

6.2 Resetting the Gate Opener and Reinitializing Settings

To reset the Mighty Mule MM371W, turn the gate opener off and then on again. This process often resolves minor issues. Use the BILT app for guided reset instructions or refer to the manual. After resetting, reconfigure settings like auto-close and sensitivity. If issues persist, contact Mighty Mule support for advanced troubleshooting. Regular resets can help maintain optimal performance and ensure all features function correctly.

Maintenance and Care Tips

Regularly inspect and clean moving parts, lubricate hinges, and ensure proper alignment. Check battery levels and low voltage wire connections. Follow manual guidelines for optimal performance.

7.1 Regular Maintenance Tasks for Longevity

Inspect and clean moving parts regularly to ensure smooth operation. Lubricate hinges and gears with silicone-based lubricants to prevent wear. Check battery levels monthly and recharge as needed. Inspect low voltage wire connections for damage or corrosion. Clean the gate opener’s control box and sensors to maintain functionality. Refer to the manual for specific maintenance schedules and guidelines to extend the product’s lifespan and performance. Seasonal checks are recommended to address weather-related wear.

7.2 Cleaning and Lubricating Moving Parts

Regularly clean moving parts with a dry cloth to remove dirt and debris. Lubricate hinges, gears, and chains with a silicone-based lubricant to reduce friction and wear. Avoid using grease, as it may attract dust. Inspect for worn or damaged components and replace them promptly. Clean the gate opener’s sensors and control box to ensure proper functionality. Lubricate monthly for optimal performance and longevity.

Compatible Devices and Accessories

The MM371W is compatible with a range of devices, including remote controls, keypads, and sensors. It works with the Mighty Mule app for smartphone control. Solar capability allows integration with the FM123 solar kit for eco-friendly power. Accessories like the FM137 wireless keypad and RB741 remote enhance convenience and security.

8.1 List of Compatible Remote Controls and Sensors

The MM371W is compatible with the FM134 2-button keychain remote, FM135 single-button remote, and FM137 wireless keypad. It also supports the FM140 vehicle sensor exit wand for automatic gate activation. These accessories enhance convenience, security, and hands-free operation. Ensure all devices are synced with the gate opener for seamless functionality. Visit the Mighty Mule website for a full list of compatible products and purchasing options.

8.2 Integrating with Smart Home Systems

The Mighty Mule MM371W seamlessly integrates with smart home systems, enhancing convenience and security. Compatible with platforms like Samsung SmartThings and Amazon Alexa, it allows voice control and remote monitoring through the Mighty Mule app. To integrate, enable the Mighty Mule skill in Alexa or add the device within SmartThings. Ensure secure connections and explore advanced features like automated routines and notifications for a enhanced smart home experience.

Customer Support and Resources

Mighty Mule offers dedicated customer support. Call 800-543-4283 for sales or 800-543-1236 for technical assistance. Visit www.mightymule.com or email support@mightymule.com for additional resources and help.

9.1 Contact Information for Technical Support

For technical support, contact Mighty Mule at 800-543-1236 (Monday-Friday, 8am-7pm EST, Saturday 10am-6:30pm EST). Visit www.mightymule.com or email support@mightymule.com. Their office is located at 5919 Sea Otter Place, Carlsbad, CA, 92010. Representatives are ready to assist with installation, troubleshooting, or maintenance queries, ensuring your gate opener functions optimally.

9.2 Online Resources and Community Forums

Access comprehensive online resources at www.mightymule.com, including installation guides, manuals, and FAQs. Utilize the BILT app for interactive installation support. Engage with the Mighty Mule community forums to share experiences and gain tips. These platforms offer troubleshooting solutions, maintenance advice, and updates to ensure optimal performance and longevity of your MM371W gate opener.

Warranty and Repair Information

The Mighty Mule MM371W is backed by a comprehensive warranty. For repair details, visit www.mightymule.com or contact support at 800-543-1236. Genuine replacement parts ensure longevity and reliability.

10.1 Understanding the Warranty Terms

The Mighty Mule MM371W Gate Opener is covered by a 12-month limited warranty, starting from the date of purchase. This warranty covers defects in materials and workmanship under normal use. It excludes damage caused by misuse, improper installation, or natural wear and tear. For warranty claims, contact Mighty Mule Technical Support at 800-543-1236. Ensure your product is registered for faster assistance. Refer to the manual for detailed terms and conditions.

10.2 Repair Options and Replacement Parts

Mighty Mule offers replacement parts for the MM371W, available through their official website or authorized dealers. Contact Mighty Mule Technical Support at 800-543-1236 for troubleshooting before ordering parts. Registered products receive priority support. Always use genuine Mighty Mule parts to maintain warranty validity and ensure safety. Unauthorized parts may void the warranty and compromise performance. Refer to the manual for a list of compatible replacement components.

User Feedback and Reviews

Customer reviews highlight the MM371W’s ease of use, durability, and smart features. Feedback helps improve products and aids future buyers in making informed decisions. Share your experience today!

11.1 Importance of Customer Reviews

Customer reviews are crucial for assessing product performance and aiding others in decision-making. They provide real-world insights into the MM371W’s features and reliability. Positive feedback encourages innovation, while constructive criticism drives improvements. Sharing your experience helps future buyers make informed choices and supports the Mighty Mule community. Your voice contributes to enhancing products and services, ensuring better solutions for everyone.

11.2 Leaving Feedback for Future Buyers

Leaving feedback is a valuable way to share your experience with the MM371W gate opener. Your insights help future buyers make informed decisions and improve product development. By providing detailed comments on performance, features, and ease of use, you contribute to enhancing the product and assisting others in choosing the right solution for their needs. Your input makes a difference in the Mighty Mule community.

The Mighty Mule MM371W gate opener offers reliable performance and smart features, making it a top choice for residential use. Register your product for support and updates, ensuring optimal functionality and longevity. Your satisfaction is our priority. Thank you for choosing Mighty Mule for your gate automation needs.

12.1 Final Thoughts on the MM371W Gate Opener

The Mighty Mule MM371W gate opener is a top choice for residential automation, offering smart features, solar capability, and ease of use. Its Dual Sense Technology ensures safety, while the app integration provides convenience. With proper installation and maintenance, it delivers reliable performance. Register your product for extended support and updates. A worthwhile investment for homeowners seeking a modern, efficient gate solution.

12.2 Encouragement to Register and Review the Product

Registering your MM371W gate opener unlocks exclusive benefits, including updates, support, and special offers. Sharing your experience through a review helps others make informed decisions. Your feedback is invaluable for improving products and assisting future buyers. Take a moment to register and leave a review, contributing to the Mighty Mule community and enhancing your ownership experience.

signia pure charge and go manual pdf

The Signia Pure Charge&Go manual provides comprehensive guidance on using and maintaining your hearing aids‚ covering components‚ controls‚ charging‚ and troubleshooting for optimal performance.

Overview of the Signia Pure Charge&Go Hearing Aids

The Signia Pure Charge&Go hearing aids are cutting-edge‚ rechargeable devices designed for convenience and performance; They feature lithium-ion batteries‚ eliminating the need for disposable batteries and offering a full day of use with overnight charging. Available in receiver-in-canal (RIC) styles‚ these hearing aids are known for their sleek design and user-friendly functionality. They are water-resistant‚ ensuring durability in various environments. The aids support direct audio streaming from iOS devices via MFi technology and are compatible with the StreamLine Mic for Android and other devices. The user manual provides detailed instructions on operation‚ maintenance‚ and troubleshooting‚ ensuring optimal use of these advanced hearing solutions.

Key Features and Benefits of the Device

The Signia Pure Charge&Go offers advanced features for enhanced hearing experiences. With lithium-ion rechargeable batteries‚ they provide up to 24 hours of use on a single charge. The sleek‚ water-resistant design ensures durability‚ while the receiver-in-canal (RIC) style offers discretion. These hearing aids support direct audio streaming from Apple devices via MFi technology and compatibility with the StreamLine Mic for Android and other devices. Volume control and program adjustments are easily accessible‚ enhancing user customization. The comprehensive manual outlines these features‚ ensuring users can maximize their hearing aid experience with ease and confidence‚ making it an ideal choice for those seeking both functionality and style.

Charging the Hearing Aids

Step-by-Step Charging Process

Connect the USB power cable to the charger and plug it into a power source. Insert the hearing aids into the charging slots. The LEDs will indicate charging status. Once fully charged‚ remove the aids and they will automatically turn on for use.

To charge your Signia Pure Charge&Go hearing aids‚ start by connecting the USB power cable to the charger and plug it into a power source. Ensure the charger is properly connected and the LEDs indicate it is ready. Next‚ place the hearing aids in the charging slots‚ aligning them correctly to ensure proper contact. The LEDs will blink green to signal charging is in progress. A full charge typically takes 3-4 hours. If needed‚ a quick 30-minute charge provides up to 7 hours of use. Once fully charged‚ the LEDs will turn solid green. Remove the hearing aids‚ and they will automatically turn on‚ ready for use. Always store the charger in a cool‚ dry place to maintain optimal performance.

Understanding Charging Status Indicators

The charging status of your Signia Pure Charge&Go hearing aids is indicated by LED lights on the charger. When the charger is connected to power‚ the LEDs blink green three times‚ signaling readiness. During charging‚ the LEDs flash green‚ indicating the process is active. Once fully charged‚ the LEDs turn solid green. If an error occurs‚ the red LED blinks three times‚ prompting you to check the manual or consult a professional. These indicators ensure you are informed about the charging progress and any potential issues‚ helping you maintain your hearing aids effectively and troubleshoot when necessary.

Charging Tips and Best Practices

For optimal performance‚ charge your Signia Pure Charge&Go hearing aids daily‚ even if the battery isn’t fully depleted. Overnight charging is recommended to ensure they’re fully powered for the next day. When not in use‚ store the hearing aids in the charger to maintain their charge and avoid deep discharge. Clean the devices before charging to prevent dirt or moisture from affecting performance. Avoid charging in extreme temperatures‚ as this can reduce battery lifespan. If storing for extended periods‚ charge the hearing aids every 6 months to prevent irreversible battery damage. Always use the provided charger and follow the manual’s guidelines for best results.

Using the Hearing Aids

Inserting and removing the hearing aids properly‚ adjusting settings‚ and controlling volume are essential for optimal use‚ as detailed in the manual for user convenience.

Inserting and Removing the Hearing Aids

Inserting and removing the Signia Pure Charge&Go hearing aids requires care to ensure proper fit and function. Start by holding the hearing aid correctly‚ placing it in your ear as instructed by your hearing care professional. Ensure the device sits comfortably and securely. To remove‚ gently pull the hearing aid from your ear‚ taking care not to force it. Avoid touching the microphone or speaker to prevent damage. Always handle the hearing aids by the surfaces‚ not the electrical components. After removal‚ store them in the provided charger to maintain battery life and cleanliness. Proper handling ensures longevity and optimal performance of your hearing aids.

Adjusting Settings and Volume

Adjusting the settings and volume of your Signia Pure Charge&Go hearing aids is straightforward. Use the rocker switch to control volume—press and hold to increase or decrease. For personalized settings‚ the Signia app allows you to customize sound preferences‚ switch programs‚ and adapt to different environments. Ensure your hearing aids are on before making adjustments. Utilize the app to fine-tune settings for optimal listening experiences. This feature helps you manage sound in various settings‚ enhancing your auditory comfort and clarity. Proper use of these controls ensures a tailored hearing experience. Always refer to the manual for detailed guidance on maximizing your hearing aid’s potential.

Special Listening Situations

The Signia Pure Charge&Go manual offers tips for enhancing audio in challenging environments‚ such as using the StreamLine Mic for streaming and optimizing settings in noisy spaces.

Using the StreamLine Mic for Audio Streaming

The StreamLine Mic enhances audio streaming capabilities for non-iOS devices‚ such as Android smartphones or PCs. It connects via Bluetooth‚ enabling high-quality audio transmission directly to the hearing aids. To use the StreamLine Mic‚ ensure it is paired with your device. Once connected‚ audio will stream seamlessly to your hearing aids. The mic automatically switches between audio sources‚ allowing you to take calls or listen to music without manual adjustments. For optimal performance‚ keep the mic close to the audio source and minimize background noise. This accessory ensures crystal-clear sound in various listening environments‚ making it ideal for phone calls‚ video conferencing‚ or streaming media.

Optimizing Performance in Noisy Environments

In noisy settings‚ the Signia Pure Charge&Go hearing aids utilize advanced noise reduction technology to enhance speech clarity. Positioning yourself to face the speaker can improve sound reception. Using the StreamLine Mic in such environments captures the speaker’s voice directly‚ minimizing ambient noise. Adjusting settings through the companion app can further tailor sound quality. Ensure the hearing aids are fitted correctly to maximize noise reduction. Regularly cleaning the devices and checking for software updates ensures optimal performance. By leveraging these strategies‚ users can enjoy clearer communication even in challenging acoustic conditions.

Troubleshooting and Maintenance

Regularly clean the hearing aids and charger to ensure proper function. Check for software updates and store devices in a cool‚ dry place to maintain performance and longevity.

Common Issues and Solutions

Common issues with the Signia Pure Charge&Go include charging problems or devices not turning on. Ensure the charger is properly connected to power and hearing aids are correctly placed. If LEDs indicate errors‚ refer to the troubleshooting guide. For connectivity issues with the StreamLine Mic‚ restart both devices and ensure Bluetooth is enabled. If sound quality is poor‚ clean the hearing aids and check for software updates. Battery life concerns can be addressed by avoiding deep discharges and charging daily. For persistent issues‚ consult the manual or contact your hearing care professional for assistance.

Cleaning and Storing the Hearing Aids

Regular cleaning and proper storage are essential for maintaining the performance of your Signia Pure Charge&Go hearing aids. Use a soft‚ dry cloth to wipe away dirt and moisture‚ avoiding harsh chemicals or alcohol. Store the devices in a cool‚ dry place‚ away from direct sunlight and extreme temperatures. For long-term storage‚ fully charge the hearing aids‚ turn them off‚ and use a drying kit to prevent moisture buildup. Recharge every 6 months to avoid deep discharge‚ which can damage the batteries. Always ensure the hearing aids are clean and dry before storing or charging. Refer to the manual for detailed care instructions to ensure longevity and optimal functionality.

The Signia Pure Charge&Go manual serves as a vital resource for users‚ offering clear guidance on setup‚ operation‚ and maintenance. With its comprehensive instructions‚ this manual ensures a seamless experience‚ empowering users to maximize the potential of their hearing aids. By following the outlined steps and tips‚ you can enjoy improved listening clarity‚ convenience‚ and reliability. Whether you’re navigating everyday situations or addressing technical concerns‚ the manual provides the tools to enhance your hearing journey. Regularly refer to this guide to maintain optimal performance and prolong the lifespan of your device. Your journey to better hearing starts here‚ supported by Signia’s innovative technology and expert guidance.

minnesota’s drivers manual

The Minnesota Driver’s Manual is the official guide for learning safe driving practices, state laws, and techniques for obtaining a driver’s license in Minnesota.

Purpose and Structure of the Manual

The Minnesota Driver’s Manual is designed to educate drivers on safe driving practices, state laws, and the licensing process. It serves as a comprehensive guide for both new and experienced drivers, ensuring they understand traffic rules, road signs, and defensive driving techniques. The manual is structured into clear sections, covering topics such as driver’s license types, traffic laws, and safe driving practices. It also provides study materials for written and road tests, helping applicants prepare effectively. This organized approach ensures drivers are well-informed and equipped to operate vehicles safely and legally in Minnesota.

Key Topics Covered for Safe and Legal Driving

The Minnesota Driver’s Manual emphasizes speed limits, right-of-way rules, and traffic signals to ensure safe navigation. It also covers seatbelt laws, DWI regulations, and defensive driving techniques to promote responsible behavior. Additional topics include handling adverse weather conditions and sharing the road with pedestrians, cyclists, and other vehicles. The manual highlights the importance of understanding traffic signs and signals, adhering to speed limits, and following proper procedures at intersections. These topics are essential for drivers to operate vehicles safely and legally in Minnesota, ensuring the well-being of all road users.

Types of Driver’s Licenses in Minnesota

Minnesota offers various driver’s licenses, including Class D for passenger vehicles, Commercial Driver’s Licenses (CDL), and motorcycle endorsements, each with specific requirements.

Class D Driver’s License for Passenger Vehicles

The Class D Driver’s License is designed for operating passenger vehicles, including cars, SUVs, and small trucks. It is the most common license issued in Minnesota. To obtain this license, applicants must meet age requirements, pass a vision test, and successfully complete a written knowledge test. Additional requirements include providing proof of identity and residency. The Class D license allows drivers to operate vehicles with a gross vehicle weight rating (GVWR) of up to 16,000 pounds for non-commercial use. This license is essential for personal transportation and daily commuting needs.

Commercial Driver’s License (CDL) Requirements

To obtain a Commercial Driver’s License (CDL) in Minnesota, applicants must meet specific requirements. The minimum age is 21 for interstate driving and 18 for intrastate driving. A valid medical examiner’s certificate is mandatory. Applicants must pass a vision test and a written knowledge test. The CDL is classified into Class A, B, and C, depending on the type of vehicle and cargo. Additional endorsements, such as HAZMAT or tanker vehicles, require specialized testing. A skills test, including pre-trip inspection, basic vehicle control, and on-road driving, is also required. These requirements ensure safe and legal operation of commercial vehicles.

Motorcycle Endorsement and Special Licenses

A motorcycle endorsement is required to legally operate a motorcycle in Minnesota. To obtain it, applicants must pass a written test and a skills test. The endorsement can be added to a Class D driver’s license. Riders under 18 must complete a motorcycle safety course approved by the Minnesota Motorcycle Safety Center. Special licenses, such as the motorcycle-only license, are also available. The manual provides detailed information on motorcycle operation, safety tips, and the process for obtaining endorsements. Safe riding practices and traffic laws specific to motorcyclists are emphasized to ensure responsible and legal operation of motorcycles on Minnesota roads.

Obtaining a Driver’s License in Minnesota

The Minnesota Driver’s Manual guides applicants through the process of obtaining a driver’s license, ensuring they understand requirements, tests, and regulations for safe and legal driving.

Eligibility Requirements and Age Restrictions

Minnesota requires applicants to meet specific eligibility criteria before obtaining a driver’s license. The minimum age for an instructional permit is 15, with restrictions on driving hours and passenger limits. At 16, teens may apply for a provisional license, provided they complete driver’s education and log supervised driving hours. Full unrestricted licenses are issued at 17 for teens and 18 for adults without additional requirements. Vision tests, proof of residency, and identity documentation are mandatory for all applicants. These guidelines ensure safe and legal driving practices across all age groups in Minnesota.

Steps to Apply for a Driver’s License

To apply for a driver’s license in Minnesota, candidates must follow a structured process. First, study the Minnesota Driver’s Manual to prepare for the written knowledge test. Next, visit a Driver and Vehicle Services (DVS) office to complete the application and provide required documents, such as proof of identity and residency. Applicants must pass a vision test and a knowledge test to obtain an instructional permit. After practicing with a licensed driver, they can schedule a road test. Upon passing, applicants receive their driver’s license. Additional requirements, such as parental consent for minors, may apply. Processing times vary, so plan accordingly.

Written Knowledge Test and Vision Test

The written knowledge test and vision test are essential steps in obtaining a Minnesota driver’s license. The written test assesses understanding of traffic laws, road signs, and safe driving practices, while the vision test ensures applicants can see well enough to operate a vehicle safely. Both tests are administered at Driver and Vehicle Services (DVS) offices. Study the Minnesota Driver’s Manual thoroughly to prepare for the written test, which covers topics like speed limits, right-of-way rules, and defensive driving. Corrective lenses are permitted during the vision test if needed. Passing both tests is required to proceed with the licensing process.

Minnesota Traffic Laws and Rules

This section outlines the state’s traffic laws, including speed limits, right-of-way rules, and safe driving practices, ensuring compliance and safety on Minnesota roads.

Speed Limits and Right-of-Way Rules

Minnesota’s speed limits vary by location, with urban areas typically capped at 30-40 mph and rural highways up to 70 mph. School zones and construction areas have reduced speeds. Right-of-way rules dictate who proceeds first at intersections, with priority often given to pedestrians and vehicles on the right. At four-way stops, drivers arriving simultaneously yield to those on their right. Failure to obey these rules can result in fines or accidents, emphasizing the importance of understanding and adhering to these laws for safe driving.

Seatbelt and DWI Laws

In Minnesota, all drivers and passengers must wear seatbelts, enforced as a primary law. Children under 8 years old or shorter than 4 feet 9 inches require a booster seat. DWI (Driving While Impaired) laws prohibit driving with a Blood Alcohol Content (BAC) of 0.08% or higher. Penalties include license revocation, fines, and ignition interlock devices. Repeat offenses escalate consequences. Minnesota also enforces a “not a drop” law for drivers under 21, with any detectable alcohol leading to penalties. These laws aim to reduce accidents and ensure road safety for all.

Traffic Signals and Signs

Traffic signals and signs are essential for maintaining order and safety on Minnesota roads. Drivers must obey all traffic signals, including red, yellow, and green lights, and adhere to posted speed limits. Regulatory signs, such as Stop, Yield, and Speed Limit signs, enforce specific driving behaviors. Warning signs indicate potential hazards, while guide signs provide directional and informational assistance. Understanding and following traffic signals and signs is crucial for safe and lawful driving. Failure to comply can result in accidents or penalties. Pedestrians and drivers must also be aware of crosswalk signals and traffic light timing to ensure mutual safety and smooth traffic flow.

Safe Driving Practices

Safe driving practices emphasize awareness, caution, and adherence to traffic laws to minimize risks on Minnesota roads. Always maintain a safe distance, avoid distractions, and stay alert.

Defensive Driving Techniques

Defensive driving techniques are essential for safe road interaction. These include maintaining a safe distance, anticipating other drivers’ actions, and being attentive to road conditions. Always stay alert and avoid distractions to react in time. Use mirrors and check blind spots regularly to stay aware of your surroundings. Avoid aggressive driving behaviors and adjust your speed according to weather conditions. Proper use of signals ensures clear communication with other drivers, reducing the risk of accidents. By adopting these practices, drivers can significantly enhance road safety and protect themselves and others.

Handling Adverse Weather Conditions

Driving in adverse weather requires extra caution and adjusted techniques. In rain or fog, reduce speed, use low beams, and increase following distance. Avoid sudden movements and use windshield wipers and defrosters for clear visibility. On snowy or icy roads, slow down, avoid hard braking, and use winter tires if necessary. Keep a safe distance and be prepared for reduced traction. Always check mirrors and blind spots before changing lanes. Stay alert for black ice, especially on bridges and overpasses. Carry an emergency kit with supplies like a blanket, flashlight, and ice scraper in case of a breakdown.

Sharing the Road with Other Vehicles

Sharing the road safely involves being aware of and respecting all vehicles, pedestrians, and cyclists. Always yield the right-of-way when required by law. Maintain a safe following distance to allow time to react. Be cautious around large trucks and buses, as they have blind spots and require more space to stop. When encountering pedestrians or cyclists, slow down and give plenty of space. Use signals to communicate your intentions to other drivers. Avoid aggressive driving and be patient with slower-moving vehicles. Mutual respect and awareness help ensure a safe and smooth flow of traffic for everyone.

Additional Resources and Study Materials

The Minnesota DVS offers study materials, including the driver’s manual, practice tests, and guides for CDL and motorcycle endorsements, to help prepare for exams and road tests.

Where to Find Study Materials for Tests

The Minnesota Department of Vehicle Services (DVS) provides comprehensive study materials to help prepare for driver’s tests. The official Minnesota Driver’s Manual is available online and covers essential topics like traffic laws, road signs, and safe driving practices. Additional resources include practice tests, driver’s handbooks, and guides for commercial and motorcycle licenses. These materials can be accessed on the DVS website or at local driver’s license offices. Online platforms also offer interactive tools and study guides to aid in preparation. Utilizing these resources ensures a thorough understanding of the requirements for obtaining a Minnesota driver’s license.

Preparing for the Road Test

To prepare for the road test in Minnesota, thoroughly review the Minnesota Driver’s Manual to understand traffic laws, road signs, and safe driving techniques. Practice driving in various conditions, such as urban and rural areas, to build confidence. Familiarize yourself with the vehicle you will use for the test, ensuring it is in good working condition. Study the scoring criteria to avoid common mistakes. Consider taking practice tests or enrolling in a driver’s education course for additional guidance. Practicing regularly and staying calm during the test will help you perform your best and demonstrate your ability to drive safely and effectively.

Online Resources for Driver’s Education

Minnesota offers a variety of online resources to help individuals prepare for driver’s education. The Minnesota Department of Vehicle Services (DVS) provides study materials, including practice tests and guides, on their official website. These resources cover essential topics like traffic laws, road signs, and safe driving practices. Additionally, online platforms offer interactive tools, such as video tutorials and quizzes, to enhance learning. These resources are designed to help drivers of all experience levels, from teens to adults, feel confident and prepared for both the written and road tests. Utilizing these tools can significantly improve readiness for obtaining a driver’s license.

« Older posts Newer posts »