
Cessna 152 Maintenance Manual: A Comprehensive Guide
This manual details installation, operation, and maintenance for the Cessna 152. It provides essential guidance, covering everything from daily checks to detailed inspections and component replacements.
This manual serves as a vital resource for owners and maintenance personnel of the Cessna 152 aircraft. It’s designed to ensure continued airworthiness and safe operation through detailed procedures. Covering installation, operation, and upkeep, this guide offers a structured approach to aircraft maintenance;
Regularly consulting this manual, alongside adherence to FAA regulations, is crucial. It details everything from pre-flight checks to complex component replacements, promoting longevity and reliability. Proper maintenance, as outlined herein, directly impacts flight safety and aircraft value.
Understanding Aircraft Maintenance Records
Comprehensive record-keeping is paramount for any Cessna 152, ensuring traceability of all maintenance performed. These records detail inspections, repairs, alterations, and component replacements, vital for demonstrating airworthiness. Maintaining accurate logs—engine, airframe, and propeller—is legally required and crucial during audits.
Proper documentation supports resale value and provides a historical overview of the aircraft’s condition. Detailed records facilitate efficient troubleshooting and informed maintenance decisions, ultimately enhancing safety and operational reliability.

Pre-Flight Inspection & Daily Checks
Daily checks encompass fluid levels, control surface freedom, and tire condition. Thorough pre-flight inspections are vital for identifying potential issues before each flight.
Fluid Level Checks (Oil, Fuel, Hydraulic)
Prior to each flight, meticulously verify all fluid levels. For engine oil, check the dipstick ensuring it falls within the acceptable range, adding as needed. Inspect fuel quantity, confirming sufficient reserves for the intended flight, and drain fuel sumps for contamination.
The Cessna 152 utilizes a simple system; hydraulic fluid checks are less frequent but crucial when performed. Always refer to the aircraft’s specific checklist and maintenance schedule for precise procedures and acceptable limits. Document any discrepancies immediately.
Control Surface Inspection & Freedom of Movement
Thoroughly inspect all control surfaces – ailerons, elevator, and rudder – for any signs of damage, such as dents, cracks, or fabric deterioration. Verify full and free movement throughout their entire range of motion, checking for binding or excessive play.
Pay close attention to hinge points and control cable attachments. Ensure proper operation of the trim tabs. Document any anomalies discovered during the inspection, and address them before flight. Smooth, unrestricted movement is vital for safe operation.
Tire Condition & Brake System Check
Inspect tires for wear, cuts, bulges, and proper inflation. Check brake lines and hoses for leaks or damage, ensuring secure connections. Verify brake pad thickness and rotor condition. Perform a brake system functional check, testing for firm pedal feel and effective stopping power on both sides.
Document any discrepancies, such as uneven wear or soft brake pedals. Address any issues before flight to maintain safe taxiing and landing capabilities. Proper tire pressure is crucial for ground handling.
Scheduled Maintenance – 100 Hour Inspection
This inspection involves critical tasks like oil/filter changes, spark plug checks, air filter replacement, and a thorough fuel system drain and inspection.
Engine Oil & Filter Change Procedure
Prior to commencing, ensure the engine is warm but not hot. Drain the old oil completely, utilizing an approved disposal method. Remove the old oil filter, lubricating the gasket of the new filter with fresh oil before installation.
Tighten the filter to the manufacturer’s specified torque. Refill the engine with the correct grade and quantity of oil, as outlined in the Lycoming O-235 specifications.
Verify the oil level using the dipstick, ensuring it falls within the acceptable range. Run the engine briefly and recheck for leaks around the filter and drain plug.
Spark Plug Inspection & Cleaning/Replacement
Remove each spark plug carefully, noting its position for reinstallation. Inspect for wear, fouling, corrosion, and electrode condition. Clean serviceable plugs with a spark plug cleaner, ensuring the gap is within specifications using a feeler gauge.
Replace plugs exhibiting excessive wear or damage. Apply a small amount of anti-seize compound to the threads of new plugs before installation. Torque to the manufacturer’s recommended specification.
Ensure proper gap and electrode condition for optimal engine performance and efficient combustion.
Air Filter Inspection & Replacement
Regularly inspect the air filter for dirt, debris, and damage. A clogged filter restricts airflow, reducing engine performance. Carefully remove the filter assembly, noting its orientation for correct reinstallation.
Check for tears, holes, or excessive contamination. Clean reusable filters with appropriate solvent, ensuring they are completely dry before reinstalling. Replace disposable filters with a new one of the correct type.
Proper filter maintenance ensures clean air to the engine, maximizing efficiency and extending its lifespan.
Fuel System Drain & Inspection
Prior to each flight, drain fuel samples from all sumps – wing tips and fuel strainer – to check for water or contaminants. Discard the drained fuel properly, adhering to safety regulations.
Inspect fuel lines for cracks, leaks, or damage. Ensure all connections are secure and fuel caps are tightly sealed. Look for any signs of fuel stains around components.
A clean fuel system is crucial for reliable engine operation. Regular draining and inspection prevent water ingestion and maintain optimal performance.

Annual Inspection – Detailed Procedures
This comprehensive inspection covers structural integrity, landing gear, and control systems. It ensures continued airworthiness, adhering to FAA regulations and manufacturer guidelines.
Structural Inspection – Wings, Fuselage, Tail
A meticulous examination of the airframe is crucial during the annual inspection. This involves a thorough visual check for corrosion, cracks, dents, and any structural damage to the wings, fuselage, and tail surfaces.
Pay close attention to areas prone to stress concentration, such as around rivets, skin joints, and control surface hinges.
Inspect fabric covering (if equipped) for tears, deterioration, and proper tension.
Document all findings and address any discrepancies according to approved maintenance procedures, ensuring the continued structural integrity of the aircraft.
Landing Gear Inspection & Servicing
The landing gear requires comprehensive inspection during annual maintenance. Examine the main and nose gear assemblies for any signs of wear, damage, or corrosion. Inspect tires for tread depth, cuts, and proper inflation. Check brake discs, calipers, and brake lines for leaks or deterioration.
Service wheel bearings with appropriate grease, ensuring proper lubrication.
Verify strut extension and compression, and inspect for oil leaks. Document all findings and rectify any issues to maintain safe landing gear operation.
Control Cable Inspection & Lubrication
Thorough control cable inspection is crucial during annual maintenance. Carefully examine all flight control cables – aileron, elevator, and rudder – for fraying, kinks, corrosion, and proper routing. Check cable tension and adjust as needed, adhering to Cessna specifications. Lubricate cables with an approved lubricant to ensure smooth operation and prevent corrosion.
Inspect pulleys and fairleads for wear and proper function. Document all findings and address any deficiencies immediately to maintain flight control integrity.

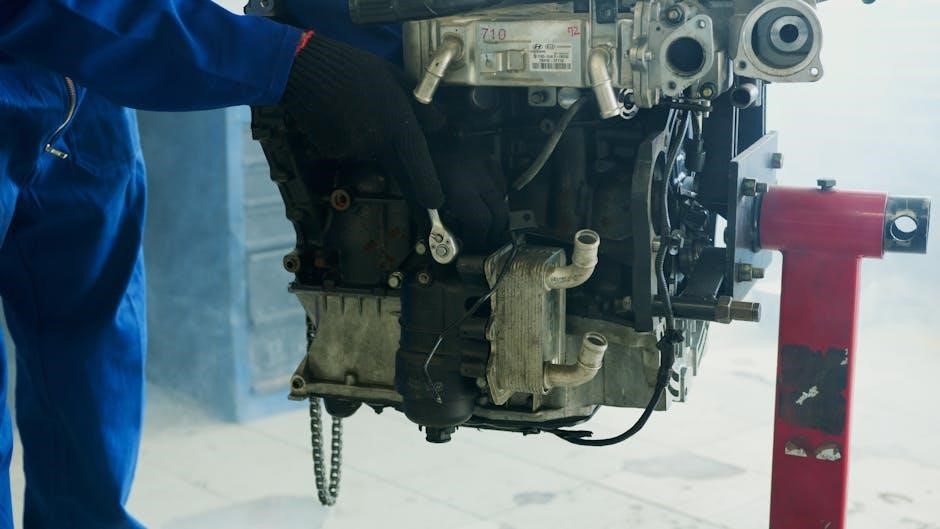
Engine Maintenance
This section covers the Lycoming O-235 engine, including specifications, carburetor overhaul, magneto inspection, and timing procedures for optimal performance and reliability.
Lycoming O-235 Engine Specifications
The Lycoming O-235 is a four-cylinder, normally aspirated, air-cooled engine powering the Cessna 152. It boasts a displacement of 235 cubic inches (3.86 liters) and delivers 110 horsepower. Compression ratio is 8.5:1, requiring 80/87 aviation fuel.
Key specifications include a dry weight of 290 pounds and an oil capacity of 6 quarts. The engine operates on a 20W-50 oil grade. Its reliable design and relatively simple maintenance contribute to the Cessna 152’s enduring popularity as a training aircraft.
Carburetor Maintenance & Overhaul
Regular carburetor maintenance is crucial for optimal Cessna 152 engine performance; This includes periodic inspection for debris, proper float level adjustment, and cleaning of jets and passages. Overhaul is recommended every 500 hours, or as dictated by inspection findings.
Overhaul involves complete disassembly, cleaning, inspection for wear, and replacement of worn components. Proper reassembly and calibration are essential. A qualified aviation mechanic should perform all carburetor work to ensure airworthiness and safety.
Magneto Inspection & Timing
Consistent magneto performance is vital for reliable ignition in the Cessna 152’s Lycoming O-235 engine. Inspections should include checking points, condensers, and wiring for wear, corrosion, and proper function. Regular cleaning and lubrication are also essential maintenance steps.
Accurate timing is critical; improper timing can lead to reduced power and potential engine damage. Utilize specialized timing tools to verify and adjust ignition timing per the manufacturer’s specifications. A qualified mechanic must perform these procedures.
Avionics & Electrical System Maintenance
Maintaining avionics and the electrical system ensures safe flight operations. This includes pitot-static checks, transponder testing, and battery upkeep for optimal performance.
Pitot-Static System Check & Repair
The pitot-static system is crucial for accurate airspeed, altitude, and vertical speed indications. Regular checks involve verifying proper function of the pitot tube, static port, and associated lines for obstructions or leaks.
Inspections confirm correct instrument readings across various altitudes and airspeeds.
Repair procedures encompass leak detection using soapy water, line replacement if damaged, and instrument calibration.
Proper functioning is vital for flight safety, demanding meticulous attention to detail during maintenance and certification processes.
Transponder Testing & Certification
The transponder is a vital component for air traffic control identification. Routine testing verifies proper code transmission and altitude reporting functionality. Certification requires a qualified technician to perform a comprehensive check of the transponder’s operational status, ensuring compliance with aviation regulations.
This includes verifying the unit responds correctly to interrogation signals and accurately displays the assigned squawk code.
Proper maintenance and certification are essential for safe and legal operation within controlled airspace.
Battery Maintenance & Replacement
Maintaining the aircraft battery ensures reliable starting and electrical system operation. Regular inspections should check for corrosion on terminals and proper electrolyte levels (if applicable). Replacement is necessary when the battery fails to hold a charge or exhibits physical damage.
Always disconnect the battery before performing any electrical work.
Use a battery specifically designed for aviation use, adhering to Cessna’s specifications for capacity and type. Proper disposal of old batteries is crucial.

Hydraulic System Maintenance
This section covers brake line inspections, bleeding procedures, and master cylinder overhaul. Maintaining hydraulic integrity is vital for safe and effective braking performance.
Brake Line Inspection & Bleeding
Regular inspection of brake lines is crucial for identifying leaks, cracks, or damage. Carefully examine all lines, fittings, and connections for any signs of deterioration.
Pay close attention to areas exposed to heat or vibration.
Bleeding the brake system removes air bubbles, ensuring firm pedal feel and optimal braking performance.
Follow the proper bleeding sequence, starting with the wheel furthest from the master cylinder.
Use the correct brake fluid specification and avoid introducing contaminants during the process. Thoroughly flush the system to remove old fluid and debris.
Master Cylinder Inspection & Overhaul
The master cylinder is a vital component of the braking system, requiring periodic inspection for leaks and proper function. Check for fluid seepage around the piston seals and reservoir.
Inspect the piston for corrosion or damage.
Overhaul involves disassembling, cleaning, and replacing worn seals and O-rings.
Ensure all parts are thoroughly cleaned and lubricated with compatible brake fluid before reassembly.
Bench testing verifies proper pressure output and leak-free operation before installation.

Airframe Maintenance
Airframe upkeep focuses on corrosion prevention, fabric covering checks (if equipped), and ensuring seatbelts and harnesses are in optimal, safe working condition.
Corrosion Prevention & Control
Regular inspection for corrosion is paramount in Cessna 152 airframe maintenance. Pay close attention to areas prone to moisture accumulation, such as around fasteners, joints, and lower fuselage sections. Cleaning and applying corrosion inhibitors are crucial preventative measures.
Any discovered corrosion must be addressed promptly, utilizing approved methods for removal and treatment. This includes mechanical cleaning, chemical treatment, and protective coating application. Proper sealing of exposed metal surfaces further safeguards against future corrosion development, extending the airframe’s lifespan and ensuring continued structural integrity.
Fabric Covering Inspection (If Applicable)
If your Cessna 152 features fabric covering, meticulous inspection is vital. Regularly check for rips, tears, punctures, and deterioration of the fabric surface. Examine the stitching for looseness or damage, and inspect the underlying structure for any signs of weakness or corrosion.
Pay close attention to areas subject to stress or abrasion. Any defects discovered require prompt repair by a qualified technician, adhering to approved fabric covering maintenance procedures and utilizing appropriate materials to maintain structural integrity and aerodynamic performance.
Seatbelt & Harness Inspection
Regular inspection of seatbelts and harnesses is crucial for passenger safety. Thoroughly examine the webbing for cuts, fraying, or excessive wear. Check the buckles and release mechanisms for smooth operation and secure locking functionality. Ensure all hardware, including metal components and attachment points, are free from corrosion or damage.
Any identified defects necessitate immediate replacement of the affected seatbelt or harness. Adhere to manufacturer’s specifications and approved maintenance procedures during replacement to guarantee continued safety and compliance.
Troubleshooting Common Cessna 152 Issues
This section addresses frequent problems like engine starting difficulties, electrical malfunctions, and flight control concerns, offering diagnostic steps and solutions.
Engine Starting Problems
Difficulties starting the Lycoming O-235 engine can stem from several sources. First, verify adequate fuel supply and check the fuel selector valve position. Inspect the spark plugs for fouling or damage, ensuring proper gap settings. A weak battery or faulty magneto timing can also hinder starting.
Confirm the mixture control is appropriately set and the carburetor is free from ice. Examine the starter motor and solenoid for proper operation. If issues persist, consult the detailed troubleshooting charts within this manual for specific diagnostic procedures and repair guidance.
Electrical System Malfunctions
Electrical issues in the Cessna 152 can range from simple fuse failures to complex wiring problems. Begin by checking the main battery voltage and connections, ensuring proper charging from the alternator. Inspect all circuit breakers and fuses for continuity, replacing any blown components.
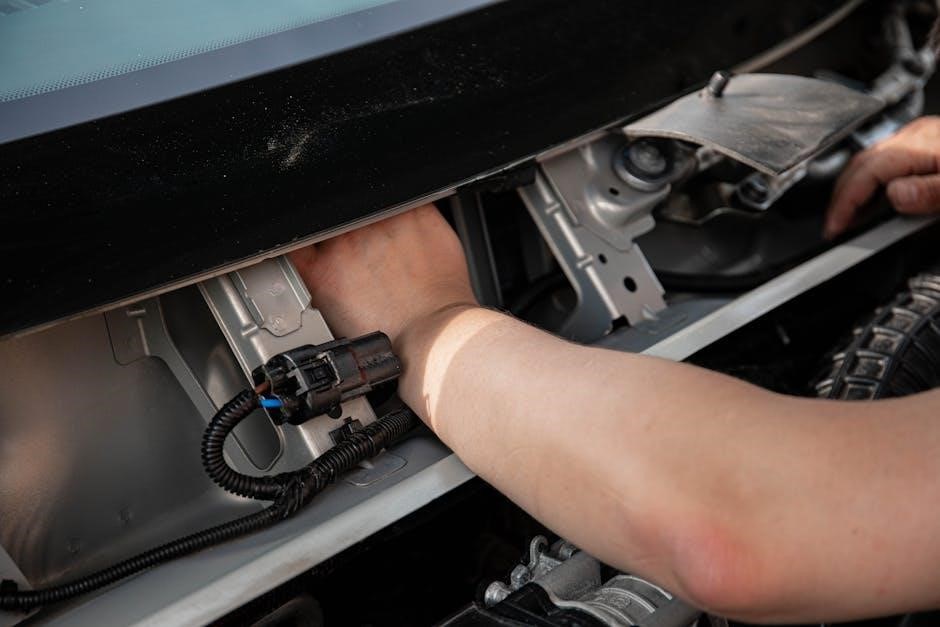
Investigate faulty switches, wiring harnesses, and connections for corrosion or damage. Utilize a multimeter to trace voltage drops and identify short circuits. Refer to the wiring diagrams in this manual for accurate troubleshooting and repair procedures.
Flight Control Issues
Addressing flight control problems requires meticulous inspection and precise adjustments. Begin by verifying full and free movement of the ailerons, elevator, and rudder, checking for binding or excessive play. Inspect control cables for fraying, kinks, or corrosion, ensuring proper tension and routing.
Examine control surfaces for damage, cracks, or loose hinges. Lubricate all moving parts according to the lubrication schedule. Refer to detailed diagrams within this manual for proper rigging and adjustment procedures to maintain safe and responsive flight controls.
Component Replacement Procedures
Detailed steps for replacing key Cessna 152 parts are outlined here. This section covers wheel bearings, fuel pumps, and alternators, ensuring proper installation and function.
Wheel Bearing Replacement
This procedure details the safe and effective replacement of Cessna 152 wheel bearings. Begin by safely jacking and supporting the aircraft, then removing the wheel assembly. Carefully inspect the old bearings for wear or damage before extraction.
Clean the bearing housing thoroughly, and install new bearings with appropriate grease, ensuring proper seating. Reassemble the wheel, torque all fasteners to specification, and perform a thorough ground run to verify proper operation and eliminate any unusual noises or vibrations.
Fuel Pump Replacement
This outlines the procedure for Cessna 152 fuel pump replacement, prioritizing safety and proper function. First, relieve fuel system pressure and disconnect the battery. Carefully access the fuel pump, noting wiring and fuel line connections for correct reinstallation.
Remove the old pump and install the new one, ensuring secure connections and leak-free fittings. Prime the fuel system, check for leaks, and perform a functional test to confirm proper operation before flight.
Alternator Replacement
This details the Cessna 152 alternator replacement process, emphasizing electrical safety. Disconnect the battery and ensure the aircraft is grounded. Access the alternator, carefully labeling all wiring connections before removal. Install the new alternator, meticulously reconnecting all wires according to the original configuration.
Verify belt tension and proper alignment. Perform a functional check of the charging system to confirm correct voltage output and operation before returning the aircraft to service.
Lubrication Guide
This section outlines recommended lubricants and grease points for the Cessna 152. A detailed schedule ensures optimal component life and aircraft performance.
Recommended Lubricants & Grease Points
Maintaining proper lubrication is crucial for Cessna 152 longevity. Utilize aviation-grade oil meeting Lycoming specifications (e.g., SAE 50, 60, or a multi-grade equivalent) for engine lubrication. Grease points include control surface hinges, landing gear components, and various fittings within the airframe.
Employ a high-quality airframe grease, such as MIL-G-8182, for these areas. Regularly inspect and replenish grease levels to prevent corrosion and ensure smooth operation. Specific lubricant types and application points are detailed in the aircraft’s component maintenance manuals for optimal results.
Lubrication Schedule
Adhering to a strict lubrication schedule is vital for Cessna 152 airworthiness. During each pre-flight inspection, visually check control surfaces and landing gear for adequate grease. Every 50 flight hours, thoroughly grease all accessible fittings – control hinges, landing gear, and exposed linkages.
At the 100-hour inspection, perform a comprehensive lubrication of all grease points. Annual inspections require a complete lubrication overhaul, including inspection of lubricant condition and replacement as needed. Consult the aircraft maintenance manual for specific intervals and procedures.
Appendix: Tools & Equipment
Essential tools include torque wrenches, screwdrivers, pliers, and multimeters. Specialized tools, like a pitot-static tester, are crucial for comprehensive Cessna 152 maintenance.
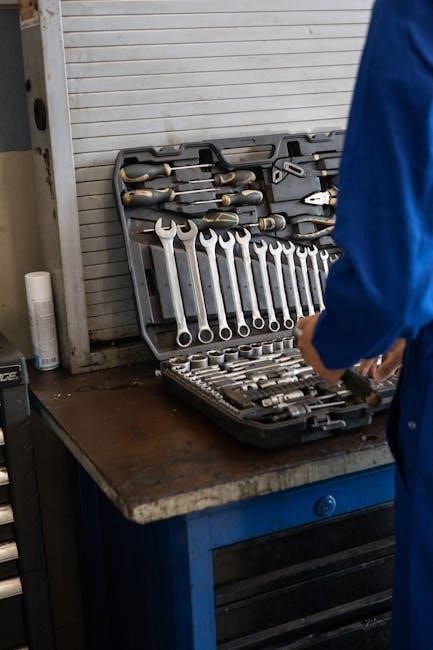
Essential Tools for Cessna 152 Maintenance
Maintaining a Cessna 152 requires a well-equipped toolkit. Standard hand tools – including a comprehensive set of screwdrivers (Phillips and flathead), adjustable wrenches, pliers (various types), and socket sets – form the foundation. Torque wrenches are vital for accurate fastener tightening, preventing damage. A multimeter is essential for electrical system checks. Additionally, safety wire pliers, a rachet, and inspection mirrors are highly recommended. Don’t forget specialized tools like a compression tester for engine diagnostics and a borescope for internal inspections. Proper tool organization and calibration are paramount for safe and effective maintenance procedures.
Specialized Tools & Their Applications
Beyond standard tools, Cessna 152 maintenance demands specific instruments. A pitot-static tester verifies accurate airspeed and altitude readings, crucial for flight safety. A magneto timer ensures proper ignition timing. Fuel system pressure testers diagnose fuel delivery issues. A cylinder compression tester assesses engine health. Additionally, a cable tension gauge is vital for flight control integrity. A digital multimeter is essential for electrical diagnostics. These specialized tools, when used correctly, enable precise troubleshooting and ensure adherence to maintenance schedules, maximizing aircraft reliability and safety.