Calligraphy guide sheets are essential tools for learning and perfecting the art of calligraphy․ They provide structured layouts with lines, grids, and lettering examples to help practitioners maintain consistency and proper alignment․ These sheets are versatile, catering to both beginners and advanced artists, and are often used for practice, creative projects, and refining techniques․ By offering a clear framework, guide sheets make the process of mastering calligraphy more accessible and enjoyable․
What Are Calligraphy Guide Sheets?
Calligraphy guide sheets are specially designed templates that provide structured layouts for practicing and perfecting calligraphy․ They typically feature slanted lines, grids, or lettering examples to help artists maintain consistency in letterforms, spacing, and alignment․ These sheets are invaluable for both beginners and experienced calligraphers, offering a clear framework to refine techniques and achieve professional-looking results in various styles of lettering․
Importance of Guide Sheets in Calligraphy Practice
Guide sheets are indispensable in calligraphy practice as they offer structure and consistency, aiding in the development of uniform letterforms and precise alignment․ They help beginners establish proper techniques and experienced artists refine their skills․ By providing slanted lines or grids, these sheets ensure accuracy and save time, allowing focus on stroke quality and creativity․ They are versatile, supporting various styles and projects, and serve as a cost-effective, self-paced learning tool for mastering calligraphy․
Types of Calligraphy Guide Sheets
Calligraphy guide sheets come in various forms, including lined, alphabet practice, and dot grid sheets․ Each type caters to specific needs, aiding in letter alignment, stroke practice, and creative projects․
Lined Guide Sheets
Lined guide sheets are fundamental tools for calligraphy practice, featuring evenly spaced lines to help maintain consistent letter height and spacing․ These sheets are ideal for mastering basic strokes and letterforms, ensuring uniformity and proper alignment․ They are particularly beneficial for beginners, as they provide a clear structure for practicing alphabets and intricate designs, helping to build muscle memory and improve overall technique effectively․
Alphabet Practice Sheets
Alphabet practice sheets are specifically designed for mastering individual letterforms in calligraphy․ These sheets typically include uppercase and lowercase letters, allowing artists to focus on stroke techniques, spacing, and consistency․ They are ideal for both beginners and advanced practitioners, offering a structured way to practice and refine lettering skills․ Repetition on these sheets helps build muscle memory and enhances the accuracy of calligraphy styles․
Dot Grid Sheets
Dot grid sheets are versatile tools for calligraphy practice, featuring evenly spaced dots that form a grid pattern․ These sheets help artists achieve precise alignment and spacing between letters, making them ideal for both traditional and modern calligraphy․ The grid structure allows for consistent letterforms and flourishes, while also enabling creative freedom․ They are particularly useful for practicing intricate designs and ensuring uniformity in lettering styles․

Materials Needed for Calligraphy Practice
Essential materials include high-quality paper, calligraphy ink, pens with interchangeable nibs, and guide sheets․ These tools ensure precise lettering and help maintain consistency in practice․
Paper and Ink
High-quality paper and ink are fundamental for calligraphy․ Choose smooth, heavy-weight paper to prevent ink bleeding or feathering․ Opt for acid-free options to ensure durability․ Calligraphy ink, such as Higgins or iron gall, flows consistently and dries quickly․ Some artists prefer gouache for vibrant colors․ Select paper with a texture that complements your nib, ensuring precise strokes and optimal ink flow for professional results․
Calligraphy Pens and Nibs
Calligraphy pens and nibs are vital tools for achieving precise strokes and elegant lettering․ Dip pens with interchangeable nibs, such as Nikko G or Hiro 4000, are popular for their flexibility and control․ Nibs vary in size and type, offering different line widths and flourishes․ Some pens have built-in ink reservoirs, while others require dipping․ Proper nib maintenance, including cleaning and aligning, ensures optimal ink flow and performance․
Guide Sheets and Workbooks
Guide sheets and workbooks are indispensable for structured calligraphy practice․ They feature lined, alphabet, and dot grid layouts, helping maintain consistency and alignment․ Many workbooks include step-by-step instructions and exercises for mastering letterforms․ Free printable worksheets are widely available online, while specialized workbooks offer comprehensive guides for various calligraphy styles․ These resources cater to all skill levels, from beginners to advanced practitioners, ensuring steady progress in the art․
Best Practices for Using Calligraphy Guide Sheets
Using guide sheets effectively involves setting up a dedicated workspace, starting with basic strokes, and gradually progressing to complex letterforms․ Consistency and patience are key to mastering calligraphy․
Setting Up Your Workspace
Creating a dedicated workspace is crucial for effective calligraphy practice․ Ensure good lighting, a flat surface, and minimal distractions․ Organize your materials, such as ink, nibs, and guide sheets, within easy reach․ Use a comfortable chair and maintain proper posture to avoid fatigue․ Position your paper at a slight angle to facilitate smooth strokes․ A well-prepared workspace enhances focus and consistency, helping you master calligraphy techniques more efficiently․
Mastering Basic Strokes
Mastering basic strokes is the foundation of calligraphy․ Guide sheets provide clear examples of strokes, such as horizontal, vertical, and diagonal lines, to practice consistency and control․ Start with simple exercises, focusing on varied line widths and spacing․ As you progress, combine strokes to form basic letterforms․ Regular practice with guide sheets helps develop muscle memory and refine your technique, ensuring smooth transitions between strokes and letters․
Progressing to Complex Letterforms
Once basic strokes are mastered, guide sheets help transition to complex letterforms by providing structured templates for practice․ Focus on maintaining proper spacing, alignment, and consistency while forming intricate letters․ Use guide sheets to refine flourishes, curves, and connections between letters․ Regular practice with these tools builds confidence and skill, allowing you to create elegant, sophisticated calligraphy pieces with precision and artistry․
Historical and Modern Calligraphy Guide Sheets
Historical guide sheets often feature traditional letterforms like copperplate and Spencerian scripts, while modern versions incorporate digital tools and contemporary designs for versatile practice and artistic expression․
Traditional Calligraphy Guide Sheets
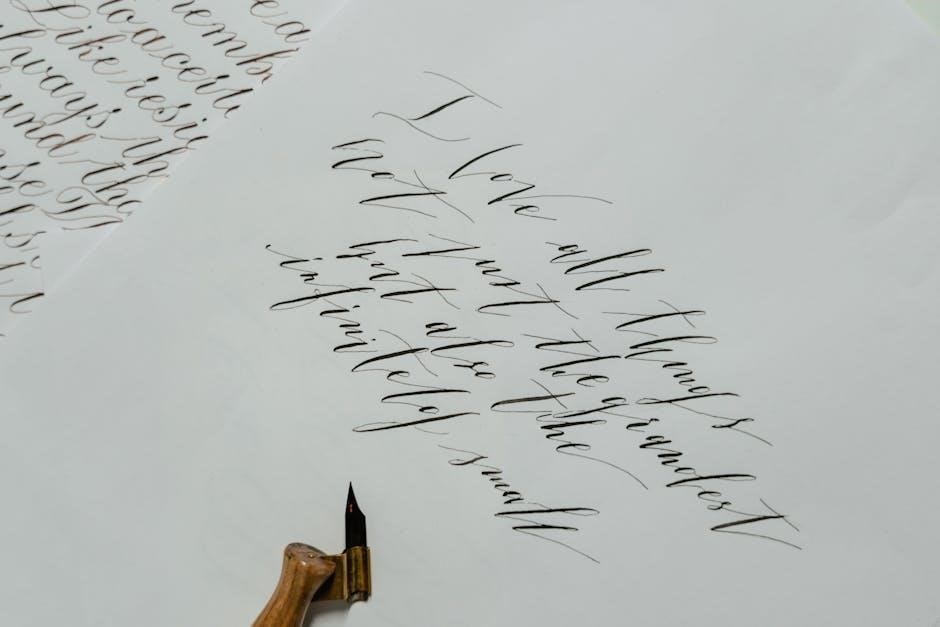
Traditional calligraphy guide sheets typically feature classic scripts like copperplate, Spencerian, and brush scripts․ These sheets often include slanted lines, lettering examples, and spacing guides to help practitioners master historical techniques․ They emphasize precision, flourishes, and the preservation of traditional lettering styles, making them ideal for those seeking to learn authentic calligraphy methods and achieve consistent, elegant results in their work․
Modern and Digital Calligraphy Guides
Modern calligraphy guides blend traditional techniques with contemporary styles, often featuring digital tools and creative designs․ These guides include printable worksheets, digital downloads, and Procreate-friendly templates for modern scripts․ They cater to both analog and digital artists, offering flexibility for projects like invitations, art prints, and social media content․ This blend of traditional and modern methods makes calligraphy accessible and versatile for today’s creators․

Common Mistakes to Avoid
Incorrect nib usage, inconsistent ink flow, and rushing practice are common errors․ Proper spacing, alignment, and patience are key to mastering calligraphy with guide sheets effectively․
Incorrect Use of Nibs and Ink Flow
Using the wrong nib size or type can lead to inconsistent lettering․ Incorrect ink flow due to poor nib maintenance or improper dipping can cause strokes to appear uneven or blotchy․ Guide sheets help practitioners adjust their technique, ensuring proper alignment and fluidity․ Regular cleaning and testing of nibs are essential to avoid such mistakes and achieve smooth, professional results in calligraphy practice․
Improper Spacing and Alignment
Improper spacing and alignment are common pitfalls in calligraphy, leading to uneven and visually unappealing results․ Guide sheets are designed to help maintain consistent letter spacing and baseline alignment, ensuring each character is proportionate and evenly spaced․ By practicing with these tools, artists can develop a keen eye for proper spacing, enhancing the overall aesthetic of their work․
Rushing the Practice Process
Rushing through calligraphy practice often leads to inconsistent strokes, poor letter formation, and a lack of refinement․ Guide sheets help establish a steady rhythm, but hurrying can negate their benefits․ Taking time to focus on each stroke and letterform ensures better technique and lasting progress․ Patience is key to mastering calligraphy, as it allows for the development of muscle memory and artistic precision․
Calligraphy Guide Sheets for Learning
Calligraphy guide sheets are tailored for all skill levels, offering structured layouts to refine lettering techniques and spacing․ They provide a foundation for consistent practice and improvement․
Beginner-Friendly Worksheets
Beginner-friendly calligraphy worksheets are designed to simplify the learning process․ They often feature large, clear guidelines and basic letterforms, allowing new artists to focus on fundamental strokes and spacing․ These sheets typically include step-by-step instructions and practice exercises, making them ideal for those just starting their calligraphy journey․ They help build confidence and muscle memory, laying a solid foundation for more complex techniques․
Intermediate and Advanced Practice Sheets
Intermediate and advanced practice sheets are tailored for those looking to refine their skills and explore complex letterforms․ These sheets often feature intricate designs, varied spacing, and elaborate flourishes, allowing artists to experiment with creative styles․ They provide challenges that push beyond basic techniques, encouraging the development of personal flair and mastery of advanced calligraphy methods․ Customization options let artists tailor sheets to their evolving needs․
Customizing Your Guide Sheets
Customizing calligraphy guide sheets allows artists to tailor their practice to specific needs and projects․ Users can adjust spacing, grid sizes, and lettering styles to suit their skill level or creative goals․ Digital downloads often include editable templates, enabling precise adjustments for personalized learning․ This flexibility makes guide sheets adaptable for both skill progression and unique artistic visions, enhancing the overall calligraphy experience․

Creative Projects Using Guide Sheets
Calligraphy guide sheets unlock creativity, helping artists craft beautiful designs for invitations, posters, journals, and more․ They provide structured layouts for professional, artistic results․
Designing Invitations and Cards
Calligraphy guide sheets are invaluable for crafting elegant invitations and cards․ They ensure proper alignment and spacing, making your designs look professional․ With guide sheets, you can experiment with various lettering styles and flourishes, adding a personal touch to your creations․ Whether for weddings, parties, or special occasions, guide sheets help you achieve beautiful, polished results that impress․ Using high-quality paper and ink enhances the final look, making your invitations truly stand out․
Creating Art Prints and Posters
Calligraphy guide sheets are perfect for designing art prints and posters, offering a structured way to achieve precise lettering and artistic flourishes․ They allow you to experiment with layouts, ensuring text aligns beautifully with visuals․ By using guide sheets, you can create professional-looking prints with consistent spacing and style․ This makes your artwork stand out, whether for personal projects or commercial use, enhancing creativity and presentation․
Personalizing Journals and Notebooks
Calligraphy guide sheets are ideal for personalizing journals and notebooks, allowing you to add elegant lettering and custom designs․ They help you create consistent spacing and alignment, making your journal pages look polished and professional․ Use guide sheets to experiment with lettering styles, decorative flourishes, or inspirational quotes, transforming ordinary notebooks into unique, personalized keepsakes that reflect your creativity and style․
Resources for Calligraphy Guide Sheets
Discover a variety of calligraphy guide sheets online, including free printable worksheets, downloadable workbooks, and recommended tools․ Explore digital downloads for handy practice and creative projects;
Free Printable Worksheets Online
Explore a wide range of free printable calligraphy worksheets online, offering lined guides, alphabet practice, and dot grid sheets․ These resources are perfect for refining lettering techniques and exploring creative projects․ Many websites provide downloadable PDFs tailored for both traditional and modern calligraphy, making it easy to practice at home․ They cater to all skill levels, ensuring everyone can improve their calligraphy skills effortlessly and enjoyably․
Purchasing Guide Sheets and Workbooks
Calligraphy guide sheets and workbooks are widely available for purchase online and in stationery stores․ Many artists and educators offer downloadable PDFs or printed books featuring structured layouts for practice․ These resources often include lined guides, alphabet templates, and creative projects․ Purchasing high-quality workbooks ensures access to professional designs and comprehensive lessons, making them invaluable for both beginners and experienced calligraphers seeking to refine their skills․
Recommended Tools and Supplies
Calligraphy requires specific tools like pens, nibs, ink, and high-quality paper․ Guide sheets and workbooks with structured layouts are essential for precise strokes and alignment․ Recommended supplies include Higgins Calligraphy Ink, flexible nibs, and light pads for tracing․ These tools, available online and in art stores, are vital for mastering techniques and creating beautiful lettering․
Calligraphy guide sheets are invaluable for mastering the art, offering structured layouts and practice exercises․ They provide a foundation for learning, helping artists achieve precision and creativity in their work․
Final Thoughts on Calligraphy Guide Sheets
Calligraphy guide sheets are indispensable for mastering the art, providing structured layouts that enhance consistency and creativity․ They cater to all skill levels, offering a clear path for learners to refine their techniques․ Whether for practice or projects, these sheets ensure precision and artistry, making them a timeless tool in the journey of calligraphy․
Encouragement to Keep Practicing
Consistency is key to mastering calligraphy․ Regular practice with guide sheets helps refine strokes and alignment, leading to noticeable progress․ Embrace the journey, enjoy the creative process, and take pride in every small improvement․ With dedication and the right tools, you’ll unlock the full potential of this beautiful art form․