Month: October 2025

singer sewing machine manual free download

Welcome to our guide on Singer sewing machine manuals! Whether you’re a beginner or an experienced sewist, these manuals are essential for optimal machine performance and creativity.

Overview of Singer Sewing Machines

Singer sewing machines have been a cornerstone of sewing innovation since 1851, offering a wide range of models from basic mechanical machines to advanced computerized systems. Known for their durability and versatility, Singer machines cater to both beginners and experienced sewists. Whether you’re crafting garments, quilting, or embroidering, Singer provides tools to bring your creative visions to life. Their machines are celebrated for their user-friendly designs, robust features, and compatibility with various fabrics. With a legacy of pioneering sewing technology, Singer continues to empower creators worldwide, ensuring every stitch is precise and every project is a success.

Importance of Having a Sewing Machine Manual

A sewing machine manual is indispensable for unlocking your machine’s full potential. It provides detailed guidance on setup, operation, and maintenance, ensuring optimal performance. Manuals help users understand advanced features, troubleshoot common issues, and perform routine care to extend the machine’s lifespan. For beginners, they offer step-by-step instructions to build confidence and skills. Even experienced sewists rely on manuals to explore new techniques or repair their machines. With free downloads available, accessing these resources has never been easier, making them a vital tool for anyone aiming to master their Singer sewing machine and create flawless projects every time.

History of Singer Sewing Machines

Singer sewing machines have a rich history dating back to 1851 when Isaac Singer patented his first practical sewing machine. This innovation revolutionized the sewing industry, making Singer a household name. Over the years, Singer introduced groundbreaking models, such as the world’s first zig-zag machine and the first electronic sewing machines. Today, Singer continues to lead with advanced features and user-friendly designs. Their commitment to innovation and quality has made Singer a trusted brand for sewists worldwide. The legacy of Singer sewing machines is a testament to their enduring impact on the craft of sewing and embroidery;

Where to Find Singer Sewing Machine Manuals

Singer sewing machine manuals are available on the official Singer website, third-party sites like ManualsLib, and specific model pages for free download.

Official Singer Website Resources

The official Singer website is the primary source for free sewing machine manuals. Visit their Manuals and Updates page to download model-specific guides, stitch charts, and software updates. Simply search by model number to find your machine’s manual. Singer also offers a Quick Start Guide with every purchase, providing basic setup steps. For comprehensive instructions, the full manual is available online. Additionally, Singer provides expert support, including warranty information, troubleshooting tips, and user tutorials. This resource ensures seamless operation and helps users maximize their sewing machine’s potential. It’s the most reliable place to find accurate and official Singer sewing machine manuals.

Third-Party Websites for Manual Downloads

Third-party websites like ManualsLib and ISMACS offer free Singer sewing machine manual downloads. These platforms provide access to a wide range of models, including older and discontinued ones. Users can search by model number or machine type to find the specific manual they need. These sites are particularly helpful for those who cannot find manuals on the official Singer website. Additionally, some forums and communities share user-contributed manuals, ensuring availability for rare models. Always verify the manual’s compatibility with your machine before downloading to ensure accuracy and safety. These resources are invaluable for sewists seeking comprehensive guides for their Singer machines.

Manuals for Specific Singer Sewing Machine Models

Manuals for specific Singer sewing machine models, such as the Singer 99, 115, or 221, are readily available online. Websites like ManualsLib and ISMACS provide free downloads for these models, ensuring users can access detailed instructions tailored to their machine. These manuals often include model-specific features, troubleshooting guides, and maintenance tips. For older or discontinued models, these resources are especially valuable. Users can search by model number to find the exact manual they need, ensuring compatibility and accuracy. This makes it easier to operate, maintain, and repair their Singer sewing machine effectively, regardless of its age or complexity.

Downloading Singer Sewing Machine Manuals

Downloading Singer sewing machine manuals is straightforward via official Singer websites or third-party platforms like ManualsLib. These resources offer free, model-specific guides for easy access and use.

Step-by-Step Guide to Downloading Manuals

To download Singer sewing machine manuals, visit the official Singer website or trusted third-party sites like ManualsLib or ISMACS. Navigate to the “Manuals” section, select your machine model, and click “Download.” Ensure compatibility by verifying the model number. For older models, ISMACS offers free PDF downloads. Save the manual to your device for easy access. If prompted, create a free account or log in to access the download; Always verify the source’s reliability to avoid unauthorized versions. Once downloaded, review the manual to familiarize yourself with your machine’s features and maintenance tips. This ensures optimal performance and longevity of your Singer sewing machine.

Compatibility of Manuals with Different Models

Singer sewing machine manuals are typically model-specific, ensuring compatibility with your exact machine. Visit the official Singer website or trusted sites like ManualsLib or ISMACS to find manuals tailored to your model. Enter your machine’s model number to download the correct guide. Some manuals may cover multiple models within a series, while others are exclusive to a single machine. Always verify compatibility before downloading to ensure accuracy. For rare models, generic manuals from the same series may provide useful insights. Compatibility ensures proper operation and troubleshooting, making it essential to match your manual to your machine’s specifications precisely.

Tips for Finding Rare or Discontinued Manuals

Locating rare or discontinued Singer sewing machine manuals can be challenging but achievable. Start by visiting the official Singer website or trusted third-party sites like ManualsLib or ISMACS, which archive older manuals. Use specific model numbers or series names in your search. Join sewing communities or forums, where members often share manuals. Check eBay or specialty sewing groups for physical copies. If a manual is unavailable, look for generic guides from the same series, as they may cover similar functionality. Patience and persistence are key, as these resources can be scarce but are often found with dedicated effort.

Contents of a Singer Sewing Machine Manual

A Singer sewing machine manual typically includes setup instructions, maintenance tips, troubleshooting guides, and details on advanced features, ensuring comprehensive guidance for optimal machine use and care.

Setup and Installation Instructions

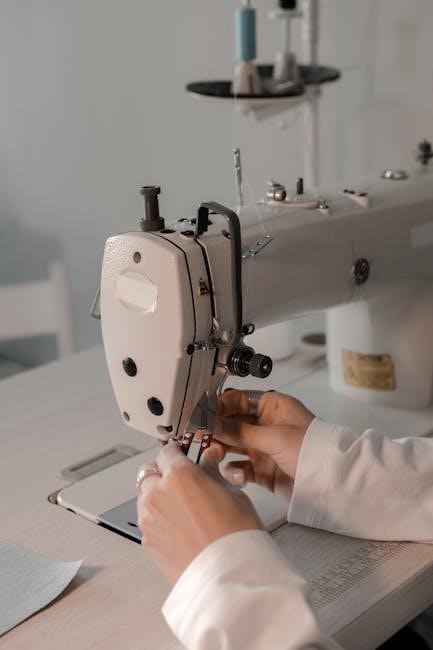
Singer sewing machine manuals provide detailed setup and installation guides to ensure smooth operation. From unpacking to placing the machine on a stable surface, these instructions cover essential steps. Learn how to properly thread the machine, install the bobbin, and adjust tension for optimal stitching. Troubleshooting tips are also included to address common issues during setup. Clear diagrams and step-by-step directions help users of all skill levels configure their machines correctly. Proper installation ensures safety, efficiency, and prevents potential damage, making these instructions indispensable for both beginners and experienced sewists. Follow these guidelines to get your Singer machine ready for seamless sewing experiences.

Maintenance and Troubleshooting Guide

Singer sewing machine manuals include comprehensive maintenance and troubleshooting sections to keep your machine in top condition. Regular oil drops, cleaning, and tension adjustments are highlighted to prevent breakdowns. Troubleshooting guides address common issues like thread jams, uneven stitching, and motor noise. Detailed diagrams and step-by-step solutions help users diagnose and resolve problems independently. These guides also emphasize the importance of proper care to extend the machine’s lifespan. Whether you’re dealing with a vintage model or a modern sewing machine, these resources ensure smooth operation and minimize downtime, helping you maintain peak performance for years to come.

Advanced Features and Stitch Options

Singer sewing machine manuals detail advanced features and stitch options, empowering users to explore creative possibilities. From decorative stitches to embroidery settings, these guides explain how to utilize specialized functions for intricate designs. Customization options, such as stitch length and width adjustments, are clearly outlined to suit various fabrics and projects. Additionally, manuals often include tutorials for using automatic needle threaders, tension controls, and programmable settings. These resources help both beginners and experienced sewists unlock their machine’s full potential, ensuring precise and professional results for every sewing endeavor.

Using the Singer Sewing Machine Manual Effectively

Maximize your sewing experience by understanding basic operations, troubleshooting common issues, and exploring advanced features. The manual offers step-by-step guides to help you master your machine’s capabilities effectively.

Understanding the Basic Operations

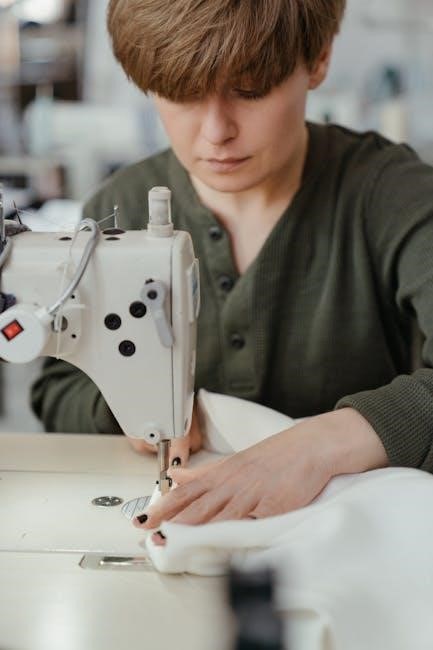
Mastering the fundamentals of your Singer sewing machine is key to a smooth sewing experience. Start by familiarizing yourself with the machine’s components, such as the spool pins, tension dials, and stitch selectors. The manual provides clear instructions on threading the machine, winding bobbins, and selecting the right stitches for various fabrics. Understanding these basic operations ensures that you can confidently navigate your machine’s functions, from straight stitching to zigzag patterns. Regular practice and reference to the manual will help you build a strong foundation for more complex projects in the future.

Customizing Settings for Specific Projects

Your Singer sewing machine manual is a valuable resource for tailoring settings to suit your creative needs. Learn how to adjust stitch length, width, and tension for different fabrics and techniques. Discover how to select the perfect stitch type for quilting, embroidery, or heavy-duty sewing. The manual also guides you on optimizing thread usage and maintaining even seam consistency. For advanced projects, explore custom stitch patterns and embroidery options, as seen in models like the Singer 988. By following these tips, you can achieve professional results and bring your unique sewing visions to life with precision and ease.

Common Mistakes to Avoid When Using the Manual

When using your Singer sewing machine manual, avoid skipping the setup instructions, as improper assembly can lead to machine malfunction. Neglecting to read the troubleshooting section may result in unnecessary repairs. Overlooking stitch guide recommendations can cause fabric damage or uneven seams. Ignoring maintenance tips, such as oiling and cleaning, can reduce machine longevity. Additionally, assuming all models are identical may lead to incorrect settings. Always verify your machine’s specific features and follow the manual’s advice for optimal performance and to avoid costly errors. By adhering to these guidelines, you can ensure a smoother sewing experience and extend your machine’s lifespan.

Singer Sewing Machine Manual for Beginners

Welcome to Singer sewing machine manuals! These guides are perfect for beginners, offering step-by-step instructions, troubleshooting tips, and free downloads to help you master your machine effortlessly.

Getting Started with Your Sewing Machine

Getting started with your Singer sewing machine is easy with the right manual. Download your free manual from Singer’s official website or platforms like ManualsLib. Begin by unpacking and assembling your machine, following the step-by-step guide. Familiarize yourself with the control panel, bobbin, and thread setup. Practice basic stitches on scrap fabric to build confidence. The manual also covers essential maintenance tips to keep your machine running smoothly. Whether you’re a beginner or upgrading, these guides ensure a seamless sewing experience. Start creating with Singer’s user-friendly instructions and unlock your full sewing potential today!

Essential Stitches and Their Uses

Understanding essential stitches is key to mastering your Singer sewing machine. The straight stitch is perfect for seaming fabrics, while the zigzag stitch is ideal for finishing raw edges. The backstitch is great for heavy-duty projects like denim. Your manual will guide you through these and more, ensuring you know when and how to use each stitch. Practice on scrap fabric to build confidence. Whether sewing clothes, home decor, or repairs, these stitches will form the foundation of your sewing skills. Refer to your Singer manual for detailed instructions and tips to get the most out of your machine.

Practice Exercises for Skill Development

Mastering your Singer sewing machine begins with practice. Start by sewing straight lines to get familiar with the machine’s rhythm. Gradually move to zigzag patterns and backstitching to build control. Use scrap fabric to test different stitches and tensions. Practice adjusting thread lengths and presser foot pressure for various fabrics. Simple projects like pillowcases or tote bags are great for honing skills. The Singer manual often includes exercises to help you progress from basic to advanced techniques. Regular practice will boost your confidence and improve the quality of your stitches. Make it a habit to practice regularly to become proficient in no time.

Advanced Techniques in Singer Sewing Machine Manuals

Explore specialized stitches, embroidery options, and machine customization. Singer manuals guide users in mastering advanced features, enabling precise control and creative freedom for intricate sewing projects.

Specialized Stitches and Embroidery Options

Singer sewing machine manuals offer detailed guidance on specialized stitches and embroidery options, empowering users to create intricate designs. From decorative stitches to advanced embroidery patterns, these manuals provide step-by-step instructions. Models like the Singer Elite ME457 and Tradition 2277 feature extensive stitch libraries, and the manuals help users unlock their full potential. Whether crafting custom garments or home decor, the manuals ensure precise control over stitching. Free downloads are available on Singer’s official website and third-party platforms like ManualsLib, making it easy to access these creative tools. Practice on muslin fabric to master techniques before working on final projects.

Customizing and Upgrading Your Machine

Singer sewing machine manuals provide comprehensive guides for customizing and upgrading your machine. Learn how to add accessories, update software, and enhance performance. Models like the Singer Elite ME457 and Tradition 2277 offer advanced features, and manuals detail how to unlock their full potential. Whether upgrading firmware or installing new stitch patterns, step-by-step instructions ensure a seamless process; Free downloads from Singer’s official website and platforms like ManualsLib make customization accessible. Tips on maintaining and upgrading your machine are also included, helping you keep your Singer sewing machine in optimal condition for years of creative projects.

Expert Tips for Optimizing Performance

Singer sewing machine manuals offer expert tips to enhance your machine’s performance. Regular maintenance, such as cleaning and oiling, ensures smooth operation. For models like the Singer Heavy Duty 4432, proper threading and tension adjustments are crucial. Using the right needles and threads prevents fabric damage and ensures high-quality stitches. Firmware updates, available on Singer’s official website, keep your machine up-to-date with the latest features. Additionally, manuals provide guidance on troubleshooting common issues and optimizing settings for specific fabrics. By following these tips, you can maximize your machine’s potential and achieve professional-grade results in your sewing projects.

Troubleshooting with Singer Sewing Machine Manuals

Singer manuals provide detailed troubleshooting guides for common issues like thread jams, error codes, and mechanical malfunctions, helping you resolve problems quickly and efficiently.

Common Issues and Solutions

Common issues with Singer sewing machines include thread jams, uneven tension, and error codes. Manuals provide step-by-step solutions, such as cleaning the bobbin area, adjusting tension discs, and resetting the machine. Troubleshooting sections often list error codes with explanations and fixes. For example, clearing thread jams involves removing the bobbin and checking for debris. Adjusting stitch length and width can resolve uneven stitching. If issues persist, manuals recommend contacting Singer support or authorized service centers; Regular maintenance, like oiling parts and updating software, can prevent many problems. Always refer to your model-specific manual for precise guidance.

Diagnosing Machine Errors

Diagnosing Singer sewing machine errors is streamlined with manual guidance. Error codes, like E1 or E2, indicate specific issues such as thread jams or sensor malfunctions. Manuals detail troubleshooting steps, such as checking the bobbin area or ensuring proper needle alignment. For models like the Singer 988, diagnostics may involve resetting the machine or updating software. Visual guides and symptom-based charts help identify problems quickly. Always refer to your model-specific manual for accurate diagnostics, as procedures vary between mechanical and computerized machines. Regular maintenance, as outlined in manuals, can prevent many common errors and ensure smooth operation.

When to Contact Professional Support

While Singer sewing machine manuals offer comprehensive troubleshooting, some issues require professional expertise. If error codes persist despite manual guidance, or if parts like the motor or gearbox malfunction, contact Singer support. For complex repairs or warranty claims, authorized service centers are recommended. Additionally, if you encounter software glitches in computerized models, reaching out to technical support ensures proper resolution. Always verify the authenticity of support channels to avoid unauthorized services. Professional assistance guarantees your machine operates safely and efficiently, preserving its longevity and performance. Timely expert intervention can prevent minor issues from escalating into major repairs.

Legal and Copyright Considerations

Respect copyright laws when downloading Singer sewing machine manuals. Use official sources to ensure compliance. Unauthorized distribution or reproduction of manuals may lead to legal consequences.

Understanding Copyright Laws for Manuals

Respecting copyright laws is crucial when accessing Singer sewing machine manuals. These documents are protected by intellectual property rights, ensuring creators receive due credit. Downloading manuals from unauthorized sources may infringe on these rights, leading to legal consequences. Always use official Singer websites or trusted third-party platforms to ensure compliance. Copyright laws protect the content’s integrity and distribution, safeguarding both the manufacturer and users. By adhering to these laws, you support ethical practices and maintain access to high-quality resources for your sewing needs.

Using Manuals Responsibly

Using Singer sewing machine manuals responsibly ensures you respect intellectual property and ethical guidelines. Always download manuals from authorized sources like the official Singer website or trusted third-party platforms. Avoid sharing or distributing manuals without permission, as this violates copyright laws. Use the manual solely for personal, non-commercial purposes to maintain compliance. By adhering to these practices, you support the creators and ensure continued access to valuable resources for your sewing projects. Responsible use also helps protect the integrity of the content and prevents legal complications.

Consequences of Unauthorized Distribution

Unauthorized distribution of Singer sewing machine manuals can lead to serious legal consequences. Copyright infringement may result in lawsuits, financial penalties, and damage to your reputation. Sharing manuals without permission violates intellectual property rights, potentially harming both individuals and businesses. Additionally, it undermines the efforts of companies that invest in creating these resources. Legal actions can include fines and injunctions, requiring you to cease distribution immediately. Always download manuals from authorized sources to avoid these risks and ensure compliance with copyright laws. Respect intellectual property to maintain a fair and ethical environment for all sewing enthusiasts.

Community and Support for Singer Sewing Machine Users

The Singer sewing machine community offers extensive support through online forums, user groups, and workshops. Sharing experiences and tips fosters creativity and troubleshooting, enriching every sewist’s journey.

Online Forums and User Groups

Online forums and user groups provide invaluable resources for Singer sewing machine users. Communities like ManualsLib and ISMACS offer free downloads of manuals for various models, including rare ones. These platforms also host discussions where users share tips, troubleshooting solutions, and creative projects. For instance, the Singer Model 99 manual is readily available, while the Model 115 manual can be found with specific instructions. Users often collaborate to solve issues, making these forums a hub for both novice and experienced sewists. The collective knowledge shared fosters a supportive environment, ensuring everyone can maximize their machine’s potential and enjoy sewing with confidence.

Workshops and Sewing Classes

Workshops and sewing classes are excellent resources for mastering your Singer sewing machine. Many classes include access to free manuals, ensuring you understand your machine’s features. Tutorials often cover basic operations, maintenance, and troubleshooting, helping you make the most of your Singer model. Whether you’re using a Singer 988 or a Model 99, these sessions provide hands-on experience. Instructors also share tips for customizing settings and avoiding common mistakes. Additionally, community-driven workshops foster creativity and skill development, making them a great way to enhance your sewing journey with expert guidance and support.

Sharing Experiences and Tips

Sharing experiences and tips within the sewing community enhances learning and creativity. Many users, like Isaac Merritt Singer, share their manuals and insights online, fostering collaboration. Online forums and groups dedicated to Singer sewing machines allow users to exchange advice, troubleshoot issues, and showcase projects. Beginners benefit from seasoned sewists’ tips, while experts gain new ideas. Platforms like ismacs.net and manualslib.com host resources, enabling users to learn from others’ experiences. This collective knowledge helps optimize machine use, resolve common problems, and explore advanced techniques, making the sewing journey more enjoyable and productive for everyone involved in the Singer sewing community.

Singer sewing machine manuals are invaluable resources for every sewist, providing guidance and inspiration. With free downloads readily available, users can unlock their machine’s full potential effortlessly.

Final Thoughts on Singer Sewing Machine Manuals

Singer sewing machine manuals are indispensable for unlocking your machine’s full potential. Whether you’re a beginner or an experienced sewist, these guides provide clear instructions and troubleshooting tips. With free downloads readily available, accessing model-specific manuals is easier than ever. From setup and maintenance to advanced stitching techniques, Singer manuals empower creativity and efficiency. They also offer insights into the rich history of Singer machines, celebrating innovation and craftsmanship. For models like the Singer 988 or 99, these resources are invaluable. Embrace your sewing journey with confidence, knowing these manuals are your ultimate companion for every project.

Encouragement to Explore and Create

With Singer sewing machine manuals readily available for free download, there’s never been a better time to explore your creativity. Whether you’re crafting garments, home decor, or unique gifts, these guides empower you to unlock your machine’s full potential. From basic stitches to advanced embroidery, Singer manuals provide the confidence to experiment and innovate. Don’t hesitate to try new techniques or personalize projects—your sewing machine is a tool for self-expression. Embrace the joy of creating something with your own hands, and let Singer’s legacy of innovation inspire your next masterpiece. Happy sewing!

Importance of Continuous Learning

Continuous learning is key to mastering your Singer sewing machine. With free downloadable manuals and online resources, you can explore new techniques and stay updated on machine advancements. Singer’s legacy of innovation, from the first practical sewing machine in 1851 to modern embroidery and stitching options, offers endless opportunities for growth. By regularly reviewing manuals and tutorials, you can discover advanced features, troubleshoot common issues, and refine your sewing skills. Embrace lifelong learning to unlock your machine’s full potential, enhance creativity, and ensure every project is a success. Stay curious, keep exploring, and let your sewing journey evolve with Singer’s guidance.

sea-doo service manual pdf free download

A Sea-Doo service manual is an essential tool for owners and technicians, providing detailed instructions, diagrams, and guidelines for maintenance, repair, and troubleshooting various Sea-Doo models.

Overview of Sea-Doo Service Manuals

Sea-Doo service manuals are comprehensive guides designed to help owners and technicians maintain, repair, and troubleshoot their watercraft. These manuals cover various models, including the 2016 SPARK series, 2017 GTI, GTR, GTS, GTX, and RXT series, as well as later models. They include detailed instructions, diagrams, and wiring information, ensuring users can perform tasks efficiently. Available for free download, these manuals are indispensable for DIY enthusiasts and professionals alike, providing everything needed to keep Sea-Doo watercraft in optimal condition.

Importance of Service Manuals for Sea-Doo Owners

Sea-Doo service manuals are vital for owners, offering detailed guidance for maintenance, repairs, and troubleshooting. They empower users to perform DIY tasks, reducing reliance on dealerships and lowering costs. Manuals ensure safety by providing proper procedures, preventing potential hazards. They also enhance performance by outlining best practices for upkeep. Accessing these resources helps owners maintain their watercraft’s longevity and functionality, making them an indispensable tool for both novice and experienced enthusiasts.

Where to Download Sea-Doo Service Manuals for Free

Official BRP websites, reliable third-party platforms, and community forums offer free Sea-Doo service manual downloads, ensuring easy access to essential repair and maintenance guides.

Official Sources for Free Downloads

Official BRP websites and authorized Sea-Doo portals provide free service manual downloads. These sources ensure authenticity and safety, offering detailed guides for maintenance and repairs. Users can access manuals for specific models, including the 2016 SPARK series, 2017 GTI, GTR, GTS, GTX, and RXT series, as well as later models. Official downloads are regularly updated, ensuring the latest information is available. These manuals are essential for DIY enthusiasts and professionals, covering troubleshooting, wiring diagrams, and technical specifications.

Reliable Third-Party Websites

Several trusted third-party websites offer free Sea-Doo service manual downloads. Platforms like BRPManuals.com and other reputable forums provide comprehensive guides for various models. These sites often feature user-contributed content, ensuring a wide range of manuals are available. They cater to DIY enthusiasts and professionals, offering easy access to detailed repair instructions, wiring diagrams, and maintenance schedules. Downloading from these sources is convenient and cost-effective, making them a popular choice for Sea-Doo owners seeking reliable information.

Community Forums and User Contributions

Community forums and user contributions are invaluable resources for accessing Sea-Doo service manuals. Enthusiasts often share free PDF downloads, parts catalogs, and DIY guides. These platforms foster collaboration, allowing users to exchange knowledge and repair experiences. Many forums have dedicated threads for specific models, ensuring easy access to relevant information. By leveraging these communities, owners can gain insights and troubleshooting tips, making repairs more manageable and cost-effective. This collective support enhances the overall ownership experience for Sea-Doo enthusiasts worldwide.

Content of a Typical Sea-Doo Service Manual

A typical Sea-Doo service manual includes maintenance schedules, troubleshooting guides, repair instructions, wiring diagrams, and technical specifications to ensure proper care and maintenance of your watercraft.

Maintenance Procedures and Schedules

A Sea-Doo service manual provides detailed maintenance procedures and schedules, ensuring your watercraft operates at peak performance. Routine checks, oil changes, and filter replacements are outlined, along with specific intervals for tasks like spark plug replacement and coolant checks. These schedules help prevent mechanical issues and extend the lifespan of your Sea-Doo. By following the manual’s guidelines, you can maintain optimal performance, safety, and reliability, ensuring your watercraft remains in excellent condition for years of enjoyable riding.

Troubleshooting Common Issues

Sea-Doo service manuals include detailed troubleshooting guides to help identify and resolve common issues. From engine problems to electrical faults, the manual provides step-by-step diagnostic procedures and solutions. Error codes, symptoms, and repair steps are clearly outlined, enabling owners to address issues efficiently. This section ensures that you can quickly pinpoint and fix problems, minimizing downtime and ensuring your Sea-Doo runs smoothly. Regular troubleshooting helps maintain performance and prevents minor issues from becoming major repairs.

Repair and Replacement Guidelines

Sea-Doo service manuals provide comprehensive repair and replacement guidelines, ensuring proper procedures for maintaining your watercraft. Detailed instructions cover everything from basic part replacements to complex engine overhauls. Torque specifications, tool requirements, and safety precautions are emphasized to guarantee repairs are done correctly. The manual also highlights the importance of using genuine Sea-Doo parts for optimal performance and longevity. Clear diagrams and illustrations guide you through each step, making even the most intricate repairs manageable and ensuring your Sea-Doo operates at its best.

Wiring Diagrams and Technical Specifications

Sea-Doo service manuals include detailed wiring diagrams and technical specifications, essential for diagnosing and resolving electrical issues. These diagrams provide a clear visual representation of the watercraft’s electrical system, while specifications outline precise measurements for components like voltage, resistance, and torque. This information is crucial for ensuring accurate repairs and maintaining system integrity. The manuals also offer comprehensive tables and charts, making it easier to identify and address potential faults effectively, while adhering to manufacturer standards for safety and performance.

Benefits of Using a Sea-Doo Service Manual

Using a Sea-Doo service manual helps owners save money, improve safety, and enhance performance by providing clear instructions for maintenance, repairs, and troubleshooting their watercraft effectively.

Cost Savings on Repairs

Using a Sea-Doo service manual enables owners to save money by performing repairs and maintenance themselves, avoiding costly labor fees. Free downloads of these manuals provide access to detailed instructions, reducing the need for professional assistance. DIY repairs, such as replacing parts or adjusting systems, become more affordable and manageable. Additionally, understanding proper maintenance schedules can prevent expensive issues from arising, ensuring long-term cost savings and extending the lifespan of the watercraft.

Improved Safety and Performance

Sea-Doo service manuals enhance safety by providing clear guidelines for proper maintenance and repair procedures, ensuring owners follow manufacturer-recommended practices. This reduces the risk of accidents and mechanical failures. Additionally, these manuals help optimize performance by detailing how to fine-tune engines, adjust settings, and maintain optimal operating conditions. By adhering to the manual’s instructions, users can ensure their watercraft runs safely and efficiently, maximizing their riding experience while minimizing potential hazards;

Enhanced DIY Capabilities

Sea-Doo service manuals empower owners to take charge of maintenance and repairs, offering detailed instructions and diagrams for various procedures. With step-by-step guidance, users can troubleshoot issues, replace parts, and perform routine maintenance confidently. These manuals eliminate the need for guesswork, making DIY repairs more accessible and cost-effective. By following the manual’s instructions, enthusiasts can ensure their watercraft is well-maintained, extending its lifespan and performance. This resource is invaluable for those seeking to enhance their DIY skills and independence in caring for their Sea-Doo.

Safety Tips for Using Sea-Doo Service Manuals

Always wear protective gear, ensure a safe workspace, and follow manufacturer guidelines to avoid accidents. Proper tool usage and precautions are essential for safe repairs and maintenance.

Precautions Before Starting Repairs

Before beginning any repair, disconnect the battery and ensure the watercraft is on a stable, flat surface. Wear protective gear, including gloves and safety glasses. Consult the service manual for specific precautions related to your model. Ensure all electrical systems are deactivated and the area is well-ventilated. Never attempt repairs without proper tools or knowledge. If unsure, seek professional assistance to avoid accidents or further damage; Always follow manufacturer guidelines to ensure safety and maintain your Sea-Doo’s performance.

Proper Use of Tools and Equipment

Always use tools and equipment as specified in the service manual to avoid damage or injury. Ensure all tools are in good condition and suitable for the task. Follow torque specifications and guidelines for electrical components. Properly secure the watercraft to prevent movement during repairs. Use protective covers for sensitive parts and refer to diagrams for correct assembly. Misuse of tools can lead to costly repairs or safety hazards, so adherence to manual instructions is crucial for successful maintenance and repairs.

Adhering to Manufacturer Guidelines

Following Sea-Doo manufacturer guidelines ensures safety, optimal performance, and prevents voiding warranties. Always adhere to specified torque values, electrical standards, and assembly procedures. Use approved lubricants and parts to maintain reliability. Ignoring these guidelines can lead to malfunctions, safety risks, or costly repairs. Refer to the manual for model-specific instructions and updates. Proper adherence guarantees compliance with safety standards and extends the lifespan of your watercraft, ensuring trouble-free operation and maintaining its value over time.

How to Effectively Use a Sea-Doo Service Manual

Familiarize yourself with the manual’s structure, use the index for quick access, and understand symbols and terminology to maximize efficiency in repairs and maintenance tasks;

Navigating the Manual Structure

The Sea-Doo service manual is organized into clear sections, starting with a table of contents for easy navigation. Chapters are divided by topics such as maintenance, troubleshooting, and repairs. Detailed diagrams and illustrations accompany step-by-step instructions, while wiring diagrams provide visual guidance for electrical systems. An index at the end allows quick access to specific topics. Understanding the manual’s structure ensures users can efficiently locate and utilize the information needed for their Sea-Doo model, enhancing DIY capabilities and repair efficiency.

Understanding Technical Terminology

Understanding the technical terminology in a Sea-Doo service manual is crucial for effective repairs and maintenance. Terms like “PWC” (Personal Watercraft) and “ECU” (Electronic Control Unit) are frequently used; The manual often includes a glossary or explanatory section to clarify complex terms. Familiarizing yourself with this language ensures accurate execution of procedures. Proper understanding of technical terms enhances safety, performance, and DIY repair success, making it essential to review and comprehend the manual’s terminology before starting any project.

Referencing Diagrams and Illustrations

Referencing diagrams and illustrations in a Sea-Doo service manual is essential for understanding complex procedures. These visuals provide clear, detailed representations of components and systems, such as wiring diagrams and engine layouts. They simplify troubleshooting and repairs by offering a visual guide; Full-color, high-resolution images are often included, making it easier to identify parts and follow step-by-step instructions. These diagrams are a critical resource for both DIY enthusiasts and professional technicians, ensuring accurate and efficient maintenance.

Model-Specific Service Manuals

Model-specific Sea-Doo service manuals provide detailed instructions tailored to individual models, such as the 2016 SPARK series, 2017 GTI, GTR, GTS, GTX, RXT, and 2018 models.

2016 Sea-Doo SPARK Series

The 2016 Sea-Doo SPARK series service manual provides detailed instructions for maintenance, troubleshooting, and repairs specific to this model. It includes procedures for engine, electrical, and hull systems, ensuring optimal performance. Owners and technicians can access wiring diagrams, torque specifications, and parts lists. This manual is essential for DIY enthusiasts and professionals alike, offering comprehensive guidance to keep the SPARK running smoothly. Downloading it for free ensures you have all the information needed to service your watercraft effectively.

2017 Sea-Doo GTI, GTR, GTS Series

The 2017 Sea-Doo GTI, GTR, and GTS series service manual offers detailed guidance for maintenance, repairs, and troubleshooting. It covers engine, electrical, and hull systems, providing step-by-step instructions and diagrams. This manual is essential for owners and technicians, ensuring optimal performance and safety. Available for free download, it includes wiring diagrams, torque specifications, and parts lists. Whether you’re a DIY enthusiast or a professional, this manual is a vital resource for keeping your 2017 Sea-Doo model in top condition.

2017 Sea-Doo GTX and RXT Series

The 2017 Sea-Doo GTX and RXT series service manual provides comprehensive guidance for maintenance, repairs, and troubleshooting. It covers engine specifications, electrical systems, and hull components, offering detailed diagrams and step-by-step instructions. This manual is crucial for owners and technicians, ensuring optimal performance and safety; Available for free download, it includes wiring diagrams, torque specifications, and parts lists. Whether for routine maintenance or complex repairs, this manual is an indispensable resource for 2017 GTX and RXT models.

2018 and Later Models

Service manuals for 2018 and later Sea-Doo models are comprehensive guides tailored for modern watercraft. They include detailed instructions for maintenance, repairs, and troubleshooting, ensuring optimal performance and safety. These manuals feature wiring diagrams, parts lists, and step-by-step procedures, making them indispensable for owners and technicians. Available for free download, they cover advanced systems and technologies introduced in newer models, providing precise information to keep your Sea-Doo in top condition. Regular updates ensure relevance and accuracy for post-2018 models.

Supplementary Resources

Supplementary resources include parts catalogs, online forums, and video tutorials, offering additional support for Sea-Doo maintenance and repairs beyond the service manual.

Parts Catalogs and Diagrams

Parts catalogs and diagrams provide detailed exploded views of Sea-Doo components, making it easier to identify and order genuine parts. These resources complement service manuals by offering visual guides for disassembly and assembly. They are available for various models, including the 2011 Sea-Doo PWC and 2016 SPARK series. Official sources and third-party websites offer free downloads, ensuring accessibility for DIY enthusiasts and technicians. These catalogs are indispensable for accurate repairs and maintenance, covering everything from engine parts to electrical systems.

Online Communities and Forums

Online communities and forums are invaluable resources for Sea-Doo enthusiasts, offering shared knowledge, troubleshooting tips, and access to free service manuals. These platforms connect owners and technicians, fostering collaboration and problem-solving. Many forums host downloadable PDF manuals for various Sea-Doo models, including the 2011 GTI and 2016 SPARK series. Users can also discuss repairs, share experiences, and gain insights from experts. Participating in these communities ensures access to up-to-date information and support for maintaining and repairing your Sea-Doo effectively.

Video Tutorials and Guides

Video tutorials and guides complement service manuals by providing visual, step-by-step instructions for Sea-Doo repairs and maintenance. Platforms like YouTube and specialized forums host a wealth of DIY videos, covering tasks from basic maintenance to complex engine repairs. These resources are particularly helpful for visual learners, offering real-time demonstrations that make troubleshooting and fixes more accessible. Many videos are created by experienced technicians or enthusiasts, ensuring practical advice tailored to specific Sea-Doo models and common issues.

Sea-Doo service manuals are invaluable resources for owners, offering detailed guidance for maintenance, repairs, and troubleshooting. Downloading and using these manuals ensures optimal performance and longevity of your watercraft.

Final Thoughts on Sea-Doo Service Manuals

Sea-Doo service manuals are indispensable for owners and technicians, providing comprehensive guidance for maintenance, repairs, and troubleshooting. They ensure optimal performance, safety, and longevity of your watercraft. With detailed instructions, diagrams, and technical specifications, these manuals empower users to handle various tasks confidently. Free downloads are widely available from official and trusted sources, making it easy to access essential information. Utilizing these resources is crucial for maximizing your Sea-Doo’s potential and ensuring a seamless riding experience.

Encouragement to Download and Use

Downloading a Sea-Doo service manual is a smart decision for any owner. These manuals provide invaluable insights, ensuring your watercraft runs smoothly and safely. With free access to detailed instructions, diagrams, and troubleshooting tips, you can save money on repairs and enhance your DIY capabilities. Whether you’re a seasoned technician or a hobbyist, these resources empower you to maintain and repair your Sea-Doo with confidence. Take advantage of these free downloads to keep your watercraft in peak condition and enjoy a hassle-free riding experience.

ring size guide

Discover the essential guide to finding your perfect ring size, ensuring comfort and style. Learn how to measure accurately, understand size variations, and explore factors influencing fit for a flawless ring experience.

Understanding Ring Sizes

Understanding ring sizes is crucial for ensuring a comfortable and proper fit. Ring sizes vary by country, with numerical and alphabetical systems used globally. Each size represents the inner circumference of the band, ensuring it slides on easily while staying secure. Proper sizing balances comfort and grip, essential for everyday wear. Factors like band thickness and knuckle size also influence the ideal fit, making accurate measurement vital. Resizing is possible for most rings, but understanding your size initially helps avoid unnecessary adjustments.

Numerical Ring Size System

The numerical ring size system is widely used to determine the perfect fit for rings. This system assigns numbers to represent the inner circumference of the ring band, typically ranging from size 4 to size 16. Each numerical size corresponds to a specific measurement in millimeters or inches, ensuring consistency across different designs. For example, size 6 measures approximately 16.5mm in diameter, while size 8 measures about 18.2mm. This system is commonly used in the United States and other countries, offering a straightforward way to measure and compare ring sizes. The difference between consecutive sizes is about 1.3mm, making precise sizing crucial for comfort and proper fit. Jewelers often use specialized tools to measure the finger and match it to the closest numerical size. Understanding this system helps individuals choose rings that are neither too tight nor too loose, ensuring optimal comfort and style.

International Ring Size Standards

Ring size standards vary globally, with different countries adopting unique systems to measure ring sizes. In the United States, the numerical system is predominant, while Europe often uses a separate scale. For instance, Germany and other European countries use a numbering system that starts at 30 and increases in increments of 1, with each size corresponding to a specific inner circumference. In contrast, Japan uses a letter-based system, with sizes labeled from “1” to “30,” but this is less common. Other regions, such as Asia, may use a combination of numerical and alphabetical systems. Understanding these international standards is crucial for consumers shopping across borders. Many jewelers provide conversion charts to help buyers align their size with the target country’s system. This ensures a proper fit regardless of where the ring is purchased. Awareness of these differences is key to avoiding sizing errors and ensuring satisfaction with the purchase.

Ring Size and Comfort

Ring size plays a significant role in determining comfort. A properly fitted ring should neither be too tight nor too loose, ensuring it stays in place without causing discomfort. If a ring is too tight, it can restrict blood flow and lead to swelling, especially in warmer weather or during physical activity. Conversely, a ring that is too loose may slip off easily or rub against adjacent fingers, causing irritation. The thickness of the band also affects comfort; thicker bands may require a slightly larger size to feel comfortable, while thinner bands can fit more snugly. Additionally, personal preferences for tightness vary, with some people favoring a secure fit and others preferring a looser feel. Achieving the right balance ensures the ring remains comfortable for daily wear. Proper sizing is essential to avoid discomfort and ensure the ring is enjoyable to wear over time. Comfort is as important as aesthetics when selecting the ideal ring size.

Ring Size and Style

Ring size and style are closely linked, as the size of the ring can significantly impact its aesthetic appeal. For smaller hands, a more delicate ring with a narrower band often looks proportionate, while larger hands can accommodate bold, statement pieces. The thickness of the band also plays a role; thicker bands may appear more prominent, so a slightly smaller size might be preferable for balance. Conversely, thinner bands can create a more elegant, streamlined look. The style of the ring, such as solitaire, halo, or pave, should also be considered alongside size to ensure harmony. For example, intricate details may be lost on larger rings, while bold designs can benefit from a slightly bigger size. Ultimately, the right ring size enhances the overall style, ensuring the piece flatters the hand and aligns with personal fashion preferences. Balancing proportions is key to achieving a polished and attractive look. Size and style must work together seamlessly for the perfect fit.

How to Measure Your Ring Size

To measure your ring size accurately, use a string or a printable ring sizer. Wrap the string around your finger at the knuckle, mark the overlap, and measure the length. For best results, measure at room temperature and consider professional assistance for precision. Ensure comfort by selecting a size that fits snugly but allows easy movement.

Using a String or Paper

Measuring your ring size with a string or paper is a simple and effective method. Wrap a flexible string or strip of paper around the base of your finger, ensuring it fits comfortably. Mark the point where the string overlaps with a pen or pencil. Lay the marked string flat and measure the length using a ruler. Compare this measurement to a standard ring size chart to find your size. For accuracy, avoid wrapping the string too tightly or loosely. Repeat the process a few times to ensure consistency. This method is ideal for those who prefer a DIY approach and want to determine their size without specialized tools. It’s also helpful for measuring at home before purchasing or resizing a ring. Keep in mind that slight variations may occur, so consider consulting a professional jeweler for the most precise fit. This technique is cost-effective and widely accessible, making it a popular choice for many.

Measuring with an Existing Ring

If you already own a ring that fits perfectly, you can use it to determine your size. Place the ring on a flat surface and compare it to a standard ring size chart, which can be found online or in jewelry stores. Measure the inside diameter of the ring using a ruler or calipers and match it to the corresponding size on the chart. For accuracy, ensure the ring lies flat and the measurement is taken from edge to edge. This method works best with rings that fit the finger you intend to wear the new ring on, as sizes can vary slightly between fingers. If the ring is decorative or has a wide band, consider its thickness when comparing. For the most precise results, use multiple rings of known sizes to find an average. If unsure, consult a professional jeweler to confirm the size. This approach is quick and reliable for those with access to well-fitting rings.

Professional Measurement

Professional measurement is the most reliable method to determine your ring size. Jewelers use a set of standardized sizing rings to find the perfect fit. During the process, they will assess your finger’s circumference and identify the size that feels most comfortable. It’s important to note that finger size can vary slightly depending on the time of day and other factors, so professionals often consider these fluctuations. They may also take into account the size of your knuckle, as it can affect how easily the ring slides on and off. For the best results, visit a jeweler when your hands are at room temperature and not swollen. Many jewelers offer this service for free, making it a convenient and accurate option. Professional measurement is especially recommended for high-value or custom pieces, where precise fit is crucial. This method ensures a tailored fit, reducing the risk of resizing later.

Printable Ring Sizer Tools

Printable ring sizer tools are a convenient and cost-effective way to measure your ring size at home. These tools are widely available online and can be downloaded as PDF files. Once printed, they provide a circular guide that you can place your finger through to determine your size. Ensure your printer is set to 100% scale for accuracy. To use the tool, cut out the circular sizer and slide your finger through the hole until it fits comfortably. The number corresponding to the hole will be your ring size. This method is ideal for those who prefer to measure privately or need a quick solution. However, accuracy depends on printing quality and proper alignment. For the best results, measure at the end of the day when fingers are at their largest. Printable tools are a practical alternative to professional measurement or using a string and ruler. They’re also reusable, making them a handy resource for future purchases.

Factors Affecting Ring Size

Factors affecting ring size include time of day, weather conditions, knuckle size, and band thickness. These elements influence comfort and fit, ensuring the ring slides on easily and stays in place securely.

Time of Day

The time of day significantly impacts ring size due to natural fluctuations in finger size. Fingers tend to be smaller in the morning and slightly larger in the afternoon due to changes in temperature and activity. This variation can affect how a ring fits, making it essential to measure ring size at a consistent time of day for accuracy. Ideally, measure your ring size in the mid-morning or early afternoon when fingers are at their average size. Avoid measuring when hands are excessively cold or hot, as this can cause temporary swelling or shrinking. Additionally, factors like humidity and physical activity can cause fingers to swell, further influencing ring fit. Consistency in measurement timing ensures a more reliable and comfortable fit. Always consider these daily fluctuations to choose the right size for your ring.

Weather Conditions

Weather conditions play a crucial role in determining ring size, as they can cause temporary changes in finger size. In hot weather, fingers tend to swell due to increased blood flow and higher humidity, which can make a ring feel tighter. Conversely, cold weather causes fingers to shrink slightly, making a ring feel looser. These fluctuations can lead to inaccurate measurements if not considered. For instance, measuring in extremely hot conditions might result in ordering a larger ring size than needed, while cold weather could lead to a smaller size. It’s essential to measure ring size in a moderate environment to ensure accuracy. Additionally, activities influenced by weather, such as gardening or sports, can cause temporary swelling or changes in finger size. To achieve the best fit, measure your ring size during stable weather conditions and avoid extreme temperatures or activities that could affect your finger size. This ensures a comfortable and proper fit for your ring.

Knuckle Size

Knuckle size significantly impacts ring fit, as it determines how easily a ring can slide over the finger. Larger knuckles may require a slightly bigger ring size to ensure comfort and ease of movement. Conversely, smaller knuckles might allow for a snugger fit. It’s essential to consider both the knuckle and the base of the finger when measuring for a ring. If the knuckle is notably larger than the finger, a ring that fits the base comfortably might still feel tight when passing over the knuckle. This can lead to discomfort or difficulty in removing the ring. Jewelers often assess knuckle size during professional measurements to recommend the most suitable size. Additionally, some people opt for rings with adjustable bands or specific styles, like hinged or expandable designs, to accommodate larger knuckles. Balancing knuckle size with personal comfort ensures a ring that is both functional and stylish, avoiding the need for resizing or adjustments later on.

Band Thickness

Band thickness plays a significant role in determining the comfort and fit of a ring. Thicker bands can feel tighter on the finger, potentially requiring a slightly larger size for comfort. Conversely, thinner bands offer more flexibility and may fit more snugly without needing a larger size. The material of the band also influences its thickness, with metals like gold or platinum often being thicker and more durable, while materials like silicone can be thinner and more flexible.

Thicker bands are often preferred for statement pieces or those seeking a more robust design, whereas thinner bands are ideal for delicate or minimalist styles. The thickness can also affect the ring’s appearance, with thicker bands potentially making fingers appear shorter and thinner bands elongating the finger. Additionally, thicker bands might require more maintenance to prevent scratching, while thinner bands are more prone to damage if not handled carefully. Balancing aesthetics and comfort is key to selecting the right band thickness, ensuring the ring is both stylish and wearable.

Average Ring Sizes

For women, average ring sizes typically range from 4 to 7, with 6 being the most common. For men, sizes usually range from 8 to 12, with 9 or 10 being average. Sizes vary based on demographics, bone structure, and personal comfort preferences.

Average Sizes for Women

For women, the average ring size typically ranges between 6 and 7 in the U.S. sizing system. This corresponds to a ring diameter of approximately 0.2 inches (5.1 mm) for size 6 and 0.21 inches (5.3 mm) for size 7. However, sizes can vary depending on factors like hand size, finger shape, and personal preference. Some women may wear smaller sizes, such as 5 or 5.5, while others may require larger sizes, up to 8 or more. International sizing standards may differ, so it’s essential to refer to a conversion chart when comparing sizes across regions. To ensure comfort and fit, consider the thickness of the band and the size of the knuckle, as these can impact the ideal ring size. Measuring at room temperature is recommended, as fingers can swell slightly during the day. Consulting a professional jeweler or using a ring sizer tool can provide the most accurate results.

Average Sizes for Men

For men, the average ring size typically ranges from size 8 to 14, with the most common sizes being 9, 9.5, and 10. This variation is influenced by factors such as finger shape, hand size, and personal comfort preferences. Men with larger hands or longer fingers often require larger ring sizes, while those with smaller hands may prefer a more snug fit. It’s important to note that finger size can fluctuate slightly throughout the day due to temperature and activity levels. To ensure the best fit, many jewelers recommend measuring later in the day when fingers are at their largest. Additionally, men’s rings often feature thicker bands, which can affect the perceived size and comfort. Choosing a size that balances style and ease of wear is key to long-term satisfaction. Always consider these factors when selecting a ring size for men to ensure a comfortable and secure fit.

Special Cases

Special cases include rings with unique or intricate designs that may require specific sizing considerations. Stacked rings can affect the overall fit, while non-resizable designs demand precise measurements. Proper sizing ensures comfort and functionality.

Stacked Rings

Stacked rings are a popular trend, but they can complicate ring size selection. When wearing multiple rings on one finger, the combined thickness of the bands can make the fit feel tighter. This is especially true for close-fitting styles like solitaire or eternity bands. To ensure comfort, it’s important to consider the total thickness of all rings being stacked. For example, if stacking two or more rings, you may need a slightly larger size than your standard ring size to accommodate the added bulk.

Additionally, the size of your knuckles plays a role. If your knuckles are larger, you may need to account for the extra space required to slide the rings over them comfortably. Some jewelers recommend sizing up by a quarter to a half size when stacking rings to ensure a comfortable fit. Always try on multiple rings together to gauge the best size, as individual ring sizes may vary slightly depending on the design and thickness of the bands.

Non-Resizable Designs

Non-resizable designs refer to rings that cannot be adjusted or resized after purchase due to their specific craftsmanship or style. These designs often feature intricate details, such as eternity bands with gemstones that encircle the entire ring, or tension-set rings where the stone is held in place by pressure rather than prongs. Resizing these rings would compromise their structural integrity or aesthetic appeal.

For individuals considering non-resizable designs, it is crucial to determine the correct size beforehand. Measurements should be taken during a time of day when fingers are at their average size, as swelling or shrinkage can affect fit. Professional jewelers often recommend trying on similar styles to ensure comfort and proper fit.

Non-resizable designs emphasize the importance of precision in ring sizing. Buyers should work closely with jewelers to ensure accuracy, as any mistakes may require costly resizing or even remaking the ring. Always prioritize proper measurement to enjoy these unique and elegant designs.

Ring Resizing Options

When a ring doesn’t fit perfectly, resizing is often the solution. Most rings can be resized, but the feasibility depends on the design and material. Soldering is a common method, where a jeweler cuts the band, adjusts the size, and joins it back. This works well for metal bands but may not be suitable for rings with intricate details or certain gemstones.

  • Mandrel stretching is another technique, often used for enlarging rings. A metal rod (mandrel) shapes the band to the desired size.
  • Sizing beads or balls can be added inside the band for a temporary fix, providing a snug fit without altering the ring’s structure.
  • Shrinking involves compressing the metal to reduce the size, typically done for minor adjustments.

Some materials, like titanium or tungsten, are difficult to resize due to their hardness. In such cases, replacement may be the only option. Always consult a professional jeweler to determine the best resizing method. Costs and timeframes vary, so inquire beforehand. Remember, not all rings can be resized, especially those with complex designs or irreversible settings.

Choosing the Right Ring Size

Choosing the right ring size is crucial for both comfort and style. A well-fitting ring should feel snug but not overly tight, allowing for ease of movement. Consider the thickness of the band, as wider bands may require a slightly larger size for comfort. If you plan to wear the ring frequently, especially during active periods, opt for a size that accommodates potential swelling. For those with larger knuckles, ensure the ring can slide over them without difficulty. Personal style also plays a role—some prefer a looser fit, while others like a more secure feel. Always check the average sizes for guidance but remember that individual preferences vary. If unsure, consult a professional jeweler or use a printable ring sizer tool to confirm your size. Finally, consider whether the ring can be resized, as some designs may not allow adjustments. Taking these factors into account ensures a perfect fit for years to come.

Maintenance Tips for Your Ring

To ensure your ring remains in pristine condition, regular maintenance is essential. Start by cleaning your ring frequently using mild soap and warm water. Avoid harsh chemicals, as they can damage certain metals or gemstones. Use a soft cloth to gently scrub the band and settings, paying attention to areas where dirt often accumulates. For more intricate designs, consider professional cleaning services.

Store your ring in a protective case or soft pouch when not worn to prevent scratches. Avoid stacking multiple rings, as this can cause friction and wear. Remove your ring during activities that may cause damage, such as heavy lifting or exposure to water.
Regularly inspect the setting to ensure stones are secure. If you notice any looseness, have it checked by a jeweler. For polished finishes, periodic repolishing can restore their shine. By following these care tips, your ring will retain its beauty and durability for years to come.

genie 3024 manual

The Genie 3024 garage door opener is designed for convenience and security‚ offering smooth and reliable performance for everyday use. It comes with comprehensive guides for installation‚ operation‚ and maintenance‚ ensuring ease of use and optimal functionality. Available resources include manuals‚ user guides‚ and troubleshooting tips to help users get the most out of their garage door opener. The Genie 3024 is part of the Professional Line‚ providing advanced features and compatibility with older models for seamless integration. With detailed instructions and support‚ this opener is a practical choice for homeowners seeking durability and efficiency.

1.1. Overview of the Genie 3024

The Genie 3024 is a versatile garage door opener designed for compatibility with most garages and door types. It belongs to the Professional Line‚ offering advanced features and reliable performance. With a focus on convenience and security‚ this opener is supported by a range of manuals‚ including installation‚ operation‚ and maintenance guides. Its compatibility with older Genie models‚ such as Series II‚ ensures seamless integration for users upgrading their systems. The Genie 3024 is known for its durability and efficiency‚ making it a practical choice for homeowners seeking a dependable garage door opener.

1.2. History and Development

The Genie 3024 garage door opener is part of the Professional Line‚ representing a culmination of innovation and reliability. Developed to meet modern garage needs‚ it builds on the legacy of Genie’s Series II models. Over time‚ the 3024 has evolved to offer enhanced features while maintaining compatibility with older systems. Its development focuses on user convenience‚ security‚ and durability. With comprehensive manuals and guides‚ the Genie 3024 has become a trusted choice for homeowners seeking advanced garage door solutions. Its history reflects Genie’s commitment to quality and customer satisfaction.

Key Features

The Genie 3024 offers advanced security features‚ reliable design‚ and compatibility with older models. It ensures smooth operation‚ intuitive functionality‚ and efficient performance for daily use.

2.1. Security Features

The Genie 3024 incorporates advanced security features to ensure safe and secure garage door operation. These include rolling code technology‚ which prevents unauthorized access by generating unique codes for each use. Additionally‚ the opener is equipped with safety sensors that detect obstacles and stop the door from closing‚ protecting people and pets. The system also allows for remote and keypad programming‚ enabling users to clear or add remotes as needed. These features provide peace of mind and enhance the overall security of the garage door system.

2.2. Design and Build Quality

The Genie 3024 is built with robust materials and designed for durability‚ ensuring long-lasting performance. Its compact design makes it suitable for most garages‚ while its quiet operation enhances user experience. The opener features a sturdy motor and high-quality components‚ ensuring smooth and reliable door movement. The design prioritizes ease of use‚ with intuitive controls and a user-friendly interface. Built to withstand regular use‚ the Genie 3024 combines functionality with a sleek appearance‚ making it a reliable choice for homeowners seeking a durable and efficient garage door opener.

Installation Instructions

The Genie 3024 manual provides a detailed‚ step-by-step guide for easy installation‚ ensuring smooth setup and proper functionality. Follow the instructions carefully to avoid complications.

3.1. Pre-Installation Checks

Before installing the Genie 3024‚ ensure your garage door is properly balanced and the area is clear of obstacles. Verify all components are included in the package‚ and check for any damage. Ensure the garage door opener is compatible with your door’s size and weight capacity. Review the manual to confirm electrical requirements and mounting specifications. Test the door’s balance by lifting it manually; it should stay in place without drifting. Secure any loose parts and ensure the door is aligned correctly. These checks are essential for a safe and successful installation process.

3.2. Step-by-Step Installation Guide

Begin by attaching the mounting brackets to the garage ceiling‚ ensuring proper alignment. Secure the rail to the brackets and align it with the center of the garage door. Connect the carriage to the opener and attach the chain or belt to the door arm. Install safety sensors about 6 inches above the floor on both sides of the door. Wire the opener to the sensors and wall button‚ following the manual’s diagram. Finally‚ test the door’s operation to ensure smooth and safe functionality. Always refer to the manual for specific torque and alignment details.

Operation Guide

The Genie 3024 operates smoothly with the remote or wall button. Press once to open or close the door. Sensors ensure safe operation by detecting obstacles.

4.1. Daily Use and Functionality

The Genie 3024 operates seamlessly for daily use. To open or close the garage door‚ press the remote control or wall button once. The opener features a reliable motor that ensures smooth operation. The LED light illuminates the garage for better visibility. For added convenience‚ the keypad allows PIN entry for secure access. Regular functionality checks ensure the door aligns properly and sensors detect obstacles accurately. Always test the emergency release handle periodically to ensure it works correctly in case of power outages or system failures.

Daily use also involves monitoring the opener’s performance. Listen for unusual noises‚ as they may indicate wear or misalignment. Ensure the door closes fully and the safety sensors are free from obstructions. Proper maintenance‚ such as cleaning and lubricating parts‚ enhances longevity and reliability. Refer to the manual for specific care instructions tailored to the Genie 3024 model.

4.2. Adjusting Settings for Optimal Performance

To optimize the Genie 3024‚ begin by calibrating the opener. Use the adjustment screws to set the opening and closing force according to the door’s weight. Ensure the door aligns properly with the rail. Adjust the travel limits using the up and down buttons on the motor unit. Fine-tune the safety sensors to detect obstacles accurately. Refer to the manual for specific torque settings and calibration steps. After adjustments‚ test the door’s operation to confirm smooth and even movement. Regularly check and tighten all bolts and screws to maintain performance.

For optimal functionality‚ ensure the emergency release handle is properly engaged. Adjust the chain or belt tension if necessary‚ following the manual’s guidelines. Test the opener’s response to remote commands and keypad inputs. If issues arise‚ consult the troubleshooting section or reset the system as needed. Proper adjustments ensure longevity and reliable operation of the Genie 3024 garage door opener.

Maintenance Tips

Regularly inspect and clean the Genie 3024 to ensure smooth operation. Lubricate moving parts annually and check the chain or belt for wear. Tighten all screws and bolts‚ and ensure the garage door is balanced properly. Replace worn or damaged components promptly to prevent further issues. Schedule professional servicing if complex problems arise.

5.1. Cleaning the Garage Door Opener

Cleaning the Genie 3024 garage door opener is essential for maintaining its performance and longevity. Use a soft cloth and mild detergent to wipe down the motor‚ rail‚ and external components. Avoid harsh chemicals or abrasive materials that could damage the finish. Regularly clean the sensors and photo eyes to ensure proper alignment and safety features function correctly. Dust and debris on the chain or belt can cause friction‚ so gently brush them clean. For stubborn dirt‚ dampen the cloth but avoid soaking any parts. Cleaning should be done every 2-3 months or as needed.

5.2. Lubrication and Part Replacement

Regular lubrication of moving parts ensures smooth operation of the Genie 3024. Apply silicone-based lubricant to the chain or belt‚ hinges‚ and rollers every 6-12 months. Avoid over-lubrication to prevent dirt buildup. Inspect wearable parts like rollers and hinges annually and replace them if worn. Use genuine Genie replacement parts for optimal performance and safety. Lubricate after cleaning and part replacement to maintain efficiency. Always test the door’s operation after servicing to ensure proper function and alignment.

Troubleshooting Common Issues

Address issues like uneven door movement or non-response by checking power supply‚ remote batteries‚ and sensor alignment. Strange noises may require lubrication or part replacement.

6.1. Identifying and Diagnosing Problems

Common issues with the Genie 3024 include the door not opening‚ strange noises‚ or the opener not responding. Start by checking the power supply and ensuring the system is properly plugged in. Verify that sensors are clean and aligned‚ as misalignment can prevent operation. Test the remote control batteries and ensure they are functioning. Listen for unusual sounds‚ such as grinding or screeching‚ which may indicate worn parts. Check the emergency release cord to ensure it hasn’t been accidentally pulled. Refer to the error codes or blinking lights on the opener for specific diagnostics.

6.2. Resetting the Garage Door Opener

To reset the Genie 3024‚ unplug the power cord from the outlet and wait 30 seconds. Plug it back in and test operation. If issues persist‚ press and hold the learn button until the LED blinks twice‚ then release. This resets all codes and settings. Re-program the remote control by pressing the learn button and holding the remote button until the opener lights flash. If problems remain‚ refer to the manual or contact customer support for assistance; Resetting restores default settings and resolves many operational issues.

Remote and Keypad Programming

Program the remote by pressing the learn button‚ then holding the remote button until the opener lights flash. For the keypad‚ enter your PIN and press enter. Ensure the keypad is synced with the opener. Always follow safety guidelines when programming. If issues arise‚ refer to the manual or contact support for assistance. Proper programming ensures secure and convenient operation of your garage door system.

7.1. Programming the Remote Control

To program the remote control for your Genie 3024‚ locate the “LEARN” button on the motor unit. Press and release it‚ then immediately press the remote button you wish to program. The indicator light on the motor will flash‚ confirming the remote is synced. Test the remote to ensure proper function. If issues arise‚ repeat the process or reset the system. Always keep the remote out of reach of children and ensure it is stored securely. Follow these steps carefully for reliable operation. Proper programming ensures smooth and safe garage door control.

7.2. Adding and Clearing Remotes

To add a remote‚ press and hold the “LEARN” button on the motor unit until the indicator light blinks. Release it‚ then press the desired remote button. The light will stop blinking when synced. To clear remotes‚ press and hold the “LEARN” button until the light stays on‚ then release and press it again. This resets all remote controls. Ensure no remotes are nearby during clearing. This process ensures only authorized remotes operate your garage door‚ enhancing security and convenience. Always test remotes after programming or clearing to confirm functionality.

Safety Precautions

Ensure the garage area is clear when opening or closing. Keep children away from controls. Never leave the door partially open. Test emergency release regularly.

8.1. Safety Sensors and Alarms

The Genie 3024 features infrared safety sensors designed to detect obstacles. These sensors prevent the door from closing on objects or people. Ensure they are properly aligned and clean. Test the sensors monthly by passing an object under the door while it’s closing. If the sensors malfunction‚ the door will not operate. Additionally‚ the opener is equipped with an alarm that sounds if the door is forced open or if there’s a system failure. Always address sensor issues promptly to maintain safety.

8.2. Emergency Release Mechanism

The Genie 3024 includes an emergency release mechanism for manual operation during power outages or system failures. Located near the door‚ this red handle disengages the opener from the door. To activate‚ pull the handle downward until you hear a clicking sound. This allows the door to be opened or closed manually. After power is restored‚ re-engage the opener by pushing the door closed and pulling the handle back up. Always test the mechanism to ensure it functions properly and refer to the manual for detailed instructions.

Compatibility

The Genie 3024 is designed to work seamlessly with a variety of garage door systems and smart home devices‚ ensuring easy integration and versatility for homeowners.

9.1. Compatibility with Older Models

The Genie 3024 is designed to be compatible with older Genie garage door opener models‚ such as the 3024 and 4024 series. This ensures seamless integration with existing systems‚ allowing homeowners to upgrade without replacing all components. The opener supports older remote controls and wall consoles‚ though some may require adapters for full functionality. This backward compatibility makes the Genie 3024 a versatile choice for those looking to modernize their garage door system while retaining familiar controls and accessories.

9.2. Accessories and Additional Features

The Genie 3024 is compatible with a variety of accessories‚ including remote controls‚ keypads‚ and smart garage door openers. It also supports integration with smart home systems for enhanced convenience. Additional features include a battery backup system for operation during power outages and a quiet operation mode. Optional accessories like motion sensors and alarm systems can be installed to improve security. These features and accessories make the Genie 3024 a versatile and modern garage door opener solution.

Technical Specifications

The Genie 3024 features a powerful DC motor‚ 12-inch lift capacity‚ and operates at 315 MHz frequency for reliable performance and smooth operation.

10.1. Motor and Power Specifications

The Genie 3024 is equipped with a reliable 1/2 HP DC motor‚ designed for smooth and quiet operation. It operates on 12V DC power and features a 315 MHz frequency for consistent performance. The motor includes a soft-start and stop function to reduce wear and tear on the door and opener. With a voltage rating of 120V AC at 60Hz and a current draw of 3.5 Amps‚ it ensures efficient energy use. The motor also includes thermal overload protection for added safety and durability‚ meeting UL 325 safety standards.

10.2. Door Weight and Size Capacity

The Genie 3024 can handle garage doors weighing up to 500 pounds‚ ensuring robust performance for various door types. It accommodates doors up to 7 feet in height and 18 feet in width‚ making it suitable for standard residential use. The opener supports steel‚ wood‚ and vinyl doors‚ providing versatility for different materials. Designed for optimal functionality‚ it operates within a 315 MHz frequency range‚ ensuring reliable communication with remotes and keypads. Compliance with UL 325 safety standards guarantees safe and efficient operation for users.

Downloading the Manual

Download the Genie 3024 manual from the official Genie website or authorized retailers. Ensure authenticity by verifying the source. Access user guides effortlessly online.

11.1. Sources for PDF Downloads

The Genie 3024 manual can be downloaded as a PDF from the official Genie website or authorized retailers. Visit the support section and search for “Genie 3024 manual.” Ensure you use trusted sources to avoid unauthorized versions. Some third-party websites may offer free downloads‚ but verify authenticity to prevent scams. For convenience‚ use direct links or search terms like “Genie 3024 manual PDF” or “download Genie 3024 user guide.” Always prioritize official sources for safety and reliability.

11.2. Tips for Effective Use

To maximize your understanding and safety‚ read the Genie 3024 manual thoroughly before installation or operation. Pay attention to safety guidelines and warnings to avoid accidents. Use the diagrams to better visualize instructions. Refer to the troubleshooting section for common issues. Regularly review maintenance tips to ensure optimal performance. For complex tasks‚ revisit the manual to confirm steps. Familiarize yourself with emergency procedures‚ such as the emergency release mechanism. By following these tips‚ you can ensure safe and efficient operation of your garage door opener. Always keep the manual handy for quick reference.

The Genie 3024 garage door opener is a reliable and efficient solution for homeowners seeking convenience and security. With its advanced features and user-friendly design‚ it offers smooth operation and long-term durability. By following the manual’s guidelines‚ users can ensure safe and optimal performance. Regular maintenance and proper care will extend the lifespan of the opener. Whether for installation‚ operation‚ or troubleshooting‚ the Genie 3024 manual provides comprehensive support. This product is a great choice for those looking to enhance their garage door system with modern technology and proven reliability.

Additional Resources

Visit the official Genie website for customer support‚ or explore online forums like Genie’s community for troubleshooting and shared experiences with the Genie 3024 model.

13.1. Customer Support and Contact Information

For assistance with the Genie 3024‚ contact customer support at 1-800-354-3643 or visit https://www.geniecompany.com/support. Email inquiries can be sent to support@geniecompany.com. Live chat is also available on their website for quick help. The official website offers a comprehensive resource section‚ including FAQs‚ troubleshooting guides‚ and downloadable manuals. Representatives are available Monday-Friday‚ 8 AM-5 PM EST‚ to address any concerns or questions about your garage door opener.

13;2. Online Communities and Forums

Online forums and communities provide valuable resources for Genie 3024 users. Websites like Reddit’s r/HomeImprovement and r/GarageDoorOpeners offer discussions‚ tips‚ and solutions from experienced users. Facebook groups dedicated to garage door systems also share insights and troubleshooting advice. These platforms allow users to connect‚ ask questions‚ and learn from others who own the Genie 3024. While not official support channels‚ they complement the manual with real-world experiences and user-generated content.

About the Manufacturer

Genie‚ a trusted name in garage door openers‚ has been a leader in the industry for over 60 years. Founded in 1954‚ the company specializes in innovative‚ user-centric solutions. Known for reliability and performance‚ Genie offers a wide range of residential and commercial garage door systems. Their commitment to safety and advanced technology has made them a preferred choice for homeowners and professionals alike. The Genie 3024 is one of their standout models‚ reflecting their dedication to quality and customer satisfaction.

indesit washer dryer instruction manual

Welcome to the Indesit Washer Dryer Instruction Manual, your comprehensive guide to understanding and operating your appliance effectively. This manual provides essential information for safe and efficient use, covering installation, operation, maintenance, and troubleshooting. Designed to help you make the most of your washer dryer, it ensures optimal performance and longevity. Please read this manual carefully before using your appliance to familiarize yourself with its features and functions.

1.1 Overview of the Indesit Washer Dryer

The Indesit Washer Dryer is a versatile appliance designed to combine efficient washing and drying functions in one unit. With a capacity of up to 7kg for washing and 4kg for drying, it offers practical solutions for daily laundry needs. The appliance features a user-friendly control panel with a clear display, enabling easy selection of wash and dry programs. Designed to meet international safety standards, it includes symbols and instructions to guide safe operation. Available in multiple languages, the manual ensures accessibility for all users, promoting optimal performance and energy efficiency.

1.2 Importance of Reading the Manual

Reading the Indesit Washer Dryer instruction manual is essential for safe and efficient use of your appliance. It provides critical information about safety precautions, operational guidelines, and troubleshooting tips. The manual is designed to help you understand the appliance’s features, optimize performance, and maintain its longevity. Always keep the manual with the appliance, especially if it is sold or transferred, to ensure the new owner can operate it correctly. Available in multiple languages and formats, the manual is a vital resource for all users.

Safety Precautions

The Indesit Washer Dryer is designed to meet international safety standards. Always follow the guidelines to ensure safe operation. Avoid hanging textiles on the handle, as door hinges may move during use. Keep the manual handy for future reference and ensure it accompanies the appliance if sold or transferred. Adhere to all safety warnings to prevent accidents and maintain optimal performance.

2.1 General Safety Information

Always read the manual carefully before using your Indesit Washer Dryer. Ensure children are kept away from the appliance and supervised when it is in operation. The washer dryer is designed for cleaning and drying clothing and textiles only; never place coins, screws, or hard objects inside. Proper ventilation is essential to avoid carbon monoxide risks, especially in confined spaces. Never open the door during a high-temperature drying cycle to prevent burns. Avoid using flammable products near the appliance. Ensure the washer dryer is installed and maintained correctly to guarantee safe operation.

2.2 Warnings and Cautions

Never overload the washer dryer, as this can damage clothing or the machine. Use only recommended detergents and avoid excessive use of fabric softeners. Ensure children do not tamper with controls or climb on the appliance. Do not leave the washer dryer unattended during operation, especially when drying. Keep the appliance away from direct sunlight and flammable materials. Always unplug the washer dryer before cleaning or performing maintenance. Avoid operating the appliance if it is damaged or malfunctioning. Never bypass safety features or disable alarms, as this could lead to accidents or injuries.

Installation Requirements

Proper installation ensures optimal performance and safety. Ensure the site has adequate space, ventilation, and electrical connections. The surface must be level and stable. Follow manufacturer guidelines to avoid damage or hazards.

3.1 Preparing the Installation Site

To ensure a smooth installation, the site must be prepared carefully. Choose a flat, stable surface away from direct sunlight and heat sources. Ensure the area is well-ventilated to prevent moisture buildup. Check that water supply and drainage points are within reach. The floor must be sturdy enough to support the appliance’s weight. Keep the space clear of obstructions for easy access. Verify that electrical connections are nearby and meet the washer dryer’s requirements. Proper preparation ensures safe and efficient operation.

3.2 Connecting the Washer Dryer

Connect the washer dryer to a water supply, ensuring the inlet hoses are securely attached to both the appliance and the water taps. Use the provided hoses and avoid twisting or kinking them. Connect the drainage hose to a nearby drain or standpipe, ensuring it is not submerged. Plug the appliance into a grounded electrical outlet, matching the specified voltage. Double-check all connections for leaks. For drying, ensure proper ventilation as per the manual. Always follow safety guidelines to prevent water damage or electrical issues.

3.3 Levelling the Appliance

Ensure the washer dryer is placed on a stable, level surface to prevent vibrations and noise. Use the adjustable feet to level the appliance; turn them clockwise to lower and counterclockwise to raise. Check the balance by placing a spirit level on top of the machine. If the surface is uneven, adjust the feet until the level indicates balance. Proper levelling ensures optimal performance and prevents damage during operation. Always refer to the manual for specific instructions on adjusting the feet for your model.

Operating the Washer Dryer

Start by ensuring the appliance is properly installed and levelled. Prepare laundry, select desired wash and dry programs, and customize settings as needed. Begin the cycle.

4.1 Starting a Wash Cycle

To start a wash cycle, first ensure the washer dryer is properly installed and levelled. Sort and prepare your laundry, checking for any items that may damage others during washing. Select the appropriate wash program using the control panel, choosing options like temperature, spin speed, or special cycles. Add detergent according to the manufacturer’s recommendations. Close the door securely to ensure a proper seal. Press the start button to begin the cycle. The appliance will automatically manage water, detergent, and energy based on your selections.

4.2 Control Panel Description

The control panel is the central interface for operating the Indesit washer dryer. It features a user-friendly design with buttons for selecting wash and dry programs, adjusting settings, and starting or pausing cycles. A dial or touchscreen may be present for easy navigation. Indicators or LEDs show the selected program, temperature, spin speed, and remaining time. The panel also includes buttons for activating additional options like pre-wash or anti-crease. The display screen provides clear information about the selected cycle and its progress, ensuring intuitive operation.

4.3 Selecting Wash and Dry Programs

Selecting the right wash and dry programs ensures optimal cleaning and care for your laundry. The Indesit washer dryer offers various pre-set programs, such as cotton, synthetic, and delicate cycles, tailored to different fabric types. For drying, options like sensor drying or timed drying are available. Use the control panel to navigate through programs and select the most suitable one for your load. Some models also feature eco modes for energy efficiency. Always match the program to the fabric type and soil level for the best results.

Wash Cycles and Options

The Indesit washer dryer offers a variety of wash cycles, including standard, delicate, and heavy-duty options. Specialized settings like quick wash and eco modes are also available.

5.1 Standard Wash Programs

The Indesit washer dryer features a range of standard wash programs designed to cater to different fabric types and soiling levels. These include cotton, synthetic, and delicate cycles. Each program offers optimized wash temperatures, spin speeds, and cycle durations to ensure effective cleaning while protecting fabrics. Users can customize settings like temperature and spin speed to suit specific needs. The standard programs are energy-efficient and designed to handle everyday laundry requirements effectively. Regular use of these programs ensures optimal performance and longevity of the appliance.

5.2 Specialized Wash Options

The Indesit washer dryer offers specialized wash options for specific fabric types and cleaning needs. These include programs for wool, silk, and heavily soiled items. The wool cycle uses gentle agitation to prevent damage, while the silk program ensures delicate fabrics are protected. For tough stains, the intensive wash option increases temperature and prolongs the cycle. These specialized options provide tailored care for various fabrics, ensuring optimal cleaning without compromising fabric integrity. They are designed to address specific laundry challenges effectively while maintaining energy efficiency.

5;3 Customizing Wash Settings

The Indesit washer dryer allows users to customize wash settings to suit their needs. Temperature, spin speed, and soil level can be adjusted for optimal results. Additional options include pre-wash for heavily soiled items and extra rinse for sensitive skin. Delay start enables scheduling wash cycles at convenient times. Customizable settings ensure tailored cleaning and fabric care, providing flexibility for various laundry requirements while maintaining efficiency and performance. This feature enhances user experience by adapting to individual preferences and specific fabric needs effectively.

5.4 Eco and Energy-Saving Modes

The Indesit washer dryer features eco and energy-saving modes designed to reduce energy consumption while maintaining performance. These modes optimize water and detergent usage, lowering environmental impact. The eco-cycle uses lower temperatures and extended wash times for energy efficiency. Additionally, the appliance includes an energy-saving standby function. By selecting these modes, users can contribute to eco-friendly laundry practices without compromising cleaning results. Regular use of eco modes helps reduce utility bills and supports sustainable living, making it a practical choice for environmentally conscious households. This feature enhances the appliance’s overall efficiency and user satisfaction.

Drying Functions and Settings

The Indesit washer dryer offers various drying cycles, including delicate, normal, and eco modes. Sensors detect moisture levels to optimize drying time and energy use.

6.1 Drying Cycle Options

The Indesit washer dryer offers a range of drying cycle options to suit different fabric types and user preferences. Choose from delicate, normal, and eco modes for optimal fabric care. The delicate cycle is gentle on fragile fabrics, while the normal cycle provides thorough drying for everyday loads. Eco mode uses lower temperatures to save energy. Additionally, some models offer timed drying and specialized cycles for specific fabrics like wool or synthetic materials. Customizable settings allow users to adjust drying times and temperatures based on load size and fabric types.

6.2 Adjusting Drying Temperatures

The Indesit washer dryer allows users to adjust drying temperatures to suit various fabrics and drying needs. High heat is ideal for heavily soiled or thick fabrics, while medium heat works well for everyday loads. Low heat is perfect for delicate or synthetic materials to prevent damage. Some models also feature an eco temperature setting, which uses lower heat to reduce energy consumption. Users can select the desired temperature via the control panel before starting the cycle. Always refer to the fabric care labels to ensure the selected temperature is appropriate for the load.

Maintenance and Care

Regular maintenance ensures optimal performance and longevity of your Indesit washer dryer. Clean filters, check hoses, and perform routine checks to prevent issues and maintain efficiency.

7.1 Cleaning the Filter and Drain Pump

Regular cleaning of the filter and drain pump is essential to maintain your Indesit washer dryer’s performance. Locate the filter at the bottom of the drum or in the pump compartment. Remove and rinse it under running water to eliminate lint and debris. For the drain pump, check for blockages and clean thoroughly. Use a soft brush if necessary. Ensure all parts are dry before reassembling. Cleaning these components regularly prevents odors, improves efficiency, and reduces the risk of malfunction. Refer to your manual for specific instructions.

7.2 Regular Maintenance Tips

To keep your Indesit washer dryer in optimal condition, perform regular maintenance. Check and clean the gasket and seals to prevent mold and mildew. After each use, leave the door open to allow the interior to dry. Inspect and clean the venting system to ensure proper airflow during drying cycles. Check for blockages in the drain hose and ensure it is securely connected. Follow the manufacturer’s guidelines for detergent usage to avoid residue buildup. Wipe down the exterior regularly to maintain its appearance. Schedule professional servicing annually to maintain efficiency and longevity.

Troubleshooting Common Issues

Address common issues like error codes, unusual noises, or the machine not starting. Check power supply, filters, and drainage. Ensure correct program selection and load size. Refer to error code tables for specific solutions. If problems persist, contact a professional technician. Regular maintenance can prevent many issues. Always follow the manufacturer’s troubleshooting guidelines for optimal results.

8.1 Identifying Error Codes

Your Indesit washer dryer displays error codes to indicate specific issues. Refer to the error code table in the manual to understand the problem. Common codes like E01, E02, or E03 often relate to issues like water supply, drainage, or sensor malfunctions. Check the code meaning, then follow the recommended troubleshooting steps. If the issue persists, contact a professional technician. Always ensure you use the correct error code reference provided in the manual for accurate diagnosis. Regular maintenance can help prevent these issues from occurring. Follow the guide for optimal appliance performance.

8.2 Resolving Common Problems

Once an error code is identified, refer to the manual for troubleshooting steps. Common issues like poor drainage or imbalanced loads can often be resolved by checking the drain filter or redistributing laundry. For water supply problems, ensure taps are fully open and hoses are not kinked. If the washer dryer is not starting, check power supply and ensure the door is closed properly. Resetting the appliance by unplugging it for a few minutes may also resolve minor glitches. If issues persist, contact an authorized technician for professional assistance.

Energy Efficiency and Savings

Indesit washer dryers are designed to optimize energy consumption. Using eco modes and lower temperature settings helps reduce energy use while maintaining performance. Always refer to the energy label for guidance on efficient operation.

9.1 Understanding Energy Labels

Energy labels provide essential information about the washer dryer’s efficiency. They display energy consumption in kWh per cycle and water usage. The label also shows energy efficiency classes, ranging from A (most efficient) to G (least efficient). Understanding these ratings helps you make eco-friendly choices. Look for the label on the appliance or in the manual to optimize your energy usage and lower utility bills. Always check the energy label to ensure you’re using the most efficient settings for your needs.

9.2 Tips for Energy-Efficient Use

To maximize energy efficiency, use eco-mode settings and lower temperature cycles when possible. Always check the energy label for guidance on optimal settings. Run full loads to minimize cycles and avoid overloading. Regularly clean filters and ensure proper ventilation for the dryer. Consider using the washer dryer’s energy-saving features, such as delayed start, to utilize off-peak energy hours. Maintaining your appliance and updating to newer, energy-efficient models can also reduce long-term energy consumption. These practices help lower utility bills and reduce environmental impact.

Thank you for choosing the Indesit Washer Dryer. This manual has provided essential information to ensure optimal and safe usage. By following the guidelines, you can maximize efficiency, prolong appliance lifespan, and enjoy efficient washing and drying. Always prioritize eco-friendly practices and regular maintenance for the best performance. For any further questions, refer to this manual or contact Indesit support. Happy washing!