Month: May 2025 (Page 1 of 2)

veise fingerprint door lock manual

The Veise Fingerprint Door Lock offers advanced security and convenience with its 3D fingerprint recognition, passcode, and mechanical key options, ensuring quick and reliable access control for your home or office. Designed for seamless integration into modern lifestyles, this lock combines cutting-edge technology with user-friendly features, making it a top choice for those seeking enhanced security and ease of use.

Overview of the Veise Fingerprint Door Lock

The Veise Fingerprint Door Lock is a cutting-edge security solution designed for modern homes and offices. It combines advanced 3D fingerprint recognition with multiple unlocking methods, ensuring convenience and reliability. With its sleek design and user-friendly interface, this lock offers a perfect blend of security, efficiency, and style, making it an ideal choice for those seeking a high-tech locking system.

Key Features of the Veise Fingerprint Door Lock

The Veise Fingerprint Door Lock features advanced 3D fingerprint recognition, rapid response time, and multiple unlocking options including fingerprint, passcode, and mechanical key. It offers high-security anti-theft protection, tamper-proof design, and smart home integration capabilities. The lock is energy-efficient with a long-lasting battery and low-power alerts. Its sleek design and durable construction ensure reliability and style for modern security needs.

Technical Specifications

The Veise Fingerprint Door Lock (model VE07) offers advanced biometric security with 0.3-second fingerprint recognition, 1-second unlock time, and up to 12-month battery life, compatible with standard doors.

Fingerprint Recognition and Response Time

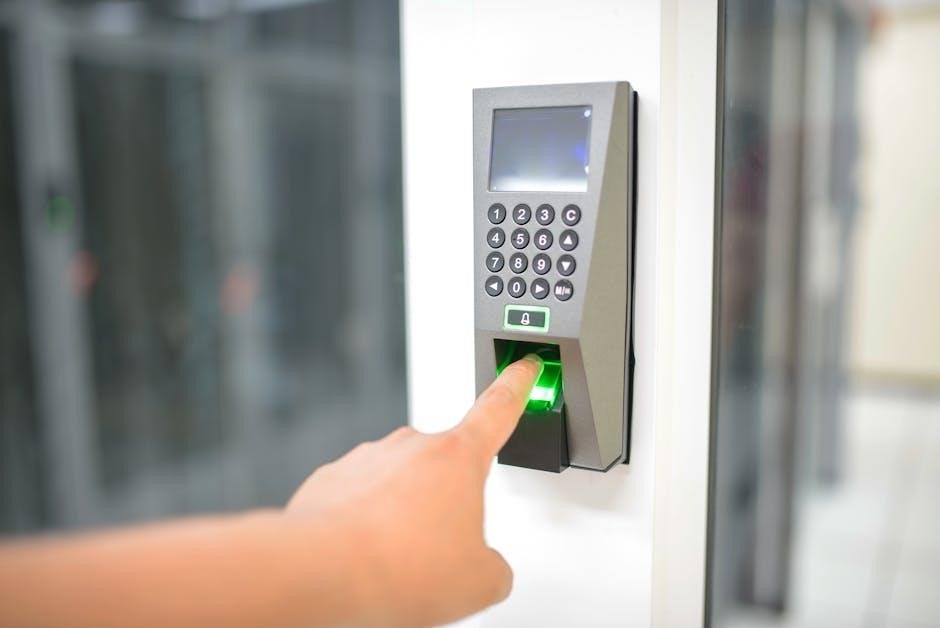
The Veise Fingerprint Door Lock features advanced 3D fingerprint scanning, recognizing prints in just 0.3 seconds and unlocking the door in 1 second. This rapid response ensures seamless access while maintaining high security. The lock’s biometric technology is designed for accuracy and reliability, providing quick and efficient entry without compromising safety. Its fast recognition and unlocking times make it ideal for everyday use, enhancing convenience and security simultaneously.

Multiple Unlocking Methods

The Veise Fingerprint Door Lock offers versatile unlocking options, including fingerprint recognition, passcode entry, and a mechanical key. This ensures flexibility and convenience for users. The fingerprint method provides biometric security, while the passcode option offers a digital alternative. The mechanical key serves as a reliable backup, ensuring access even in unexpected situations. These multiple methods cater to different preferences and needs, enhancing overall user experience and accessibility.

Installation and Setup

Installation involves opening the door, pressing and holding the reset button, removing a battery, and releasing after a beep to restore factory settings.

Installation Overview

The Veise Fingerprint Door Lock installation begins with ensuring the door is open and unlocked. Users must press and hold the Reset button while removing one battery to reset the lock to factory settings. This process is essential for initializing the lock and preparing it for setup. The manual provides detailed steps for a smooth installation experience, ensuring compatibility with various door types and mechanisms. Proper alignment and secure mounting are crucial for optimal functionality and reliability over time.

Step-by-Step Installation Guide

Begin by ensuring the door is fully open and unlocked. Press and hold the Reset button while removing one battery to initialize the lock. Align the lock with the door mechanism, securing it with screws. Follow the manual’s guidance for proper alignment and mounting. Once installed, restore power and complete the setup process through the KK Home App to register fingerprints and configure settings for seamless operation.

Initial Setup and Configuration

After installation, restore power to the lock and access the KK Home App to begin configuration. Add your fingerprint by pressing the sensor for 2 seconds until recognition is confirmed. Set a passcode for additional security and convenience. Configure user permissions and notification preferences within the app. Ensure all features are activated for remote monitoring and smart integration, completing the setup for a secure and efficient locking system.

Daily Use and Operation

The Veise Fingerprint Door Lock offers fingerprint, passcode, and key entry for quick access. Its responsive design ensures efficient and secure daily operation.

Unlocking Methods

The Veise Fingerprint Door Lock supports multiple unlocking methods, including fingerprint recognition, passcode entry, and a mechanical key. Fingerprint access is quick and secure, while passcodes offer an alternative for users. The mechanical key provides a traditional backup option, ensuring reliability in all situations. These methods combine convenience and flexibility, catering to different preferences and needs for seamless access control.

Managing User Fingerprints

Managing user fingerprints on the Veise Fingerprint Door Lock is straightforward. Users can add or delete fingerprints via the KK Home App or the lock’s admin mode. The system allows multiple user fingerprints, ensuring shared access for family or colleagues. Fingerprint registration is quick, requiring a few presses, and the lock stores data securely. This feature enhances convenience while maintaining high security levels for your property.

Troubleshooting Common Issues

The Veise Fingerprint Door Lock may encounter issues like fingerprint recognition errors or connectivity problems. This section guides users through diagnosing and resolving common issues effectively.

Common Problems and Solutions

Common issues with the Veise Fingerprint Door Lock include fingerprint recognition errors, connectivity problems, or battery drainage. To resolve these, clean the sensor, ensure proper fingerprint alignment, and restart the device. For persistent issues, reset the lock by removing the battery and pressing the reset button. Refer to the user manual for detailed troubleshooting steps and solutions to ensure optimal performance and security.

Error Codes and Their Meanings

The Veise Fingerprint Door Lock displays specific error codes to indicate issues. For instance, “Error Code E1” may signify a sensor malfunction, while “Error Code E2” could indicate low battery. Refer to the user manual or official support resources for a comprehensive list of error codes and their corresponding meanings to diagnose and resolve problems effectively. This ensures optimal functionality and security of your lock system.

Maintenance and Care

Regularly clean the fingerprint sensor with a soft cloth and avoid harsh chemicals. Replace batteries promptly when low to ensure uninterrupted functionality. Perform routine checks to maintain optimal performance and security of your Veise Fingerprint Door Lock.

Cleaning and Upkeep

Regularly clean the fingerprint sensor with a soft, dry cloth to ensure optimal performance. Avoid harsh chemicals or abrasive materials that may damage the surface. For external surfaces, use a mild detergent and water solution, wiping gently to prevent scratches. Ensure the lock is dry after cleaning to maintain functionality. Proper upkeep extends the lifespan and reliability of your Veise Fingerprint Door Lock.

Battery Replacement and Management

Replace the batteries when the low-battery indicator flashes or alerts. Use high-quality, alkaline batteries for optimal performance. To replace, open the battery compartment, remove the old batteries, and insert new ones as indicated. Ensure proper alignment to avoid connectivity issues. Regularly check battery levels to prevent unexpected lockouts. Refer to the user manual for specific instructions and guidelines on managing your Veise Fingerprint Door Lock’s power efficiently.

Integration with Smart Home Systems

The Veise Fingerprint Door Lock seamlessly integrates with popular smart home systems, enhancing your home’s automation and security. Connect via Bluetooth or Wi-Fi for remote monitoring and control, ensuring your lock works harmoniously with other smart devices, providing a unified and convenient smart home experience with advanced features and real-time notifications.

Compatible Smart Home Systems

The Veise Fingerprint Door Lock is compatible with leading smart home systems like Samsung SmartThings, Google Assistant, and Amazon Alexa. It integrates seamlessly via Bluetooth or Wi-Fi, allowing remote control and monitoring through dedicated apps. Users can receive real-time notifications, manage access, and synchronize the lock with other smart devices for a unified home automation experience, enhancing convenience and security.

Benefits of Smart Integration

Smart integration enhances convenience by enabling remote access and voice control through platforms like Amazon Alexa and Google Assistant. Users receive real-time notifications for lock events, ensuring heightened security. Energy efficiency and seamless device synchronization further improve overall home automation. This integration not only streamlines daily operations but also provides peace of mind with advanced monitoring and control capabilities from anywhere.

Security Features

The Veise Fingerprint Door Lock boasts advanced biometric technology, offering robust protection against unauthorized access. Its anti-theft design and tamper-proof mechanism ensure maximum security for your property, providing peace of mind with cutting-edge fingerprint recognition.

Advanced Fingerprint Technology

The Veise Fingerprint Door Lock features cutting-edge 3D fingerprint recognition, ensuring rapid and accurate identification. With a response time of just 0.3 seconds, it provides seamless and secure access. The advanced biometric system is designed to prevent unauthorized entry, offering robust protection against fraud and tampering. This technology enhances security while maintaining convenience, making it a reliable choice for modern homes and offices.

Anti-Theft and Tamper-Proof Features

The Veise Fingerprint Door Lock is equipped with robust anti-theft and tamper-proof features, ensuring maximum security. The lock includes anti-pick pins and a reinforced design to prevent forced entry. Additionally, it features an alarm system that triggers during tampering attempts, offering added protection against unauthorized access. These advanced security measures safeguard your property while providing peace of mind.

Advanced Settings and Customization

The Veise Fingerprint Door Lock offers customizable settings for advanced user control. Adjust sensitivity, set custom access permissions, and manage notifications for enhanced personalization and security.

Customizing Lock Settings

Customize your Veise lock to suit your preferences. Adjust fingerprint sensitivity, set auto-lock timers, and enable silent mode. Define user access levels and schedules, ensuring only authorized individuals can unlock. These features enhance convenience and security, allowing you to tailor the lock’s behavior to your specific needs and lifestyle seamlessly.

Backup and Recovery Options

Easily back up your fingerprint data and settings to ensure seamless recovery. Use the mechanical key or factory reset option to restore default settings. Export fingerprints via the KK Home App for safekeeping. In case of issues, reset the lock by holding the reset button and removing a battery to restore factory settings, ensuring your security remains intact and accessible.

Warranty and Customer Support

The Veise Fingerprint Door Lock comes with a 1-year warranty. Dedicated customer support is available via email, phone, or chat. Comprehensive resources and troubleshooting guides are provided.

Warranty Information

The Veise Fingerprint Door Lock is backed by a 1-year warranty, covering manufacturing defects and ensuring reliability. The warranty period begins from the date of purchase, providing customers with peace of mind. For further details, refer to the official documentation or contact customer support. The warranty ensures repairs or replacements are handled promptly, maintaining your security and convenience.

Customer Support and Resources

Veise offers comprehensive customer support and resources to ensure a smooth experience with your fingerprint door lock. Detailed user manuals, troubleshooting guides, and technical documentation are available online. For further assistance, contact the dedicated support team via email or phone. Additionally, the official website provides access to FAQs, installation videos, and software updates, ensuring you have all the tools needed for optimal performance and maintenance of your lock.

Comparison with Other Models

Veise fingerprint door locks stand out with their advanced 3D fingerprint technology, faster response times, and multiple unlocking methods, offering superior security and convenience compared to other brands.

Veise Fingerprint Door Lock vs. Other Brands

Veise fingerprint door locks outperform competitors with their advanced 3D fingerprint technology, offering faster response times and higher accuracy. Unlike other brands, Veise supports multiple unlocking methods, including fingerprint, passcode, and mechanical keys, providing superior convenience and flexibility. Additionally, Veise locks often feature longer battery life and sleeker designs, making them a more reliable and stylish choice for modern security needs.

Unique Selling Points

Veise Fingerprint Door Lock stands out with its ability to store up to 200 fingerprints, ensuring versatility for large families or offices. Its advanced anti-theft and tamper-proof features provide unparalleled security. The lock also boasts a long-lasting battery life with a low-battery alert and mechanical key override, ensuring reliability. These features make it a robust and user-friendly option for modern security needs.

The Veise Fingerprint Door Lock delivers exceptional convenience, security, and reliability, making it a standout choice for modern homes and offices seeking advanced access control solutions.

Final Thoughts on the Veise Fingerprint Door Lock

The Veise Fingerprint Door Lock stands out as a reliable and modern solution for secure access control. Its advanced 3D fingerprint technology, multiple unlocking methods, and user-friendly design make it an excellent choice for both residential and commercial settings. With its quick response time and robust security features, it offers peace of mind and convenience, catering to a wide range of user needs effectively.

george orwell shooting an elephant pdf

George Orwell’s “Shooting an Elephant” is a gripping essay reflecting his experiences as a police officer in colonial Burma, exploring themes of imperialism and moral conflict.

Background Information on George Orwell

George Orwell, born Eric Arthur Blair in 1903, was a British novelist, essayist, and critic known for his sharp political commentary. His father, a colonial civil servant, influenced his early exposure to imperialism. Orwell studied in England, later serving as a police officer in colonial Burma, experiences that shaped his anti-imperialist views. His writing often explored totalitarianism and societal control, as seen in Animal Farm and 1984; Orwell’s clarity and moral urgency made him one of the 20th century’s most influential writers.

Historical Context of Colonial Burma

During the late 19th and early 20th centuries, Burma was under British colonial rule, which began in 1885 after the Third Anglo-Burmese War. The British exploited Burma’s resources, leading to widespread resentment among locals. As a police officer, Orwell witnessed firsthand the tensions between colonial authorities and native populations. His experiences in Burma deeply influenced his views on imperialism, which he later critiqued in “Shooting an Elephant.” The essay reflects the complexities of colonial life and the moral dilemmas faced by those enforcing British rule.

In “Shooting an Elephant,” George Orwell recounts his experiences as a British police officer in colonial Burma. A rogue elephant wreaks havoc, and Orwell, pressured by the local crowd, reluctantly decides to shoot it. The essay explores the moral dilemma Orwell faces, torn between his personal conscience and the expectations of those around him. Ultimately, he shoots the elephant, not out of necessity, but to maintain his authority. The story critiques imperialism, revealing the inherent tensions and moral complexities of colonial rule.

Key Themes

The essay explores themes of imperialism, moral conflict, and societal pressure, highlighting the tension between personal conscience and colonial expectations.

Imperialism and Colonialism

In “Shooting an Elephant,” Orwell critiques the exploitation and moral corruption of imperialism. As a colonial officer in Burma, he feels trapped by the oppressive system, forced to act against his conscience to maintain British authority. The essay highlights how imperialism dehumanizes both the colonizer and the colonized, creating a cycle of oppression. Orwell’s narrative exposes the hypocrisy of colonial rule, where power is maintained through fear and violence rather than justice or equality.

Moral Conflict and Personal Struggle

Orwell’s essay vividly portrays his internal turmoil as a colonial officer. Torn between his moral opposition to killing the elephant and societal pressure to act, he feels a deep sense of helplessness. The narrator’s reluctance to shoot the elephant, despite knowing it’s unnecessary, underscores the conflict between personal ethics and external expectations. This struggle reflects the broader human tendency to conform to societal norms, even when they contradict one’s values, highlighting the psychological toll of such decisions.

Societal Pressure and Conformity

Orwell’s essay illustrates the overwhelming power of societal pressure, as the narrator feels compelled to shoot the elephant to maintain his authority and avoid ridicule. The presence of the crowd forces him to conform to expectations, despite his moral reservations. This highlights how individuals often prioritize social approval over personal ethics, revealing the destructive influence of conformity in upholding oppressive systems like colonialism. The essay critiques how societal norms can lead to morally questionable actions, driven by the fear of appearing weak or incompetent.

Symbolism in the Essay

The elephant and rifle serve as powerful symbols, representing colonial oppression, the destruction of innocence, and the corrupting influence of authority in Burma.

The Elephant as a Symbol

The elephant symbolizes both the oppressed indigenous population and the untamed natural world. Its destruction represents the senseless violence of colonialism and the loss of innocence. Orwell’s act of shooting the elephant, despite his moral reservations, underscores the destructive nature of imperialism. The elephant’s death serves no practical purpose, mirroring the futility of colonial dominance. This powerful imagery critiques the moral corruption inherent in systems of oppression, where individuals act against their conscience to maintain authority. The elephant’s demise symbolizes the devastating cost of imperialism on both the colonized and the colonizer.

The Rifle as a Symbol of Power

The rifle in “Shooting an Elephant” embodies colonial authority and its oppressive weight. Orwell carries it as a symbol of British power, yet it burdens him, representing the coercive force of imperialism. The rifle’s presence amplifies the pressure from the crowd, compelling Orwell to act against his moral judgment. Its significance lies in its dual role: as a tool of control and a source of internal conflict. The rifle symbolizes the broader struggle between personal ethics and societal expectations, highlighting the moral dilemmas of colonial rule.

George Orwell’s Literary Style

George Orwell’s literary style is marked by clarity and simplicity, effectively conveying moral and political themes through vivid storytelling and accessible prose in his essays.

Clarity and Simplicity of Prose

George Orwell’s prose in “Shooting an Elephant” is characterized by its directness and accessibility. His writing avoids complexity, making it easy for readers to engage with the narrative. Orwell uses straightforward language to convey deep moral and political themes, ensuring his message resonates widely. This clarity enhances the essay’s emotional impact, particularly in depicting the tension between personal morality and societal expectations. His simple yet powerful style allows the reader to focus on the gravity of the narrator’s dilemma, making the essay both thought-provoking and enduring.

Narrative Structure and Tension

Orwell’s essay “Shooting an Elephant” employs a chronological narrative structure that builds tension through vivid descriptions and emotional depth. The narrator’s internal conflict is heightened by the external pressure of the crowd, creating a sense of inevitability. Orwell’s use of descriptive language and precise detail escalates the tension, drawing readers into the moral dilemma. The narrative’s pacing mirrors the narrator’s growing anxiety, culminating in the tragic yet deliberate act of shooting the elephant. This structure effectively conveys the psychological and societal pressures at play.

Historical Context of British Colonialism in Burma

British colonial rule in Burma began in the 19th century, leading to widespread resentment among locals. Orwell’s essay reflects the tense dynamics during this period of imperial control.

The British Raj and Its Impact

The British Raj, the period of British rule in India and Burma, profoundly shaped the region’s political and social landscape. In Burma, this era was marked by exploitation, cultural disruption, and rising anti-colonial sentiment. Orwell’s essay reflects his firsthand experience of this tense environment, where colonial authority often led to moral and ethical dilemmas. The British Raj’s expansion into Burma disrupted local traditions and economies, fostering widespread resentment. Orwell’s narrative captures the complexities of colonial rule, highlighting its impact on both the ruled and the rulers, offering a nuanced critique of imperialism’s legacy.

Burma’s Role in the Empire

Burma, as a colony of the British Empire, played a significant role in the imperial economy and strategic interests. Its resources, particularly rice and teak, were exploited to fuel British prosperity. The region’s location also made it a crucial outpost for expanding influence in Southeast Asia. However, Burma’s integration into the empire was marked by resistance, as local traditions and governance were disrupted. Orwell’s essay reflects the tensions of this period, highlighting Burma’s complex position within the empire and the growing anti-colonial sentiment that shaped its history.

Biographical Insights

George Orwell, born in 1903 and passing in 1950, drew heavily from his experiences as a sub-divisional police officer in Burma, shaping his critical views on imperialism and authority.

Orwell’s Time in Burma

During his tenure as a sub-divisional police officer in Moulmein, Burma, Orwell witnessed firsthand the complexities of colonial rule, fostering a deep-seated disdain for imperialism. His experiences in this region, marked by anti-European sentiment and the oppressive British Raj, significantly influenced his writing, particularly in “Shooting an Elephant.” The essay captures the moral dilemmas and societal pressures Orwell faced, reflecting his growing critique of colonialism and its impact on both the ruled and the rulers.

How the Experience Shaped His Writing

Orwell’s time in Burma profoundly shaped his literary style and thematic focus, as seen in “Shooting an Elephant.” The essay showcases his ability to blend personal narrative with political commentary, highlighting the moral complexities of imperialism. His experiences instilled a critical perspective on authority and power, themes that would dominate his later works like Animal Farm and 1984. The incident of shooting the elephant became a metaphor for the destructive nature of colonialism, solidifying Orwell’s reputation as a biting social critic.

Cultural and Political Significance

“Shooting an Elephant” remains a powerful critique of colonialism, influencing anti-imperialist movements and sparking global discussions on power dynamics and moral responsibility.

The Essay’s Influence on Anti-Colonial Movements

Orwell’s “Shooting an Elephant” has profoundly influenced anti-colonial movements by exposing the moral complexities and inherent brutality of imperialism. The essay, detailing Orwell’s reluctant shooting of an elephant to maintain colonial authority, became a powerful symbol of resistance against oppressive regimes. It highlighted how colonialism dehumanizes both the rulers and the ruled, resonating with anti-colonial leaders worldwide. By critiquing British imperialism, Orwell’s work inspired movements seeking liberation and self-determination, cementing its role in the broader struggle against colonial domination and its enduring relevance today;

Modern Relevance of the Essay’s Themes

Orwell’s “Shooting an Elephant” remains strikingly relevant today, as its themes of oppression, moral ambiguity, and societal pressure resonate with contemporary issues. The essay critiques power dynamics, echoing modern struggles against systemic inequality and authoritarianism. Its exploration of moral conflict and the dangers of unchecked authority continues to inspire reflection on personal ethics and societal responsibilities. The text’s timeless appeal lies in its universal themes, making it a powerful tool for understanding human behavior and the consequences of conformity in any era.

Orwell’s “Shooting an Elephant” remains a powerful critique of imperialism, offering timeless insights into moral conflict and the dangers of unchecked power.

Reflection on the Essay’s Enduring Importance

George Orwell’s “Shooting an Elephant” remains a vital critique of imperialism, offering enduring insights into moral conflict and societal pressure. The essay’s exploration of colonial dynamics and personal struggle continues to resonate, reflecting Orwell’s experiences in Burma. Its influence on anti-colonial movements underscores its historical significance. Today, the essay remains relevant, prompting discussions on power and morality. Orwell’s vivid narrative ensures its lasting impact, making it a cornerstone of literary and political discourse.

Final Thoughts on Orwell’s Message

Orwell’s “Shooting an Elephant” delivers a powerful critique of imperialism, highlighting the moral complexities faced by individuals within oppressive systems. The essay serves as both a personal account and a broader commentary on colonialism’s dehumanizing effects. Orwell’s narrative underscores the universal themes of power abuse and the loss of individual freedom. His vivid portrayal of internal conflict resonates deeply, illustrating how societal expectations can compel individuals to act against their conscience. Ultimately, the essay remains a timeless reflection on the dangers of unchecked authority and the enduring relevance of moral courage.

aia a305 form pdf

The AIA A305 form is a standardized document widely recognized in the construction industry for providing contractors’ qualifications and experience, essential for project evaluation and success.

1.1 Overview of the AIA A305 Form

The AIA A305 form is a standardized document designed to collect detailed information about a contractor’s qualifications, experience, and financial stability. It is widely used in the construction industry to assess a contractor’s ability to successfully complete a project. The form includes sections for company history, licensing, references, and financial data, providing a comprehensive overview of a contractor’s capabilities. Approved by the American Institute of Architects (AIA) and the Associated General Contractors of America (AGC), it is a trusted tool for owners and architects during the pre-qualification process. This document ensures transparency and helps stakeholders make informed decisions about potential contractors.

1.2 Importance of the AIA A305 Form in the Construction Industry

The AIA A305 form plays a critical role in the construction industry by ensuring transparency and accountability in contractor qualification. It provides a standardized method for evaluating a contractor’s experience, financial stability, and licensing, which helps reduce project risks. By requiring detailed information, the form enables owners and architects to make informed decisions about contractor selection. This document is essential for maintaining trust and professionalism in construction projects. Its widespread adoption has made it a cornerstone of pre-qualification processes, ensuring that only capable and reliable contractors are selected for projects. This ultimately contributes to the successful completion of construction endeavors.

Purpose and Scope of the AIA A305 Form

The AIA A305 form serves as a standardized tool for contractors to provide qualification statements, enabling owners and architects to assess their expertise and reliability effectively.

2.1 Understanding the Contractors Qualification Statement

The AIA A305 form provides a structured format for contractors to detail their qualifications, experience, and financial stability. This document is essential for owners and architects to evaluate a contractor’s capability to execute projects successfully. It includes information about the contractor’s background, references, and financial standing, ensuring transparency and accountability. The form is often required during the pre-qualification process for construction projects. By completing the AIA A305, contractors demonstrate their credibility and readiness to undertake specific projects. This standardized approach helps maintain consistency and fairness in the selection process, benefiting both contractors and project stakeholders. It is a sworn, notarized statement, adding legal weight to the information provided.

2.2 Key Elements of the AIA A305 Form

The AIA A305 form includes essential details about a contractor’s qualifications, such as their experience, licensing, and financial stability. It requires information on the contractor’s background, including past projects and references. The form also mandates disclosure of financial statements, ensuring transparency about the contractor’s ability to manage project finances. Additionally, it includes a sworn, notarized statement, emphasizing the legal significance of the information provided. The form may also require attachments like resumes of key personnel or lists of completed projects. These elements collectively provide a comprehensive assessment of a contractor’s capabilities, aiding owners and architects in making informed decisions. This structured approach ensures clarity and fairness in the evaluation process.

Structure and Components of the AIA A305 Form

The AIA A305 form is structured to include sections on contractor qualifications, financial statements, and experience, with a notarized statement ensuring authenticity and compliance.

3.1 Sections of the AIA A305 Form

The AIA A305 form is divided into distinct sections designed to collect comprehensive information about a contractor’s qualifications. These sections include details about the contractor’s experience, licensing, financial stability, and references. Additionally, the form requires a notarized statement to ensure the accuracy of the provided information. Separate forms are often submitted for each classification of work, allowing for a detailed evaluation of the contractor’s suitability for specific projects. This structured approach ensures that owners and architects can assess a contractor’s capabilities thoroughly, making it an essential tool in the construction industry for pre-qualification and project planning purposes.

3.2 Required Information and Documentation

The AIA A305 form requires contractors to provide detailed information about their qualifications, including a notarized statement confirming the accuracy of the data. Contractors must submit documentation such as proof of licensing, financial statements, and references from previous projects. Additionally, they must disclose their experience in specific types of construction work and provide details about their insurance coverage, including liability and workers’ compensation. The form also asks for information about key personnel and their roles within the company. This comprehensive documentation ensures that project owners and architects can thoroughly assess a contractor’s credibility and capacity to execute the project successfully.

How to Complete the AIA A305 Form

The AIA A305 form requires a notarized statement and detailed documentation, including licensing, financial statements, and references. Follow the step-by-step guide for accurate submission;

4.1 Step-by-Step Guide to Filling Out the Form

Filling out the AIA A305 form involves several structured steps. Begin by downloading the official PDF template from a reliable source. Carefully review each section to ensure accuracy. Start with basic company information, including business name, address, and contact details. Next, provide licensing information and certifications. Include financial statements and references to demonstrate stability and reliability. Attach any additional documentation, such as project examples or certifications. Ensure all information is notarized and signed by an authorized representative. Double-check for completeness and accuracy before submission to avoid delays. Following these steps ensures a smooth and professional process.

4.2 Tips for Accurate and Effective Submission

Ensure all sections of the AIA A305 form are thoroughly reviewed for completeness and accuracy. Use clear and concise language when describing qualifications and experience. Double-check financial statements and references for correctness. Attach all required documentation, such as licenses and certifications, to avoid delays. Ensure the form is notarized and signed by an authorized representative. Submit the form well in advance of deadlines to allow time for corrections. Use professional formatting and avoid handwritten entries. Verify that all information aligns with the project requirements. By following these tips, contractors can present a polished and professional submission, enhancing their chances of approval.

Legal and Compliance Considerations

The AIA A305 form requires strict adherence to legal standards, ensuring confidentiality and accuracy of submitted information. Proper notarization and verification processes must be followed to maintain compliance.

5.1 Understanding the Legal Implications of the AIA A305 Form

The AIA A305 form carries significant legal implications, as it serves as a sworn, notarized statement from contractors. Its purpose is to provide accurate and verifiable information about a contractor’s qualifications, experience, and financial stability. The form is legally recognized and recommended by the American Institute of Architects (AIA) and the Associated General Contractors of America (AGC). Contractors must ensure all submitted information is truthful, as any misrepresentation can lead to legal consequences. The form also emphasizes the importance of confidentiality, suggesting the execution of a separate agreement if sensitive information is involved. Compliance with these legal standards is essential to maintain trust and integrity in the construction process.

5.2 Confidentiality and Verification of Information

The AIA A305 form emphasizes the importance of confidentiality and verification. Contractors must ensure that all submitted information is accurate and truthful. The form includes a note advising parties to execute a separate confidentiality agreement if they intend for any information to be held confidential. This ensures that sensitive data, such as financial statements or project details, is protected. Verification of the contractor’s qualifications, experience, and financial stability is a critical step for owners and architects to assess reliability. The form’s notarized and sworn nature adds a legal layer, ensuring accountability and trust in the information provided.

Benefits of Using the AIA A305 Form

The AIA A305 form streamlines contractor qualification processes, enhancing credibility and transparency. It ensures comprehensive project evaluation, aiding contractors in showcasing strengths and improving bidding success.

6.1 Advantages for Contractors

The AIA A305 form offers significant advantages for contractors by providing a structured platform to showcase their qualifications, experience, and financial stability. It streamlines the pre-qualification process, allowing contractors to present their credentials in a clear and professional manner. This enhances their credibility and trustworthiness in the eyes of project owners and architects. Additionally, the form helps contractors highlight their strengths, making it easier to differentiate themselves from competitors. By using the AIA A305 form, contractors can improve their chances of securing projects and building long-term relationships with clients. It also ensures transparency and compliance with industry standards, further solidifying their professional reputation.

  • Streamlined pre-qualification process
  • Professional presentation of credentials
  • Enhanced credibility and trust
  • Opportunity to showcase strengths
  • Improved bidding success
  • Compliance with industry standards

6.2 Advantages for Project Owners and Architects

The AIA A305 form provides project owners and architects with a reliable tool to assess contractors’ qualifications, ensuring informed decision-making. It offers transparency by requiring detailed information about a contractor’s experience, references, and financial stability. This reduces the risk of selecting underqualified contractors and enhances project confidence. The form also streamlines the evaluation process, saving time and resources. By standardizing the submission of qualifications, it ensures consistency and fairness in contractor selection. This ultimately leads to better project outcomes and stronger professional relationships, aligning with industry standards and best practices.

  • Transparent evaluation of contractor qualifications
  • Reduced risk of selecting underqualified contractors
  • Streamlined and efficient evaluation process
  • Consistency and fairness in selection
  • Better alignment with industry standards

Frequently Asked Questions About the AIA A305 Form

The AIA A305 form is a standardized document used to evaluate contractors’ qualifications, ensuring transparency and fairness in project bidding and selection processes.

7.1 Common Queries and Clarifications

Common questions about the AIA A305 form include its purpose, who can use it, and where to download the PDF. It is a standardized document for contractors to provide qualifications and experience, aiding project owners and architects in evaluating bids. The form is available on the AIA website and third-party platforms. Contractors often inquire about the required information, such as licensing, financial stability, and references. Clarifications typically involve understanding the form’s legal implications and ensuring accurate submissions. Proper completion is essential for demonstrating credibility and increasing chances of project approval. The AIA A305 form is a vital tool for fair and transparent project bidding processes.

7.2 Best Practices for Using the AIA A305 Form

Best practices for using the AIA A305 form include ensuring accuracy and completeness in all sections, as it reflects a contractor’s credibility. Always use the latest version of the form to comply with current standards. Thoroughly review and verify all information before submission to avoid errors. Include detailed references and financial statements to demonstrate stability and reliability. Submit the form electronically in PDF format for convenience and professionalism. Seek professional advice if unsure about specific sections. Regularly update the form to reflect changes in qualifications or experience. By following these practices, contractors can present a strong case for project consideration and build trust with project owners and architects.

The AIA A305 form is a vital tool for contractors to showcase qualifications and experience, ensuring project success and compliance with industry standards.

8.1 Summary of the AIA A305 Form and Its Significance

The AIA A305 form is a crucial document in the construction industry, providing a standardized method for contractors to detail their qualifications, experience, and financial stability. Approved by the American Institute of Architects (AIA) and the Associated General Contractors of America (AGC), it ensures transparency and accountability. This form is essential for project owners and architects to assess a contractor’s capability to deliver projects successfully. By highlighting a contractor’s strengths and adherence to industry standards, the AIA A305 form fosters trust and collaboration, making it a cornerstone of modern construction practices.

511 porous plus sealer instructions

The 511 Porous Plus Sealer is a high-performance, penetrating sealer designed to protect porous surfaces from moisture and stains. It forms an invisible barrier while allowing vapor to escape, making it ideal for various materials like stone, tile, and grout. Unlike surface coatings, it doesn’t alter the appearance of the surface, ensuring a natural look. This sealer is widely recommended for both new and existing installations, offering long-lasting protection and ease of application.

1.1 What is 511 Porous Plus Sealer?

511 Porous Plus Sealer is a high-performance, penetrating sealer designed to protect porous surfaces such as natural stone, tile, and grout. It forms an invisible barrier that repels moisture and stains while allowing vapor to escape, preventing damage from water and spills. Unlike surface coatings, it doesn’t leave a visible film, making it ideal for maintaining the natural appearance of surfaces. It is suitable for both new and existing installations, offering durable protection against everyday wear and tear.

1.2 Benefits of Using 511 Porous Plus Sealer

Using 511 Porous Plus Sealer offers numerous benefits, including superior protection against moisture and stains while maintaining the surface’s natural appearance. It allows vapor to escape, preventing damage from trapped moisture. The sealer is ideal for various materials, such as natural stone, tile, and grout, and works effectively on both new and existing installations. Its invisible barrier ensures surfaces remain protected without altering their aesthetic appeal. This makes it a versatile and reliable choice for preserving the longevity and beauty of porous surfaces in residential and commercial settings.

Surface Preparation for Application

Ensure the surface is clean, dry, and free of contaminants like dirt, lime, or hard water deposits. Heavy-duty cleaning may be needed for stubborn substances.

2.1 Cleaning the Surface

Thoroughly clean the surface to remove dirt, grime, and any existing sealers or waxes. Use a suitable cleaner or stripper, like Mira Strip or Finish Sealer Stripper, following the manufacturer’s instructions. Scrub the area with a stiff brush to ensure deep cleaning, especially in porous areas. Rinse the surface with clean water to remove all cleaning residue. Allow the surface to dry completely before proceeding with the sealer application. A clean, contaminant-free surface ensures proper adhesion and effectiveness of the sealer.

2.2 Ensuring the Surface is Dry

Ensure the surface is completely dry and free of moisture before applying the sealer. Any dampness can prevent proper adhesion and reduce the sealer’s effectiveness. Check for visible water spots or condensation. If necessary, use fans or heaters to accelerate drying, but avoid direct heat that could damage the material. The surface should remain dry for at least 24 hours after cleaning and before sealing. Moisture in the substrate can compromise the sealer’s performance, so patience is key to achieving optimal results.

2.3 Removing Existing Coatings or Waxes

Remove existing coatings, sealers, or waxes before applying 511 Porous Plus Sealer. Use a heavy-duty stripper like Mira Strip or Sealer Stripper, following the product’s instructions carefully. Thoroughly rinse the surface with clean water to eliminate any residues. Ensure the surface is free of old coatings to allow the sealer to penetrate properly. Any remaining residue can block absorption and reduce effectiveness. After stripping, check for any remaining residue and ensure the surface is clean and dry before proceeding.

Application Instructions

Apply 511 Porous Plus Sealer evenly using a spray bottle for best results. Follow the product’s instructions carefully to ensure proper coverage and penetration of the sealer.

3.1 Tools Needed for Application

To apply 511 Porous Plus Sealer effectively, you’ll need a spray bottle for even distribution, a lint-free cloth or sponge to wipe excess, and a lambswool applicator for larger surfaces. A paintbrush may be useful for edges or detailed areas. Ensure all tools are clean and free of contaminants to avoid interfering with the sealer’s performance. Protective gloves and eyewear are recommended for safety. A drop cloth can protect surrounding areas from accidental overspray. Proper tools ensure a smooth, professional-grade application process.

3.2 Step-by-Step Application Process

Shake the 511 Porous Plus Sealer bottle thoroughly before use. Spray the sealer evenly onto the surface using a spray bottle. Allow it to sit for 5–10 minutes to penetrate deeply. Use a lint-free cloth, sponge, or lambswool applicator to wipe away excess sealer, ensuring no residue remains. For edges or tight spaces, a paintbrush can be used for precise application. Work in small sections to maintain even coverage. Avoid over-application, as this can lead to a hazy appearance. Follow these steps carefully for optimal results and long-lasting protection.

3.3 Tips for Even Application

For an even application of 511 Porous Plus Sealer, avoid over-application, as it can lead to a hazy finish. Use a clean, lint-free cloth or sponge to spread the sealer evenly, working in small, manageable sections. Ensure the surface is uniformly covered, but not saturated. Avoid applying in direct sunlight or high temperatures, as this can cause rapid evaporation. Test the sealer on a small, inconspicuous area first to ensure compatibility. Use a paintbrush for edges or corners to maintain precise coverage and prevent streaks.

Sealing Existing Installations

Sealing existing installations with 511 Porous Plus Sealer involves following the same application steps as new surfaces but now includes sealing both grout and tile or stone surfaces simultaneously.

4.1 Preparing Existing Surfaces

Preparing existing surfaces for sealing with 511 Porous Plus Sealer involves ensuring the area is clean and free of contaminants. Remove any dirt, grime, or old sealers using a suitable cleaner or stripper, such as Mira Strip or Finish Sealer Stripper, following the manufacturer’s instructions. Rinse thoroughly and allow the surface to dry completely. This step is crucial to ensure proper penetration and adhesion of the sealer. A well-prepared surface guarantees optimal results and extends the longevity of the sealant.

4.2 Sealing Grout and Tile or Stone

For existing installations, apply the 511 Porous Plus Sealer to both the grout and tile or stone surfaces simultaneously. Use a spray bottle for even coverage, ensuring the sealer penetrates evenly. The surface must be clean, dry, and free of old sealers or waxes. This process ensures comprehensive protection against moisture and stains while maintaining the natural appearance of the material. The sealer forms an invisible barrier that allows vapor to escape, making it ideal for both new and existing installations.

Drying and Curing Times

The drying and curing process of 511 Porous Plus Sealer is straightforward, ensuring surfaces are moisture-resistant and breathable, with a natural appearance preserved.

5.1 Recommended Drying Time

The 511 Porous Plus Sealer typically dries within 1 to 3 hours under normal conditions, with full cure achieved in 24 hours. Ensure the surface is touch-dry before exposing it to water or foot traffic. High humidity or low temperatures may extend drying times. Avoid applying the sealer in direct sunlight or high winds to ensure even drying. Proper ventilation and surface preparation are key for optimal results. The sealer will be fully effective and provide long-lasting protection once the curing process is complete.

5.2 Curing Process and Duration

The 511 Porous Plus Sealer requires a curing period of 24 hours to achieve its full protective properties. During this time, the sealer penetrates deeply into the porous surface, creating a durable barrier against moisture and stains. For optimal results, the surface should not be exposed to water or heavy use during the curing process. Allow the sealer to cure under normal temperature and humidity conditions. High humidity or cooler temperatures may extend the curing time. Once fully cured, the surface will be protected and ready for normal use.

Maintenance and Reapplication

Regular cleaning with mild detergents is essential. Reapply when water no longer beads on the surface, usually every 2-5 years, depending on usage and environmental factors.

6.1 Cleaning Sealed Surfaces

Regular maintenance is crucial to preserve the effectiveness of the 511 Porous Plus Sealer. For routine cleaning, use a damp mop or soft cloth to remove dirt and debris. For deeper cleaning, apply a mild detergent solution, avoiding harsh chemicals or abrasive materials that could damage the surface. Rinse thoroughly with clean water to remove any soap residue. Avoid using acidic cleaners, wax-based products, or excessive water, as these can compromise the sealer’s performance. Proper cleaning ensures the sealer remains effective and extends its lifespan.

6.2 When to Reapply the Sealer

The need to reapply 511 Porous Plus Sealer depends on wear and tear. Signs include water no longer beading on the surface or the material appearing dull. High-traffic areas or exposure to harsh conditions may require reapplication every 2-5 years. Lightly clean the surface before reapplying to ensure proper adhesion. Regular inspections can help determine if the sealer is still effective. Reapplication maintains protection against stains and moisture, ensuring the surface remains preserved and functional for years to come. Always follow the manufacturer’s instructions for optimal results. Proper timing ensures the sealer’s longevity and effectiveness.

Common Mistakes to Avoid

Common mistakes include inadequate surface preparation and over-application of the sealer. Ensure the surface is clean and dry before applying, and follow instructions to avoid excess product buildup.

7.1 Inadequate Surface Preparation

Inadequate surface preparation is a common mistake that can lead to poor results. The surface must be clean, dry, and free of contaminants like dirt, oil, or old sealers. Failing to remove existing coatings or waxes can prevent the sealer from penetrating properly. Using Mira Strip or similar products is recommended to strip old finishes. Ensure the surface is thoroughly cleaned and rinsed before applying the sealer. Neglecting these steps can result in uneven sealing or reduced effectiveness of the 511 Porous Plus Sealer.

7.2 Over-Application of the Sealer

Over-application of the 511 Porous Plus Sealer can lead to a visible residue on the surface, which is undesirable for a penetrating sealer. Excess sealer that isn’t absorbed can attract dirt and diminish the material’s natural appearance. To avoid this, apply the sealer evenly and sparingly, using a clean cloth or spray bottle. Wipe away any excess product that doesn’t penetrate within a few minutes. Always test a small area first to ensure the correct application amount. Proper application ensures the sealer performs as intended without leaving a surface film.

The 511 Porous Plus Sealer is a reliable solution for protecting porous surfaces, offering durability and ease of use when applied correctly. It effectively safeguards against moisture and stains while maintaining the natural appearance of materials, ensuring long-lasting protection with proper application.

8.1 Summary of Key Points

The 511 Porous Plus Sealer is a high-performance penetrating sealer that protects porous surfaces like stone, tile, and grout from moisture and stains. It maintains breathability while forming an invisible barrier. Suitable for both new and existing installations, it ensures long-lasting protection when applied correctly. Proper surface preparation, including cleaning and drying, is essential for optimal results. Regular maintenance and reapplication as needed will extend the sealer’s effectiveness. This product is ideal for preserving the natural appearance of surfaces while providing reliable protection against environmental factors.

jurassic coaster timetable 2024 pdf download

The Jurassic Coaster 2024 Timetable offers a comprehensive guide to bus services along Dorset’s stunning coastline, including routes X50, X51, and X53, connecting key destinations like Weymouth, Bridport, Lyme Regis, and Axminster․ This essential resource helps passengers plan their journeys efficiently, ensuring they make the most of the scenic views and attractions along England’s iconic Jurassic Coast․

1․1 Overview of the Jurassic Coaster Service

The Jurassic Coaster Service is a scenic bus network operated by First Hampshire & Dorset, offering routes like X50, X51, and X53 along Dorset’s Jurassic Coast․ Connecting Weymouth, Bridport, Lyme Regis, and Axminster, it features open-top buses for stunning views․ The service runs Monday to Friday, with stops at key attractions like Lulworth Cove, making it a popular way to explore this iconic coastline․

1․2 Importance of the 2024 Timetable for Passengers

The 2024 Jurassic Coaster Timetable is essential for passengers to plan their journeys efficiently along Dorset’s Jurassic Coast․ It provides up-to-date information on service frequencies, route adjustments, and special schedules for events․ With details on fares and stops, the timetable ensures passengers can explore attractions like Lulworth Cove and Lyme Regis seamlessly, making it a vital resource for both locals and tourists․

Key Features of the Jurassic Coaster Service

The Jurassic Coaster service offers scenic routes along Dorset’s Jurassic Coast, including open-top buses for stunning views․ Routes like X50, X51, and X53 connect key destinations, ensuring convenient travel between Weymouth, Bridport, and Axminster․ The service features modern, comfortable buses with amenities like Wi-Fi, catering to both tourists and locals exploring the region’s natural beauty and charming towns․

2․1 Routes and Stops Along the Jurassic Coastline

The Jurassic Coaster operates on routes X50, X51, X53, and X54, connecting Weymouth, Bridport, Lyme Regis, and Axminster․ Key stops include West Bay, Charmouth, and Lulworth Cove․ The X54 now operates Monday to Friday, serving these destinations with scenic views of Dorset’s coastline․ Frequencies vary, ensuring convenient travel for both locals and tourists exploring the Jurassic Coast’s natural beauty and charming villages․

2․2 Types of Buses and Amenities Available

The Jurassic Coaster fleet includes modern, comfortable buses, with some routes featuring open-top vehicles for panoramic views․ Amenities vary but often include Wi-Fi, spacious seating, and luggage storage․ Eco-friendly buses are prioritized as part of sustainability efforts․ All buses are equipped to accommodate passengers with disabilities, ensuring accessibility for everyone․ Some routes also allow bicycles, making it ideal for explorers and commuters alike․

How to Download the Jurassic Coaster 2024 Timetable PDF

Visit the official First Bus website and navigate to the “Timetables” section․ Select the Jurassic Coaster route and download the 2024 PDF timetable for easy planning․

3․1 Step-by-Step Guide to Accessing the Timetable

To access the Jurassic Coaster 2024 Timetable PDF, visit the official First Bus website․ Navigate to the “Timetables” section, select “Jurassic Coaster,” and choose your preferred route․ Click the “Download Timetable” option to save the PDF․ Ensure you have a PDF viewer installed to open the file․ Use the built-in search function to quickly find specific stops or times․

3․2 Tips for Navigating the PDF Document

Use the PDF’s built-in search function to quickly locate specific stops or times․ Zoom in for better readability of the timetable details․ Familiarize yourself with the layout, which lists routes, stops, and departure times․ Use bookmarks or page thumbnails for easy navigation between different sections․ Print the PDF for offline access or reference while planning your journey along the Jurassic Coast․

Seasonal Changes and Updates for 2024

The Jurassic Coaster X54 service now operates Monday to Friday only, via Lulworth Cove, while the X50 route continues to offer scenic views from Weymouth to Axminster․

4․1 Adjustments to Service Frequencies and Routes

The Jurassic Coaster X54 service now operates Monday to Friday only, with all trips routed via Lulworth Cove, while the X50 remains unchanged, connecting Weymouth to Lyme Regis and Axminster․ These adjustments ensure efficient service delivery while maintaining scenic views for passengers traveling along Dorset’s iconic coastline․

4;2 Special Events and Holiday Schedules

The Jurassic Coaster timetable includes special event services and holiday schedules, with adjustments made during peak seasons․ The X50 service is withdrawn during winter, resuming in summer 2024, while additional open-top buses operate during summer months․ Passengers can enjoy enhanced services for events like TANKFEST and summer festivals, ensuring connectivity to key attractions along Dorset’s Jurassic Coast during holidays and special occasions․

Fares and Ticketing Options for 2024

The Jurassic Coaster offers competitive fares, with single tickets starting from £3․ Discounted passes and day tickets are available for frequent travelers, providing flexible and affordable options․

5․1 Single and Return Fare Options

The Jurassic Coaster offers affordable single fares starting from £3, ideal for short trips․ Return tickets provide additional savings, perfect for day excursions․ Both options ensure flexibility, catering to locals and tourists exploring Dorset’s stunning coastline․ With clear pricing and convenient payment methods, passengers can enjoy hassle-free travel while taking in the breathtaking views of the Jurassic Coast․

5․2 Discounted Tickets and Passes for Frequent Travelers

Frequent travelers can benefit from discounted tickets and passes, offering significant savings․ Weekly and monthly passes are available, providing unlimited travel on Jurassic Coaster routes․ These options are ideal for commuters and regular visitors, ensuring cost-effective exploration of Dorset’s Jurassic Coast․ Passengers can purchase tickets online or via the First Bus app, making travel planning convenient and affordable․

Popular Attractions and Destinations on the Route

The Jurassic Coaster route showcases Dorset’s stunning coastline, including iconic spots like Lulworth Cove, Durdle Door, and Lyme Regis, offering breathtaking views and historical charm․

6․1 Must-Visit Locations Along the Jurassic Coast

The Jurassic Coast is renowned for its natural beauty and historical significance․ Key attractions include Lulworth Cove, Durdle Door, and Charmouth Beach, offering stunning landscapes and fossil-rich shores․

6․2 Planning Your Trip Around Key Landmarks

Plan your journey with the Jurassic Coaster timetable to explore iconic landmarks like Lulworth Cove and Durdle Door․ Use the PDF guide to identify stops near popular attractions, ensuring you maximize your time along the Jurassic Coast․ The timetable helps you align your travel with must-see destinations, making your trip seamless and enjoyable․

Accessibility and Special Requirements

The Jurassic Coaster offers accessible buses with facilities for passengers with disabilities․ Assistance is available for wheelchairs, and accommodations can be made for bicycles and large luggage․ Prior notification is recommended for special requirements․

7․1 Facilities for Passengers with Disabilities

The Jurassic Coaster buses are equipped with wheelchair-accessible ramps and priority seating areas for passengers with disabilities․ Trained staff are available to assist with boarding and seating, ensuring a smooth and comfortable journey․ The service aims to provide inclusive travel options, making the Jurassic Coast accessible to all passengers, regardless of mobility needs․

7․2 Traveling with Bicycles or Large Luggage

The Jurassic Coaster accommodates passengers with bicycles or large luggage, subject to space availability․ Bicycles must be folded or securely stored to avoid obstructing aisles․ For large luggage, passengers are advised to check with the driver before boarding․ This ensures a safe and comfortable journey for all while exploring the Jurassic Coastline․

Real-Time Updates and Service Alerts

Stay informed with real-time updates and service alerts for the Jurassic Coaster via mobile apps, website notifications, or social media․ Plan your journey seamlessly with the latest information․

8․1 How to Stay Informed About Service Changes

Passengers can stay updated on Jurassic Coaster service changes by regularly checking the official website or mobile app for real-time alerts․ Additionally, following the service’s social media accounts provides timely notifications about disruptions or schedule adjustments․ Ensuring you have the latest PDF timetable downloaded helps plan your journey accurately, especially during peak seasons or special events․

8․2 Using Mobile Apps for Live Timetable Updates

Downloading the official mobile app for the Jurassic Coaster service provides live timetable updates, allowing passengers to track their buses in real-time․ The app offers personalized journey planning, service alerts, and push notifications for disruptions․ With the app, travelers can access the latest PDF timetables and enjoy a seamless experience navigating the Jurassic Coast, ensuring they never miss their bus or connection․

Environmental Impact and Sustainability

The Jurassic Coaster operates eco-friendly buses, reducing carbon emissions along the Jurassic Coast․ Its initiatives promote sustainable travel, encouraging passengers to choose an environmentally responsible transport option․

9․1 Eco-Friendly Initiatives by the Jurassic Coaster

The Jurassic Coaster has implemented eco-friendly initiatives to minimize its environmental impact․ By using cleaner engines and optimizing routes, the service reduces carbon emissions․ Partnerships with local environmental groups support coastal conservation efforts, promoting sustainable tourism․ These actions highlight the operator’s commitment to protecting Dorset’s natural beauty while offering a greener travel option for passengers exploring the Jurassic Coast․

9․2 Promoting Green Travel Along the Jurassic Coast

The Jurassic Coaster promotes green travel by offering eco-friendly bus services and supporting local environmental initiatives․ By encouraging passengers to use public transport, they help reduce the region’s carbon footprint and preserve the Jurassic Coast’s natural beauty․

This sustainable approach enhances the travel experience, allowing visitors to enjoy scenic views responsibly while contributing to Dorset’s unique heritage preservation․

Customer Feedback and Service Improvements

The Jurassic Coaster continuously enhances its services based on passenger feedback, ensuring improved reliability, comfort, and accessibility for all travelers along the Jurassic Coast․

10․1 How Passenger Feedback Shapes the Service

The Jurassic Coaster service actively seeks passenger feedback through surveys, online portals, and social media to identify areas for improvement․ By analyzing this input, the service has made adjustments to routes, timetables, and onboard amenities, ensuring a more convenient and enjoyable travel experience․ Passenger insights have also led to enhanced real-time updates and clearer information dissemination, reflecting a commitment to customer-centric improvements․

10;2 Recent Enhancements Based on Customer Reviews

The Jurassic Coaster service has introduced open-top buses on select routes, enhancing scenic views․ Route adjustments, such as the X54 now serving Lulworth Cove, reflect passenger preferences․ Real-time updates have been improved, and additional stops have been added based on customer demand․ These changes aim to provide a more enjoyable and convenient travel experience, demonstrating the service’s responsiveness to passenger feedback and reviews․

Safety and Security on Board

The Jurassic Coaster ensures passenger safety with CCTV cameras and trained staff․ Emergency procedures are clearly outlined, and contact information is readily available for assistance, ensuring a secure and comfortable journey along the Jurassic Coast․

11․1 Safety Measures for Passengers

The Jurassic Coaster prioritizes passenger safety with well-trained drivers and staff, ensuring a secure journey․ Buses are equipped with CCTV cameras for added security, and emergency exits are clearly marked․ Regular safety drills are conducted to prepare for unforeseen situations, providing passengers with peace of mind while traveling along the picturesque Jurassic Coast․

Additionally, all vehicles undergo rigorous maintenance checks to guarantee optimal performance and safety standards․ Passengers are encouraged to follow safety guidelines and report any concerns to the driver or customer service team for a safe and enjoyable experience․

11․2 Emergency Procedures and Contact Information

In case of an emergency, passengers should follow the driver’s instructions and use emergency exits located at the rear and middle of the bus․ For assistance, contact Jurassic Coaster customer service at 01202XXXXXX or email info@jurassiccoaster․co․uk․ Emergencies can also be reported to staff at any stop for prompt resolution․

The Jurassic Coaster 2024 Timetable concludes with a promise of enhanced services, ensuring seamless travel along Dorset’s scenic coastline while unveiling future improvements for passenger convenience․

12․1 Summary of the Jurassic Coaster 2024 Timetable

The Jurassic Coaster 2024 Timetable provides detailed schedules for routes X50, X51, and X53, connecting Weymouth, Bridport, Lyme Regis, and Axminster․ It ensures efficient travel planning, offering frequent services and stunning coastal views․ The timetable is essential for exploring Dorset’s iconic Jurassic Coast, with clear departure times and stops, making it easy for passengers to navigate the region’s scenic attractions and charming towns․

12․2 Looking Ahead to Future Service Developments

The Jurassic Coaster service is expected to expand its routes and improve frequency, enhancing connectivity along the Jurassic Coast․ Future developments may include new eco-friendly buses and enhanced digital ticketing options․ Passenger feedback will continue to shape service improvements, ensuring the Jurassic Coaster remains a sustainable and reliable transport option for exploring Dorset’s stunning coastline and attractions․

shopping channel weekly program guide

Welcome to the Shopping Channel Weekly Program Guide, your ultimate resource for discovering the latest products, exclusive deals, and exciting shows. Tune in for a diverse range of offerings, from beauty and fashion to home essentials, all showcased with expert demonstrations and live-only discounts. Stay updated on daily schedules, themed shopping days, and interactive contests designed to enhance your shopping experience. This guide is your go-to source for planning your week and making the most of our live broadcasts.

With over 1,000 products featured weekly, our channel brings you the latest trends, must-have items, and celebrity guest appearances. Explore our program highlights, meet our hosts, and enjoy expert tips to help you shop smarter. Whether you’re a beauty enthusiast, a fashionista, or a home decor lover, this guide has something for everyone. Dive into the world of convenient shopping, exclusive offers, and engaging entertainment, all from the comfort of your home.

From morning to midnight, our daily segments are packed with exciting content. Stay informed about new arrivals, special promotions, and how to interact with our live shows. Discover how to shop seamlessly across multiple platforms, including mobile apps and streaming services. This guide is your key to unlocking a world of shopping possibilities, ensuring you never miss out on the best deals and trending products.

1.1 Overview of the Shopping Channel

Welcome to the Shopping Channel, your premier destination for live shopping, exclusive deals, and expert demonstrations. We feature a wide range of products, from beauty and skincare to fashion and jewelry, and home and lifestyle essentials. With a focus on quality and affordability, our channel offers something for everyone. Tune in for live-only discounts, celebrity guest hosts, and interactive segments that make shopping fun and engaging. Discover the latest trends, must-have items, and tips from industry experts, all while enjoying a seamless shopping experience from the comfort of your home.

1.2 Purpose of the Weekly Program Guide

The weekly program guide is crafted to keep viewers informed about upcoming shows, exclusive deals, and new product launches. It offers a detailed schedule, spotlighting top-trending items and live-only discounts. The guide includes expert tips and interactive features, enhancing the shopping experience. By planning their viewing, shoppers can maximize special offers and discover must-have products. This comprehensive tool ensures they never miss the best deals and latest trends, making it indispensable for every shopping enthusiast.

Weekly Highlights and Featured Products

Discover the latest trends, must-have items, and exclusive deals featured this week. Explore top products, new launches, and expert demonstrations designed to enhance your shopping experience.

2.1 Top-Trending Products of the Week

This week’s top-trending products include the luxurious KORRES Greek Natural Beauty skincare line, featuring powerful, natural ingredients for glowing skin. Fashion enthusiasts are loving G by Giuliana Rancic’s stylish and affordable collections. Beauty lovers can’t get enough of Fenty Beauty’s Icon Velvet Liquid Lipstick, perfect for bold, vibrant looks. Home decor fans are flocking to Nakery’s clean bath & body care for refreshing spaces. Don’t miss Cristiana Jewels, offering exquisite, Made-in-Italy pieces. These must-have items are flying off the shelves—shop them while they’re in stock!

2.2 Exclusive Deals and Discounts

Discover unbeatable savings with our exclusive deals and discounts, available only during live broadcasts. Enjoy live-only discounts on top-trending products like Kala Red Light Therapy and Bodywear by Rhonda Shear. Don’t miss out on expert guidance from our hosts, who share tips to help you shop smarter. From 30% off SKINN Age Reset Day Cream to special offers on Brian Bailey Designer Clothing, these deals are designed to enhance your shopping experience. Tune in daily to catch limited-time offers and make the most of your purchases.

2.3 New Arrivals and Launches

Explore the latest additions to our lineup with exciting new arrivals and launches. Discover Cristiana Jewels Made in Italy, featuring elegant designs, and Patricia Nash Handbags & Accessories, perfect for style and functionality. Don’t miss G by Giuliana Rancic Fashions, offering fresh spring capsule wardrobe inspiration. These products debut live on air, giving you an exclusive first look. Tune in to our daily schedule to catch these launches and elevate your style with the newest trends in beauty, fashion, and home decor.

Daily Program Schedule

Discover our daily schedule, featuring segments from 7:00 AM to 12:00 AM. Catch morning shows like KORRES Greek Natural Beauty at 7:00 AM, afternoon highlights with Skechers Footwear at 6:00 AM, and evening specials like Cooking with Curtis Stone at 3:00 AM. Plan your day with our 24/7 shopping lineup.

3.1 Morning Segment (7:00 AM ⎼ 12:00 PM)

Start your day with style and savings! The morning segment features KORRES Greek Natural Beauty at 7:00 AM, offering luxurious skincare essentials. At 6:00 AM, explore Skechers Footwear for comfortable and trendy shoes; Discover Cristiana Jewels at 7:00 AM, showcasing stunning, handcrafted Italian jewelry. Enjoy live-only discounts and expert tips to kickstart your day. Don’t miss G by Giuliana Rancic Fashions on sale, perfect for updating your wardrobe. Tune in early for exclusive deals and must-have products to elevate your morning routine.

3.2 Afternoon Segment (12:00 PM ⸺ 6:00 PM)

The afternoon segment brings a vibrant mix of fashion, beauty, and lifestyle products. At 1:00 PM, don’t miss G by Giuliana Rancic Fashions featuring stylish, affordable pieces. Later, at 4:00 PM, explore Ron White Designer Shoe Collection for chic footwear. Tune in for Cooking with Curtis Stone at 3:00 AM, blending culinary inspiration with must-have kitchen essentials. Enjoy live-only discounts, expert tips, and interactive features like live chat to enhance your shopping experience. Stay entertained and informed with a lineup tailored to your interests and lifestyle needs.

3.3 Evening Segment (6:00 PM ⎼ 12:00 AM)

The evening segment offers a curated selection of products to enhance your lifestyle. At 12:00 AM, explore KORRES Greek Natural Beauty for luxurious skincare. Later, at 2:00 AM, discover Bodywear by Rhonda Shear for comfortable sleep solutions. Catch Brian Bailey Designer Clothing at 4:00 AM for stylish wardrobe additions. This segment is perfect for late-night shoppers, featuring exclusive deals, expert advice, and must-have items. Tune in for a seamless shopping experience tailored to your needs and preferences.

Popular Shows and Hosts

Discover captivating shows hosted by experts like Martha Stewart, Monet McMichaels, and Jenna Lyons. Tune in for style tips, beauty trends, and lifestyle inspiration from trusted personalities.

4.1 Meet the Hosts: Biographies and Favorites

Meet our charismatic hosts, each bringing unique expertise and passion to the screen. Martha Stewart shares her lifestyle and entertaining tips, while Monet McMichaels showcases bold beauty looks. Jenna Lyons offers fashion inspiration, and PJ Tucker highlights must-have lifestyle products. Discover their favorite items, from skincare essentials to trendy fashion picks, as they guide you through the latest trends. Their engaging personalities and insider knowledge make shopping a delightful experience. Tune in to connect with these hosts and explore their curated selections.

4.2 Spotlight on Celebrity Guest Hosts

Our channel features exciting appearances by celebrity guest hosts, bringing fresh energy and expertise. Martha Stewart shares her top home decor picks, while Monet McMichaels showcases trending beauty must-haves. Jenna Lyons offers insider fashion tips, and PJ Tucker highlights lifestyle favorites. These special segments provide unique insights and exclusive offers. Don’t miss their engaging storytelling and personalized product recommendations, making each show unforgettable. Catch these stars as they inspire your shopping journey with their unique perspectives and style. Their appearances are a treat for viewers, blending fun and expertise seamlessly.

Themed Shopping Days

Discover special themed shopping days, featuring curated collections in beauty, skincare, fashion, jewelry, and home lifestyle. Each day highlights trending products, exclusive deals, and expert tips to inspire your purchases. From beauty and skincare essentials to stylish fashion must-haves and home decor upgrades, these themed days offer a focused shopping experience. Plan your week around these events to explore new arrivals, limited-time offers, and expert recommendations tailored to your interests. Stay tuned for exciting themes that make shopping fun and rewarding.

5.1 Beauty and Skincare Days

Indulge in Beauty and Skincare Days, showcasing luxurious bath and skincare lines like KORRES Greek Natural Beauty. Discover trending products, expert tips, and live demonstrations. Explore Fenty Beauty’s Icon Velvet Lipstick, shimmering spring makeup trends, and Monet McMichael’s favorite picks. Enjoy exclusive deals on Kala Red Light Therapy and Bodywear by Rhonda Shear. These days offer a perfect blend of innovation, style, and savings, helping you elevate your beauty routine with must-have items and expert guidance.

5.2 Fashion and Jewelry Days

Fashion and Jewelry Days bring you the latest trends in style and accessories. Discover exclusive deals on designer clothing, handbags, and artisan jewelry. Shop collections like G by Giuliana Rancic and Samuel B. Handcrafted Jewelry. Explore Jenna Lyons’ spring capsule wardrobe picks and PJ Tucker’s curated selections. Enjoy live offers, expert styling tips, and insights from celebrity guest hosts. These days are perfect for refreshing your wardrobe and adding statement pieces to your jewelry collection, all while enjoying special discounts and expert guidance.

5.3 Home and Lifestyle Days

Home and Lifestyle Days are dedicated to helping you refresh your space and elevate your daily life. Discover essential spring decor items, organization solutions, and must-have lifestyle products. Explore Martha Stewart’s curated picks for spring, featuring trending chair styles and decor accents. Tune in for live demonstrations of innovative home gadgets and storage solutions. These segments offer practical tips and exclusive deals, making it easy to update your home without breaking the bank. Stay inspired with fresh ideas and expert advice to create a stylish, functional living space.

Viewer Benefits and Perks

Enjoy live-only discounts, expert guidance, and exclusive offers tailored to enhance your shopping experience. These perks make your viewing and shopping journey rewarding and personalized.

6.1 Live-Only Discounts and Offers

Take advantage of exclusive live-only discounts and offers available during our broadcasts. Enjoy significant savings on trending products like KORRES Greek Natural Beauty and Bodywear by Rhonda Shear. These deals, often featuring 30% off or more, are only accessible while products are aired live. With over 1,000 items showcased weekly, you’ll find unbeatable prices on jewelry, fashion, and lifestyle essentials. Don’t miss out on these limited-time savings that make live shopping a rewarding experience. Tune in early to secure the best deals before they’re gone!

6.2 Expert Guidance and Product Demonstrations

Enhance your shopping experience with expert guidance and detailed product demonstrations. Our hosts, including Martha Stewart and Monet McMichael, share insider tips and tricks to help you make informed purchases. Watch live broadcasts featuring product showcases, such as KORRES skincare and Fenty Beauty’s trending lipstick. Experts demonstrate how to use items like red light therapy devices and designer clothing, ensuring you understand their benefits. This hands-on approach gives you confidence in your selections, making your shopping journey both enjoyable and rewarding. Tune in for live demos and expert advice tailored to your needs!

Interactive Features and Contests

Engage with live chat, viewer interaction, and weekly giveaways. Participate in contests for chances to win exclusive prizes, enhancing your shopping experience with fun and rewards.

7.1 Live Chat and Viewer Interaction

Enhance your shopping experience with real-time live chat and viewer interaction. Engage directly with hosts, ask questions, and share feedback during broadcasts. This feature fosters a sense of community, making you feel connected to the show and other viewers. Participate in polls, vote for your favorite products, and get instant updates on exclusive deals. Hosts often respond to comments, creating a personalized and interactive experience. Don’t miss out on the opportunity to influence the conversation and win special prizes through active participation.

7.2 Weekly Giveaways and Contests

Elevate your shopping experience with exciting weekly giveaways and contests. Participate in live contests for a chance to win exclusive prizes, from luxury jewelry to premium home products. Follow the program guide to stay updated on contest schedules and entry details. Engage with hosts and other viewers during live broadcasts to increase your chances of winning. These contests are designed to reward loyal viewers and add an extra layer of fun to your shopping journey. Don’t miss out on the opportunity to take home incredible prizes while enjoying your favorite shows.

How to Watch and Shop

Discover how to tune in and shop effortlessly. Use our channel finder for local listings and stream live shows via our website or mobile app. Shop seamlessly while watching with convenient on-screen product links and exclusive app features. Stay connected and never miss your favorite programs or deals with our user-friendly platforms designed for ultimate viewer convenience.

8.1 Channel Finder and Streaming Options

Easily locate the Shopping Channel on your TV with our handy channel finder tool. Access live broadcasts and on-demand content via our website or mobile app. Stream your favorite shows seamlessly across devices, including smart TVs, tablets, and smartphones. Enjoy a user-friendly interface that allows you to search by provider or zip code, ensuring you never miss your favorite programs. With 24/7 availability, shopping has never been more convenient. Tune in anytime, anywhere, and shop effortlessly from the comfort of your home or on the go.

8.2 Mobile Shopping and App Features

Experience seamless shopping on the go with our mobile app, designed for a convenient and enjoyable experience. Stream live shows, browse products, and shop exclusive deals directly from your smartphone. The app features personalized recommendations, push notifications for live-only discounts, and a user-friendly interface for easy navigation. Enjoy exclusive app-only offers, secure checkout, and access to your purchase history; Plus, with features like virtual try-on and product demos, you can shop confidently from anywhere. Download the app today and take your shopping experience to the next level, anytime, anywhere.

Thank you for exploring the Shopping Channel Weekly Program Guide! We hope you’ve discovered exciting products, exclusive deals, and engaging shows to enhance your shopping experience. Stay tuned for upcoming events, including celebrity guest appearances, new product launches, and themed shopping days that promise even more savings and inspiration.

Mark your calendars for special events like “Spring into Style” and “Home Makeover Week.” Don’t miss live-only discounts, expert tips, and interactive contests that make shopping with us unforgettable. Keep an eye on our channel finder and mobile app for updates and the latest ways to shop smarter and save big!

que es una conclusion pdf

A conclusion is the final result of reasoning‚ investigation‚ or analysis‚ summarizing key findings and reinforcing the main ideas․ It provides closure while highlighting the significance of the work․

Definition of a Conclusion

A conclusion is the final part of a text‚ article‚ or research that summarizes the main points discussed․ It is derived from reasoning‚ analysis‚ or investigation‚ providing a clear and concise summary of the findings․ A conclusion does not introduce new information but rather synthesizes the key ideas‚ reinforcing the thesis or main argument․ It serves as the final statement‚ offering closure and highlighting the significance of the work․ In academic and research contexts‚ a well-crafted conclusion effectively addresses the research question or hypothesis‚ leaving a lasting impression on the reader․

The Purpose of a Conclusion in Academic Writing

The purpose of a conclusion in academic writing is to summarize the key findings‚ reinforce the thesis‚ and provide closure to the document․ It serves as the final opportunity to address the research question or hypothesis‚ ensuring the reader understands the significance of the work․ A strong conclusion ties together the main arguments and highlights their implications‚ without introducing new information․ It consolidates the analysis and reinforces the validity of the findings‚ leaving a lasting impression on the reader․ Effectively‚ a conclusion strengthens the overall argument and demonstrates the value of the research or analysis conducted․

Structure of an Effective Conclusion

An effective conclusion typically includes restating the thesis‚ summarizing main points‚ and ending with a strong closing statement that reinforces the significance of the work․

Key Components of a Strong Conclusion

A strong conclusion contains three essential elements: a restated thesis‚ a summary of main points‚ and a closing statement․ The restated thesis reaffirms the central argument without repeating it verbatim․ The summary of main points briefly recaps the most significant findings or arguments presented․ Finally‚ the closing statement provides a thought-provoking remark‚ a call to action‚ or a broader implication of the work․ Together‚ these components ensure the conclusion effectively reinforces the paper’s purpose and leaves a lasting impression on the reader․

How to Restate the Thesis Statement

Restating the thesis involves rephrasing the original argument to highlight its significance without repeating it word-for-word․ Use new wording while preserving the core message․ Maintain clarity and conciseness‚ ensuring the restated thesis aligns with the content presented․ This technique reinforces the paper’s purpose and strengthens the conclusion’s impact‚ leaving a clear and memorable impression on the reader․

Summarizing Main Findings or Arguments

Summarizing main findings or arguments involves concisely revisiting the key points of your work without introducing new information․ This step reinforces the central ideas and ensures clarity․ Use clear and direct language to highlight the most significant results or arguments‚ aligning them with your thesis․ Avoid unnecessary details and focus on what is most impactful․ This summary should provide a cohesive overview‚ demonstrating how the findings address the research question or problem․ It also prepares the reader for the final thoughts or implications discussed in the conclusion‚ ensuring a smooth transition to the closing statements․

Writing Tips for a Compelling Conclusion

Use clear‚ concise language to reinforce key points․ Avoid introducing new information and focus on summarizing main ideas․ Emphasize the significance of your findings or arguments to leave a lasting impression․ Ensure your conclusion aligns with your thesis and provides a strong final statement․ Keep it brief but impactful‚ making sure it resonates with your audience and highlights the importance of your work․ Properly structured conclusions enhance readability and clarity‚ ensuring your message is effectively communicated․

How to Avoid Introducing New Information

To maintain clarity and effectiveness‚ conclusions should strictly avoid introducing new data or ideas․ This ensures the focus remains on summarizing and reinforcing the already discussed points․ Stick to the main arguments and findings presented earlier in the document․ Avoid adding statistics‚ quotes‚ or theories that were not mentioned before․ Instead‚ synthesize the existing information to provide a cohesive summary․ This approach prevents confusion and keeps the conclusion aligned with the rest of the document․ By adhering to this guideline‚ you ensure your conclusion strengthens your argument without diverting from the established narrative․

Emphasizing the Significance of the Findings

Highlighting the importance of your findings is crucial in a conclusion․ Clearly state how your results contribute to the field or address the problem․ Connect your discoveries to broader implications or future applications․ Avoid vague statements; instead‚ use specific language to underscore the value of your work․ This not only reinforces the relevance of your research but also leaves a lasting impression on the reader․ By emphasizing significance‚ you demonstrate the impact of your study and its potential to influence further investigations or real-world applications․ This step is essential for a compelling and memorable conclusion․

Using Strong Closing Language

Using strong closing language is essential to leave a lasting impression in your conclusion․ Choose powerful verbs and active voice to convey confidence and clarity․ Avoid weak phrases like “in conclusion” or “to sum up‚” as they lack impact․ Instead‚ use definitive statements that reinforce your main points․ For example‚ “These findings unequivocally demonstrate․․․” or “This research conclusively shows․․․” Strong language ensures your conclusion is memorable and impactful․ It also underscores the significance of your work‚ making it more likely to resonate with readers․ Effective closing language elevates the professionalism and persuasiveness of your writing․

Common Mistakes to Avoid

Common mistakes include introducing new information‚ being overly verbose‚ or repeating points without adding value‚ which can weaken the impact of your conclusion and confuse readers․

Overly Long or Wordy Conclusions

A common mistake is writing conclusions that are unnecessarily long or repetitive․ This can dilute the impact of your findings and bore readers․ Conciseness is key to effectiveness․

  • Lengthy conclusions often repeat information already discussed without adding value․
  • They can confuse readers by introducing unnecessary details or tangents․
  • Wordiness weakens the clarity and focus of your final remarks․

Keep your conclusion concise‚ ensuring it summarizes main points without redundancy․ Aim for clarity and precision to leave a strong‚ lasting impression on your audience․

Repeating the Same Information Without Adding Value

Repeating the same information without adding value is a common pitfall in conclusions․ It can make your writing seem redundant and unengaging․ Instead of reinforcing your points‚ it may bore your readers․

  • Repetition without insight fails to deepen understanding or provide new perspectives․
  • It can undermine the clarity and impact of your conclusion․
  • Avoid merely paraphrasing earlier content; instead‚ synthesize your findings meaningfully․

Focus on highlighting the significance of your results and their implications to leave a lasting impression on your audience․

Examples of Effective Conclusions

  • In academic research‚ conclusions summarize key findings and their implications․
  • In business reports‚ conclusions often include actionable recommendations based on data․

Academic Research Conclusions

In academic research‚ a strong conclusion effectively summarizes the study’s key findings‚ reiterates the significance of the research‚ and provides a final perspective on the implications of the results․ It should avoid introducing new data and instead focus on synthesizing the information presented․ A well-crafted conclusion reinforces the thesis statement and addresses the research questions or hypotheses․ Additionally‚ it may suggest areas for future study or practical applications of the findings․ The conclusion should be concise‚ clear‚ and impactful‚ leaving the reader with a lasting understanding of the research’s contribution to the field․ Proper formatting in PDFs ensures readability and professional presentation․

In business reports‚ conclusions are concise and action-oriented‚ summarizing key findings and their implications for decision-making․ They should clearly state the main outcomes of the analysis and provide recommendations or next steps․ A strong business conclusion ties data to strategic goals‚ ensuring alignment with organizational objectives․ It avoids introducing new information and instead focuses on synthesizing insights to support business decisions․ Clarity and brevity are essential‚ as stakeholders often rely on conclusions to guide actions․ Proper formatting in PDFs enhances readability‚ making it easier for readers to grasp the report’s value and implement its findings effectively․ A well-crafted conclusion strengthens the report’s impact and relevance․

A PDF conclusion should be clear‚ concise‚ and visually appealing‚ ensuring readability with proper formatting and structure to effectively communicate the final insights of the document․

Best Practices for Formatting Conclusions in PDFs

Ensure clarity and consistency by using a readable font and appropriate size․ Maintain uniform margins and spacing throughout the document․ Use bullet points or numbered lists for key findings to enhance readability․ Avoid overly complex designs; keep the layout clean and professional․ Highlight the main conclusions with bold or italic text for emphasis․ Ensure proper pagination so the conclusion is easily accessible․ Use headings and subheadings to organize the section effectively․ Proofread for typos and grammatical errors to maintain credibility․ Optimize images and charts if included‚ ensuring they are high-resolution and relevant․ Finally‚ ensure the PDF is searchable and accessible for all readers․

Ensuring Readability and Clarity

To ensure readability and clarity in a conclusion within a PDF‚ use a clean and professional layout․ Choose a standard font like Arial or Times New Roman in size 12 for ease of reading․ Maintain consistent spacing and margins throughout the document․ Use bullet points or numbered lists to present key findings concisely․ Avoid overly technical language or jargon unless necessary․ Ensure the conclusion is well-organized‚ with clear headings and subheadings․ Keep paragraphs short and focused on a single idea․ Highlight important terms or phrases using bold or italic text for emphasis․ Finally‚ proofread the text to eliminate errors and ensure the conclusion is both understandable and impactful․

FAQs About Writing Conclusions

Frequently Asked Questions about writing conclusions often revolve around structure and content․ A common query is‚ “What is the ideal length of a conclusion?” Typically‚ it should be concise‚ summarizing key points without introducing new information․ Another question is‚ “Should I repeat my thesis statement?” Yes‚ but it should be rephrased to avoid redundancy․ Additionally‚ readers ask‚ “How do I emphasize the significance of my findings?” This can be achieved by highlighting the implications or broader impact․ Finally‚ many wonder‚ “What are common mistakes to avoid?” Overly wordy conclusions and repeating information without adding value are frequent pitfalls․ Addressing these ensures a strong‚ effective conclusion․

kalmar ottawa parts catalog pdf

The Kalmar Ottawa Parts Catalog PDF is a comprehensive guide for maintenance and repair, offering detailed parts listings and diagrams, available for easy download to streamline operations efficiently․

Overview of the Kalmar Ottawa Parts Catalog

The Kalmar Ottawa Parts Catalog PDF is a detailed guide designed to assist users in identifying and ordering genuine parts for their terminal tractors․ It features comprehensive listings, diagrams, and customization options tailored to specific models, ensuring accurate part identification and streamlined maintenance․

Available online, the catalog is accessible via Kalmar’s official website and authorized dealer platforms, providing users with a convenient tool for efficient parts management and repair processes․

Importance of Using Genuine Parts

Using genuine Kalmar Ottawa parts ensures optimal performance, reliability, and longevity of your terminal tractor․ Designed specifically for Kalmar models, these parts guarantee a perfect fit and maintain factory standards․ Genuine parts reduce downtime, as they are readily available and backed by comprehensive support․ They also come with a warranty, ensuring peace of mind and protecting your investment․ Always choose genuine parts for superior quality and trusted performance․

How to Access the Kalmar Ottawa Parts Catalog PDF

Access the Kalmar Ottawa Parts Catalog PDF easily online through official websites or authorized dealer platforms, allowing users to download it as a convenient PDF file․

Downloading the Catalog Online

Downloading the Kalmar Ottawa Parts Catalog PDF is a straightforward process․ Visit the official Kalmar website or authorized dealer platforms, navigate to the parts section, and search for the catalog․ Once located, users can download it as a PDF file for easy access․ The catalog is also available through platforms like MyKalmar STORE, ensuring quick and efficient access to detailed parts listings and diagrams․ This convenient option allows users to find and order genuine parts seamlessly․

Availability on Official Websites and Dealer Platforms

The Kalmar Ottawa Parts Catalog PDF is readily available on Kalmar’s official website and authorized dealer platforms like Louisville Switching and TRUCKiD․ Users can easily access the catalog through these channels, ensuring quick and reliable retrieval of parts information․ Additionally, platforms like MyKalmar STORE offer streamlined access, allowing users to download the catalog or order parts directly, supported by an extensive network of dealers for efficient service and maintenance support․

Key Features of the Kalmar Ottawa Parts Catalog

The catalog offers detailed parts listings, interactive search functionality, and customizable filters, enabling users to quickly identify and locate specific components for efficient maintenance and repair operations․

Detailed Listings of Parts and Components

The catalog provides an exhaustive breakdown of every part and component, including descriptions, diagrams, and reference numbers․ This ensures users can identify and source the exact items needed for maintenance or repair efficiently․ Each section is organized by system, such as engine, transmission, and brakes, making it easy to navigate and locate specific parts quickly․ This level of detail minimizes downtime and ensures accurate replacements, optimizing overall performance․

Interactive Search Functionality for Easy Navigation

The Kalmar Ottawa parts catalog features an advanced search function, enabling users to quickly locate specific parts by keywords, part numbers, or descriptions․ This intuitive tool simplifies navigation, allowing for fast identification and cross-referencing of components․ With instant results, the search functionality enhances efficiency, reducing time spent searching through extensive listings․ It ensures users can find what they need effortlessly, making maintenance and repair processes smoother and more productive․

Benefits of Using the Kalmar Ottawa Parts Catalog

The Kalmar Ottawa parts catalog offers streamlined maintenance, cost savings through genuine parts, and reduced downtime with fast identification, ensuring optimal performance and longevity of equipment․

Streamlined Maintenance and Repair Process

The Kalmar Ottawa parts catalog simplifies maintenance by providing clear part listings and diagrams, enabling quick identification and procurement․ This reduces downtime and ensures repairs are done efficiently, minimizing operational disruptions․ The catalog’s organized structure allows technicians to locate components swiftly, promoting a smoother workflow․ With detailed instructions and genuine parts recommendations, maintenance becomes more precise and effective, ensuring equipment longevity and optimal performance․

Cost Savings Through Genuine Parts

Using genuine Kalmar Ottawa parts ensures cost savings by reducing repair frequency and extending equipment lifespan․ These parts are designed to meet exact specifications, preventing issues that can arise from non-genuine alternatives․ By investing in high-quality components, operators avoid additional expenses from premature wear and potential downtime․ Genuine parts are backed by warranties, further enhancing their cost-effectiveness and reliability, making them a smart choice for long-term financial savings․

Reduced Downtime with Fast Parts Identification

The Kalmar Ottawa parts catalog simplifies parts identification, minimizing downtime․ Its interactive search functionality and detailed listings enable quick location of components, ensuring maintenance and repairs are completed efficiently․ Customized for specific models like the T2, the catalog streamlines the process, reducing delays and keeping operations running smoothly․ Fast access to accurate information helps technicians resolve issues swiftly, maximizing productivity and uptime for terminal tractors․

Kalmar Ottawa T2 Terminal Tractor Specifics

The Kalmar Ottawa T2 features advanced ergonomics, increased visibility, and a robust design, backed by an industry-leading 2-year/6,000 hour warranty for enhanced reliability and performance․

Advanced Features of the T2 Model

The Kalmar Ottawa T2 model boasts cutting-edge features like enhanced ergonomics, improved visibility through a larger glass area, and a robust ROPS-compliant cab for operator safety․ It also includes advanced diagnostic systems and intuitive controls, ensuring efficient operation and reduced downtime․ The T2 is designed with serviceability in mind, offering easy access to components for faster maintenance and repairs, thus optimizing overall productivity and performance․

Parts Catalog Customization for the T2

The Kalmar Ottawa T2 parts catalog is fully customizable, allowing users to quickly identify specific components for their model․ The catalog is organized by vehicle sections, such as engine, transmission, and brakes, with detailed part numbers and descriptions․ This customization ensures accuracy in ordering and reduces downtime, providing a tailored solution for T2 maintenance and repair needs․

Maintenance and Repair Guidance

The Kalmar Ottawa parts catalog provides essential guidance for routine maintenance and repairs, ensuring optimal performance and longevity of your terminal tractor with detailed instructions and diagrams․

Using the Catalog for Routine Maintenance

The Kalmar Ottawa parts catalog is an invaluable resource for routine maintenance, providing detailed listings, diagrams, and part numbers to ensure accurate and efficient servicing․ Its user-friendly format allows technicians to quickly identify required components, streamlining scheduled maintenance and reducing downtime․ With comprehensive coverage of all systems, the catalog ensures that every service task is performed correctly, using genuine parts designed for optimal performance and longevity․ Its accessibility as a PDF further enhances convenience for technicians working on-site or in the shop․

Troubleshooting Common Issues with Catalog Assistance

The Kalmar Ottawa parts catalog is a vital tool for troubleshooting common issues, offering detailed diagrams and part listings to help identify and resolve problems quickly․ By referencing the catalog, technicians can pinpoint faulty components, order genuine replacement parts, and ensure repairs are done efficiently․ This resource minimizes downtime by providing clear, actionable solutions, making it an essential aid for maintaining optimal performance and addressing operational challenges effectively․

Warranty and Service Support

The Kalmar Ottawa parts catalog PDF is backed by an industry-leading 2-year/6,000 hour warranty and extensive service support from over 120 authorized dealers across North America․

Industry-Leading 2-Year/6,000 Hour Warranty

Kalmar Ottawa offers an unmatched 2-year/6,000 hour standard warranty, providing extensive coverage for parts and service․ This warranty is supported by a network of over 120 authorized dealers across North America, ensuring prompt assistance and minimizing downtime․ The comprehensive coverage reflects Kalmar’s commitment to quality and reliability, giving customers peace of mind and protecting their investments in Kalmar Ottawa terminal tractors․

Extensive Dealer Network for Parts and Service

Kalmar Ottawa is supported by an extensive network of over 120 authorized dealers across North America․ These dealers provide quick access to genuine parts, expert service, and maintenance support․ With same-day dispatch on most parts, customers can minimize downtime and keep their terminal tractors operating at peak performance․ The dealer network ensures reliable and efficient service, complementing the industry-leading warranty and enhancing overall customer satisfaction and equipment longevity․

Genuine vs․ Aftermarket Parts

Genuine parts ensure optimal performance and longevity, backed by a 2-year/6,000-hour warranty․ Aftermarket parts may offer cost savings but often lack quality and compatibility guarantees, potentially compromising reliability and efficiency․

Advantages of Kalmar Genuine Parts

Kalmar Genuine Parts offer unmatched quality, durability, and compatibility, ensuring optimal performance and longevity for your terminal tractor․ With a 2-year/6,000-hour warranty, they provide peace of mind and reduce long-term costs․ Genuine parts are engineered to meet precise specifications, guaranteeing reliability and minimizing downtime․ Plus, with over 50,000 parts in stock and same-day dispatch, Kalmar ensures rapid availability, keeping your operations running smoothly and efficiently․

Key Differences Between Genuine and Aftermarket Parts

Genuine Kalmar parts are custom-designed for specific models, ensuring perfect fitment and performance․ They undergo rigorous testing for quality and durability․ Aftermarket parts may vary in quality, often costing less but lacking manufacturer warranty․ Genuine parts are backed by Kalmar’s 2-year/6,000-hour warranty, offering enhanced reliability and support․ This makes them a smarter choice for maintaining performance and reducing long-term maintenance costs․

Trusted Suppliers and Dealers

Kalmar Ottawa’s extensive dealer network and authorized suppliers ensure reliable access to genuine parts; Online retailers like Louisville Switching and TRUCKiD offer fast shipping and comprehensive inventories․

Authorized Dealers for Kalmar Ottawa Parts

Kalmar Ottawa’s authorized dealers provide genuine parts, ensuring quality and compatibility․ Dealers like Louisville Switching and Kalmar’s official network offer extensive inventory, fast shipping, and expert support․ Their locations across North America guarantee quick access to components, minimizing downtime․ These dealers are trusted for their reliability and commitment to customer satisfaction, making them the preferred choice for Kalmar Ottawa parts and service needs․

Online Retailers and Their Benefits

Online retailers like TRUCKiD and NAPA offer a wide selection of Kalmar Ottawa parts, providing convenience and competitive pricing․ These platforms allow users to search, compare, and purchase parts efficiently․ With options for fast shipping and affordable prices, online retailers ensure quick access to essential components, reducing downtime and keeping operations running smoothly․ They also offer detailed product information, making it easier to find the right part for specific needs․

Commonly Requested Parts

High-demand parts for the Ottawa terminal tractor include filters, brakes, and suspension components, essential for maintaining optimal performance and efficiency in daily operations․

High-Demand Parts for the Ottawa Terminal Tractor

The Ottawa terminal tractor frequently requires parts like filters, brakes, and suspension components to ensure smooth operation․ Hydraulic systems, electrical components, and engine parts are also in high demand․ These essential items are critical for maintaining performance and minimizing downtime․ The Kalmar Ottawa parts catalog provides detailed listings, making it easier to identify and order the correct parts efficiently, ensuring optimal functionality and longevity of the terminal tractor․

Essential Components for Optimal Performance

Essential components for the Ottawa terminal tractor include engine parts, transmission systems, hydraulic components, and braking systems․ These elements are crucial for ensuring smooth operation, power delivery, and safety․ Regular maintenance of these components, as outlined in the Kalmar Ottawa parts catalog, helps maintain peak performance and prevents unexpected downtime․ By prioritizing genuine parts, operators can ensure reliability and extend the lifespan of their terminal tractor, optimizing overall productivity and efficiency in demanding environments․

The Kalmar Ottawa parts catalog PDF is an invaluable resource, ensuring longevity and optimal performance through genuine parts and detailed maintenance guidance for terminal tractor operations․

Final Thoughts on the Kalmar Ottawa Parts Catalog

The Kalmar Ottawa parts catalog is an essential tool for efficient maintenance and repair, offering detailed listings and diagrams to ensure optimal performance․ Its customization for the T2 model enhances user experience, while genuine parts guarantee longevity and reliability․ With a robust support network, including a 2-year/6,000-hour warranty, Kalmar Ottawa ensures minimal downtime and maximized productivity․ Utilizing this catalog and genuine parts is crucial for maintaining your terminal tractor’s peak condition and extending its service life․

Encouragement to Utilize Genuine Parts for Longevity

Using genuine Kalmar Ottawa parts ensures optimal performance, reliability, and longevity for your terminal tractor․ These parts are precision-engineered to meet exact specifications, guaranteeing seamless compatibility and superior durability․ Genuine parts also come with comprehensive support, including a 2-year/6,000-hour warranty and an extensive dealer network․ Investing in genuine components protects your equipment, minimizes downtime, and ensures long-term operational efficiency․ Choose genuine Kalmar Ottawa parts for a smarter, future-proof investment in your machinery․

throne of the four winds guide

Raid Overview and Quick Facts

The Throne of the Four Winds is a Tier 11 raid in World of Warcraft: Cataclysm‚ located above southwestern Uldum‚ requiring a flying mount to access.

It features a unique layout with floating platforms and two main boss encounters: The Conclave of Wind and Al’Akir‚ the final boss. Available in both 10 and 25-player modes‚ the raid offers Normal and Heroic difficulties‚ making it a challenging yet rewarding experience for players.

1.1. Location and Entrance Requirements

The Throne of the Four Winds is located in the sky above southwestern Uldum‚ within the aerial realm of Skywall. To access the raid‚ players must have a flying mount‚ as the entrance is situated high above the ground. The raid is part of the Cataclysm Classic content and is considered a Tier 11 instance. Its unique location sets the stage for a challenging aerial combat experience‚ with floating platforms and dynamic environments. The entrance is accessible by flying directly to the Skywall zone‚ where the raid instance portal awaits.

1.2. Raid Layout and Structure

The Throne of the Four Winds features a unique‚ compact layout centered around floating platforms in the sky. The raid is divided into distinct sections‚ with the first encounter‚ the Conclave of Wind‚ taking place across three separate platforms.Players must split into groups to engage the three bosses simultaneously. The final encounter with Al’Akir occurs in a central‚ open area‚ surrounded by dynamic weather effects. The raid’s structure emphasizes mobility and strategic positioning‚ with a focus on navigating the aerial environment. Its design is minimalistic compared to larger raids‚ yet it delivers a challenging and immersive experience‚ particularly in Heroic mode.

1.3. Minimum Requirements for Participation

To participate in the Throne of the Four Winds raid‚ players must meet specific requirements. A flying mount is essential to access the raid entrance‚ located in the sky above southwestern Uldum. Additionally‚ a minimum gear level‚ typically around ilevel 359‚ is recommended to handle the encounters effectively. Raiders should also ensure they have sufficient consumables‚ such as food‚ flasks‚ and potions‚ to optimize performance. Coordination and communication are crucial‚ making it important for groups to have a strong team composition and strategy in place before engaging the bosses.

Boss Encounters and Mechanics

The Throne of the Four Winds features two primary encounters: The Conclave of Wind and Al’Akir. Each boss introduces unique mechanics‚ requiring precise coordination and strategy to overcome their challenges.

2;1. The Conclave of Wind

The Conclave of Wind is the first encounter in the Throne of the Four Winds‚ featuring three elemental bosses: Rohash‚ Anshal‚ and Nezir. Each boss occupies a separate platform‚ requiring the raid to split into groups to manage their respective abilities. Rohash summons cyclones‚ Anshal unleashes lightning‚ and Nezir creates fire rings. Coordination and communication are key to navigating these mechanics‚ as players must avoid environmental hazards while maintaining DPS and interrupts. The encounter demands careful positioning and teamwork to ensure a smooth progression through the fight.

2.2. Al’Akir

Al’Akir is the final boss of the Throne of the Four Winds‚ residing on a central platform. He is a powerful elemental lord with abilities like Wind Burst‚ which knocks players back‚ and Electrocute‚ a deadly area-of-effect attack. The fight features a soft enrage mechanic‚ as Al’Akir’s power grows over time‚ increasing his damage output. Players must manage their positioning to avoid being knocked off the platform while interrupting and mitigating his devastating abilities. Proper coordination and cooldown management are essential to defeat him before his power becomes overwhelming.

Strategies for Success

Effective communication‚ precise positioning‚ and cooldown management are crucial. Coordinate team roles to mitigate boss mechanics and optimize DPS while maintaining raid stability throughout the encounter.

3.1. Tank Strategies

Tanks must maintain precise positioning to avoid environmental hazards and manage boss mechanics effectively. During the Conclave of Wind‚ split the raid into three groups‚ with one tank per platform to control each boss. Use cooldowns strategically to mitigate heavy damage phases. For Al’Akir‚ ensure the raid is positioned away from tornadoes and maintain a tight formation during the “Calamity” phase. Communicate with healers to manage incoming damage spikes and ensure consistent threat generation on targets. Proper tank rotations and proactive threat management are key to success in both encounters.

3.2. Healer Strategies

Healers must prioritize efficient cooldown management and assignment-based healing‚ especially during the Conclave of Wind encounter. Assign healers to specific platforms to focus on their respective groups‚ ensuring consistent throughput. Use raid-wide cooldowns during Al’Akir’s “Electrocute” to mitigate damage spikes. Maintain high mobility to avoid tornadoes while keeping healing streams active. Coordinate with other healers to cover gaps during phase transitions and dispel debuffs promptly. Proper positioning and anticipatory healing are crucial‚ particularly during Al’Akir’s “Phase One‚” where consistent damage requires sustained healing output. Communication and adaptability are key to maintaining raid health in dynamic encounters.

3.3. DPS Strategies

DPS players should focus on maximizing damage while managing mobility and target switching. During the Conclave of Wind‚ assign DPS to each platform to evenly distribute damage. Use cooldowns strategically to burst down bosses simultaneously. On Al’Akir‚ prioritize adding management and avoid tornadoes. Ranged DPS should focus on Al’Akir during his ground phase‚ while melee handle adds. Maintain sustained damage output and utilize movement abilities to avoid mechanics. Coordinate with the raid to ensure smooth phase transitions and maximize uptime on targets. Effective communication and adaptability are key to optimizing DPS in this dynamic encounter.

3.4. Raid Leader Tips

Raid leaders should emphasize clear communication and role assignments. Assign DPS to specific platforms during the Conclave of Wind to ensure balanced progress. Designate add management responsibilities for Al’Akir’s tornadoes and Nephalin. Ensure healers are positioned to cover both melee and ranged groups. Coordinate phase transitions smoothly‚ especially when Al’Akir lands‚ to maximize damage uptime. Use cooldowns strategically during high-damage phases and ensure the raid is spread out to minimize AoE damage. Assign a player to monitor wind levels and call out tornado movements. Effective leadership and organization are crucial to overcoming the raid’s challenging mechanics.

Loot and Rewards

The Conclave of Wind and Al’Akir drop valuable loot‚ including tier 11 gear‚ weapons‚ and trinkets. Each boss offers specific items tailored to different classes and roles.

4.1; Items from The Conclave of Wind

The Conclave of Wind drops a variety of epic loot‚ including tier 11 gear such as gloves‚ cloaks‚ and belts. These items are highly sought after for their powerful stats‚ which enhance class-specific abilities. For example‚ Gloves of the Hurricane boost spellcasting‚ while Cloak of the Whirling Dervish improves melee performance. Trinkets like Belt of the Ringing Winds also provide unique effects‚ making them valuable for both healers and DPS players. The Conclave’s loot is tailored to support raid progression and optimize performance in both Normal and Heroic modes.

4.2. Items from Al’Akir

Al’Akir‚ the final boss of the Throne of the Four Winds‚ drops an array of powerful epic items tailored for various classes and roles. These include weapons such as Staff of the Forgotten and Eye of the Storm‚ which are highly sought after by casters for their spellcasting enhancements. Additionally‚ tier 11 armor pieces like Chestplate of the Tempest and Leggings of the Cloudrunner provide substantial upgrades for both healers and DPS players. Trinkets such as Crown of the Tempests and Ring of the Ruling Wind offer unique effects‚ making them valuable for raiders aiming to optimize their performance.

Raid Progression and Difficulty

The Throne of the Four Winds offers a challenging yet rewarding experience‚ with progression requiring skill‚ strategy‚ and strong team coordination to overcome its aerial battles and intense mechanics.

5.1. Normal Mode Challenges

The Normal mode of Throne of the Four Winds presents a series of challenges that require precise coordination and strategy. The Conclave of Wind demands split raid attention across three platforms‚ testing team communication. Managing adds and avoiding environmental hazards like Cyclone from Al’Akir adds complexity. Platform navigation and aerial combat mechanics introduce unique difficulties. Healers must sustain through high mobility fights‚ while DPS must balance damage output with constant movement. Overall‚ Normal mode serves as a solid foundation for mastering the raid’s intricate mechanics before progressing to Heroic difficulty.

5.2. Heroic Mode Differences

Heroic mode in Throne of the Four Winds amplifies the raid’s challenges‚ with increased boss health‚ higher damage output‚ and stricter mechanics. The Conclave of Wind sees more aggressive tornadoes and tighter enrage timers‚ demanding precise coordination. Al’Akir’s Cyclone ability is more frequent‚ requiring faster platform navigation. DPS must balance high damage output with constant movement‚ while healers face increased pressure to sustain the raid. Tanks need to manage adds more effectively‚ as their damage escalates. Heroic mode tests the raid’s ability to execute mechanics flawlessly‚ making it a true test of skill and teamwork.

The Throne of the Four Winds is a challenging yet rewarding raid that tests players’ skill and coordination. Its unique mechanics and intricate boss encounters make it a memorable experience in World of Warcraft: Cataclysm. With proper preparation‚ effective strategies‚ and strong teamwork‚ raid groups can overcome its difficulties and claim the valuable loot. Whether in Normal or Heroic mode‚ this raid offers something for every player‚ solidifying its place as a standout instance in the game’s history.

horton hatches the egg pdf

Dr. Seuss’s Horton Hatches the Egg is a timeless tale of integrity and patience, featuring Horton, a kind elephant who faithfully cares for an abandoned egg. The story emphasizes moral lessons and is widely available in PDF format, making it accessible for readers worldwide. Its popularity endures as a beloved classic in children’s literature.

Overview of “Horton Hatches the Egg”

Horton Hatches the Egg is a charming Dr. Seuss tale about Horton, a gentle elephant who agrees to sit on an egg for the irresponsible bird Mayzie. Despite facing ridicule, harsh weather, and physical discomfort, Horton remains faithful to his promise. The story highlights themes of integrity, responsibility, and perseverance. Its whimsical illustrations and rhyming text make it a beloved classic, while the PDF version ensures easy access for readers to enjoy this timeless moral lesson.

Importance of the PDF Version

The PDF version of Horton Hatches the Egg offers a convenient and accessible way to enjoy Dr. Seuss’s classic tale. It preserves the original illustrations and formatting, ensuring an authentic reading experience. The digital format allows readers to access the story on various devices, making it ideal for both children and educators. Its portability and ease of sharing have contributed to its popularity, ensuring the story’s timeless moral lessons reach a wider audience globally.

Key Themes and Moral Lessons

Horton Hatches the Egg teaches essential life lessons through Horton’s unwavering commitment. The story emphasizes integrity, trustworthiness, and patience, highlighting the importance of staying true to one’s promises. Horton’s dedication despite challenges illustrates the value of perseverance and loyalty. These themes, crafted by Dr. Seuss, provide a moral framework for young readers, encouraging them to adopt similar virtues in their own lives. The tale’s simplicity and depth make it a timeless guide for ethical behavior and personal growth.

Main Themes and Moral Lessons

Horton Hatches the Egg explores themes of integrity, responsibility, and perseverance. Horton’s unwavering commitment to hatching the egg teaches the importance of trustworthiness and loyalty. The story highlights how patience and dedication lead to rewarding outcomes, even in the face of adversity. These moral lessons, conveyed through Dr. Seuss’s timeless storytelling, resonate with readers of all ages, reinforcing the value of staying true to one’s promises and caring for others selflessly.

Integrity and Commitment

Horton’s unwavering dedication to hatching the egg exemplifies his strong sense of integrity and commitment. Despite facing ridicule and harsh conditions, Horton remains faithful to his promise, refusing to abandon the egg. His iconic line, “I meant what I said, and I said what I meant,” underscores his unshakable resolve. This steadfast commitment teaches the value of honoring one’s promises, even when challenges arise. Horton’s actions serve as a powerful lesson in staying true to one’s word, regardless of circumstances.

Responsibility and Trustworthiness

Horton’s decision to care for Mayzie’s egg highlights his strong sense of responsibility and trustworthiness. Despite the challenges, he faithfully guards the egg, enduring harsh weather and ridicule. His commitment demonstrates the importance of taking responsibility for one’s actions and honoring trust placed in them. Horton’s dedication serves as a moral lesson, showing how reliability and accountability are essential virtues in building trust and respect. The story underscores the value of standing by one’s duties, no matter the obstacles faced.

Importance of Patience and Perseverance

Horton’s journey in Horton Hatches the Egg exemplifies the importance of patience and perseverance. Despite enduring harsh weather, ridicule, and physical discomfort, Horton remains dedicated to his task. His unwavering commitment to hatching the egg teaches readers the value of waiting and persisting through challenges. The story highlights how patience leads to reward, as Horton’s perseverance ultimately results in the egg hatching. This moral lesson encourages readers to embrace patience and stay committed to their goals, even in difficult circumstances.

Characters in the Story

The story features Horton, a kindhearted elephant, and Mayzie, a lazy bird who entrusts Horton with her egg. Other characters include jungle creatures and hunters.

Horton the Elephant

Horton, the gentle and kindhearted elephant, is the protagonist of Horton Hatches the Egg. He is known for his integrity, patience, and unwavering commitment to his promises. Despite facing ridicule and challenges, Horton faithfully cares for Mayzie’s egg, showcasing his trustworthiness and loyalty. His noble motto, “I meant what I said, and I said what I meant,” highlights his strong moral character. Horton’s journey teaches valuable lessons about responsibility and perseverance, making him a beloved character in children’s literature.

Mayzie the Bird

Mayzie, a lazy and irresponsible bird, is a central character in Horton Hatches the Egg. She abandons her egg, seeking a life of leisure, and persuades Horton to take on the task of hatching it. Her selfish decision leads to Horton’s challenges, yet ultimately, her return highlights the story’s resolution. Mayzie’s character serves as a contrast to Horton’s dedication, emphasizing themes of responsibility and trustworthiness through her actions and their consequences in the narrative.

Other Supporting Characters

In Horton Hatches the Egg, other supporting characters play pivotal roles in shaping the story. The Jungle Creatures, including monkeys and kangaroos, mock Horton for his dedication, testing his resolve. Their skepticism highlights Horton’s unwavering commitment. Additionally, Dr. Seuss’s whimsical narration brings depth to the story, emphasizing moral lessons through Horton’s journey. These characters collectively enhance the tale’s themes of integrity, patience, and responsibility, making the story a timeless classic in children’s literature.

Plot Summary

Horton agrees to hatch Mayzie’s egg, faces harsh weather, and endures ridicule. The egg eventually hatches, revealing a young elephant, teaching perseverance and integrity.

Horton’s Agreement to Hatch the Egg

Horton, a kind and gentle elephant, agrees to sit on Mayzie’s egg after she grows tired of incubating it. Despite his large size, Horton carefully places the egg on a tree nest and vows to protect it. Mayzie, eager for a break, persuades Horton to take on this unexpected responsibility. Unaware of the challenges ahead, Horton commits to his new role, showcasing his noble and trustworthy nature. This selfless act sets the stage for a journey filled with patience and dedication.

Challenges Faced by Horton

Horton encounters numerous challenges while incubating the egg. He endures harsh weather conditions, including rain and freezing temperatures, which cause icicles to form on his trunk. Additionally, Horton faces ridicule from other animals in the jungle, who mock him for his unusual task. Despite these difficulties, Horton remains steadfast in his commitment, showcasing his patience and determination. His perseverance ultimately highlights the importance of staying true to one’s promises, even in the face of adversity.

Climax and Resolution

The climax occurs as Horton’s patience is rewarded when the egg finally hatches, revealing a baby elephant. Despite the lengthy and arduous journey, Horton’s unwavering dedication pays off; The story resolves with Horton being celebrated for his faithfulness, and the baby elephant bringing joy and fulfillment to his life. This heartwarming conclusion reinforces the story’s central themes of perseverance and the value of keeping promises.

PDF Version and Availability

Horton Hatches the Egg is readily available as a free PDF download, offering convenient access to Dr. Seuss’s classic tale. The digital format ensures easy reading on various devices, including smartphones and tablets, making it accessible to a global audience. Additionally, the PDF can be shared and stored effortlessly, preserving the story for future generations of readers.

Where to Find the PDF

The PDF version of Horton Hatches the Egg can be easily found on various online platforms. Websites like Google Drive, Scribd, and official Dr. Seuss fan sites offer free downloads. Additionally, digital libraries and educational platforms provide access to this classic tale. Users can also search for “Dr. Seuss Horton Hatches the Egg PDF” to find reliable sources. Many sites offer direct links for downloading, ensuring quick and convenient access to the story in digital format.

Benefits of the Digital Format

The PDF version of Horton Hatches the Egg offers numerous advantages. It allows for easy access on devices like smartphones, tablets, and e-readers, making the story portable. The digital format also enables features like zooming, bookmarking, and searching, enhancing readability. Additionally, PDFs preserve the vibrant illustrations and formatting of the original book. This makes it ideal for both individual reading and classroom use, ensuring the story’s timeless lessons reach a wider audience efficiently and conveniently.

Popularity of the PDF Version

The PDF version of Horton Hatches the Egg is highly sought after due to its convenience and accessibility. Readers can easily download and access the story on various devices, making it a preferred choice for both children and educators. The digital format ensures that the vibrant illustrations and engaging text are preserved, while features like full-page viewing enhance the reading experience. Its popularity stems from the timeless appeal of Dr. Seuss’s storytelling and the ease of sharing the PDF across platforms.

Reception and Cultural Impact

Horton Hatches the Egg has received critical acclaim for its moral depth and engaging storytelling. It solidified Dr. Seuss’s reputation as a leading children’s author and remains a cultural icon, inspiring adaptations and translations worldwide.

Critical Acclaim

Horton Hatches the Egg has garnered widespread critical acclaim for its moral depth and engaging storytelling. Dr. Seuss’s unique rhyming style and whimsical illustrations captivated readers, solidifying his reputation as a leading children’s author. Critics praised the story’s timeless themes of integrity, patience, and responsibility, resonating with both children and adults. Horton’s unwavering commitment to the egg symbolized trustworthiness and loyalty, making the book a cherished classic in children’s literature. Its enduring popularity highlights its universal appeal and cultural significance.

Impact on Children’s Literature

Horton Hatches the Egg significantly influenced children’s literature by showcasing Dr. Seuss’s unique storytelling and moral themes. Its engaging rhymes and whimsical illustrations set a new standard for children’s books, emphasizing lessons on integrity and responsibility. The story’s accessibility in PDF format has further expanded its reach, allowing modern readers to enjoy its timeless message. This book remains a cornerstone of children’s literature, inspiring young minds with its simple yet profound teachings.

Cultural Significance

Horton Hatches the Egg holds a special place in cultural history, transcending generations with its universal themes of loyalty and perseverance. The story’s simple yet profound message has resonated globally, making it a cultural icon. Its availability in PDF and translations, such as the Russian version Слон Хортон высиживает яйцо, underscores its widespread appeal. Dr. Seuss’s work continues to inspire adaptations and discussions, solidifying its legacy as a cherished tale in modern culture.

Horton Hatches the Egg remains a beloved story, teaching valuable life lessons through Horton’s unwavering commitment. The PDF version ensures accessibility, allowing readers to enjoy Dr. Seuss’s timeless tale anywhere. Its cultural impact and enduring popularity highlight its significance in children’s literature, making it a must-read for generations to come.

« Older posts